Step by step
In this section, some actions are illustrated as recommended actions in a step by step presentation.
Note:
Please note that depending on licensing and permission, not all functions may be available.
Actions:
| No. | Place |
Image |
Action |
|---|---|---|---|
| 01 | Menu bar or side menu > Tickets tab |  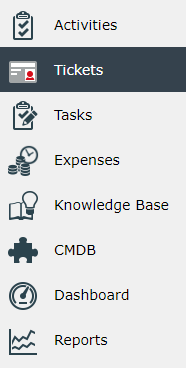
|
Click on the button New Ticket |
| 02 | The entry window for a new ticket opens. (The design of the window depends on the configuration in the Ticket Wizard.) | 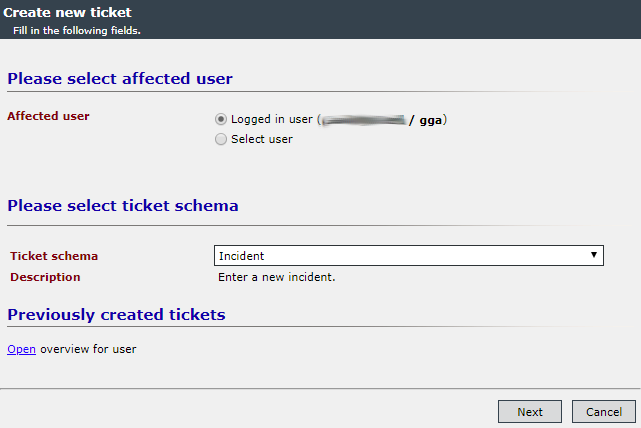
|
--- |
| 03 | The user and the ticket schema must be entered. | 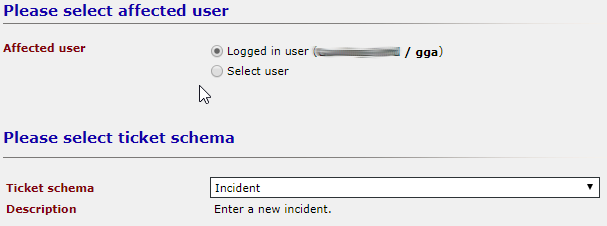
|
Either the logged in user or another user is selected with the user browser. Then select the corresponding ticket schema via a drop-down menu: The following schemas could be possible, for example:
Button > Next |
| 04 | Further menus according to the configuration are opened. | 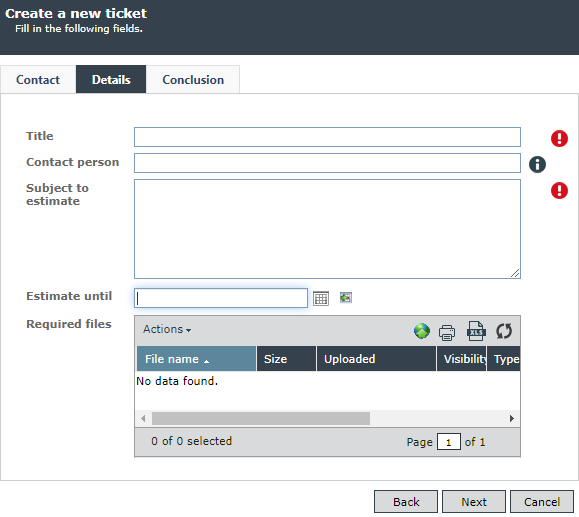
|
Various details regarding the specification of the ticket must be entered. For example:
Press Next to jump to the following entry. After a summary the ticket can be generated with Create. |
| 05 | The new ticket appears in the ticket list. | 
|
Depending on the update interval, this may take a moment. The immediate update can be done via the synchronization button (top, right). |
| Further information: | |||
| No. | Place |
Image |
Action |
|---|---|---|---|
| 01 | Menu bar |

|
Mouse movement on the Search button |
| 02 | Drop-down menu > Extended search... | 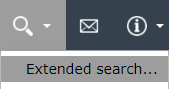
|
Click on Extended search... |
| 03 | Search window opens | 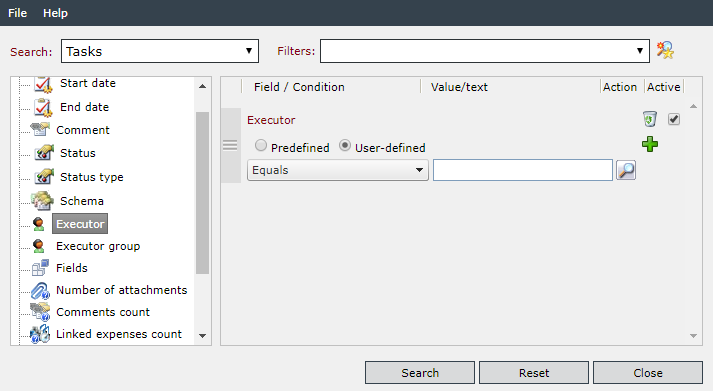
|
--- |
| 04 | Search: Drop-down menu | 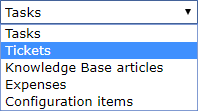
|
Selection:
|
| 05 | Window left > Select search object | 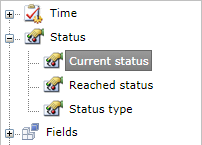
|
For example: Click on Status > Current status |
| 06 | The condition Current status appears in the window on the right. | 
|
--- |
| 07 | The comparison operator and the corresponding status can be set. | 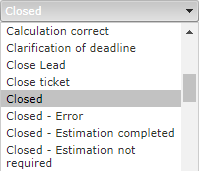
|
Click on the corresponding drop-down field and select the operator or status. |
| 08 | Points 5. to 7. can be repeated for further criteria. | 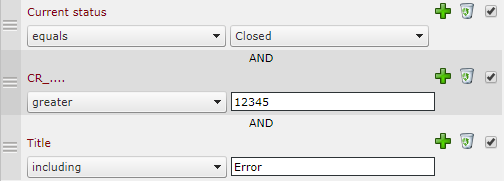
|
--- |
| 09 | The query is completely configured > Search button | 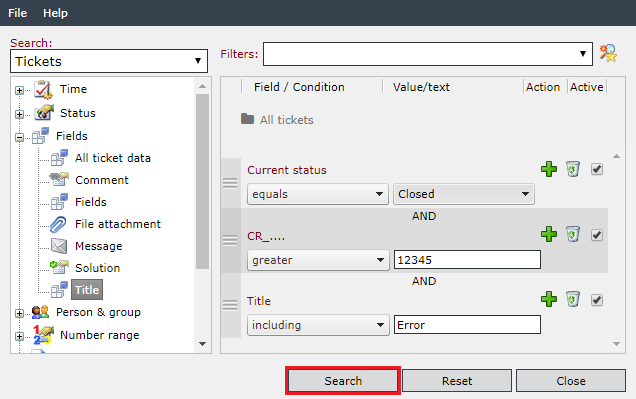
|
Click on the Search button |
| 10 | The search results will open in a new window. | 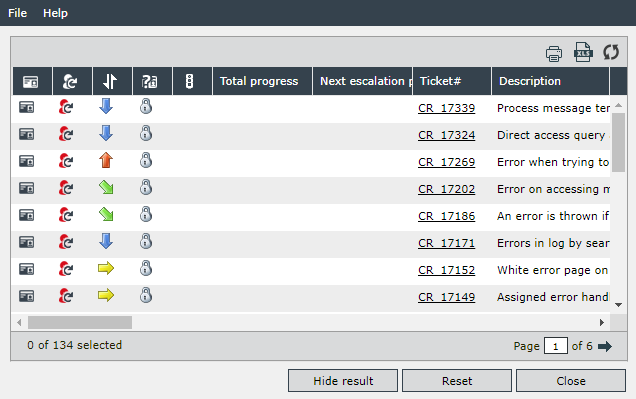
|
--- |
| 11 | End search | 
|
Hide result: Return to the search parameters. Reset: Return and all configured search parameters are deleted. Close: The window is closed without performing a search. |
Further information:
|
|||
| No. | Place |
Image |
Action |
|---|---|---|---|
| 01 | Menu bar |
|
Mouse movement on the Search button |
| 02 | Drop-down menu > Filter > [Tickets] - (Predefined filters) | 
|
Click on [Tickets] > [Active Tickets] |
| 03 | The search results will open in a new window. |
|
--- |
| 04 | End search |
|
Hide result: Return to the search parameters. Reset: Return and all configured search parameters are deleted. Close: The window is closed without performing a search. |
| 05 | If, for example, the search is reset, a separate search can be saved in the Filter drop-down field at the top right. | 
|
A click on the left magnifying glass symbol opens a dialog for entering a search name > confirm with OK. |
| --- | Tickets | 
|
On the ticket list, the filter templates for tickets are also added to the filter element. This makes it possible to apply the filters directly to the ticket list. |
| Filter templates are created by the administrator and are accessible to the user according to the configured permissions. Further information:
|
|||
| No. | Place |
Image |
Action |
|---|---|---|---|
| 01 | Side menu > Select list (e.g. Tickets) |
|
Click on Tickets |
| 02 | Position the cursor on the table header. | 
|
--- |
| 03 | Right-click to open the context menu. | 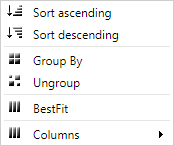
|
Various list design functions are available:
Example: Mouse pointer to Colums |
| 04 | Another menu with all available columns opens. | 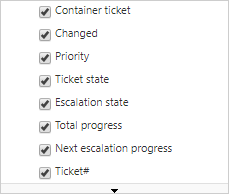
|
You can select (tick) or deselect (no tick) columns by clicking on the corresponding option field. |
| --- | Position the cursor on the table header. |

|
The column width can be changed by dragging with the cursor. |
| --- | Position the cursor on the table header. |

|
The column position can be moved to the right or left by drag-and-drop. In addition, the selected column can be dragged onto the grouping field for grouping. |
Further information:
|
|||
| No. | Place |
Image |
Action |
|---|---|---|---|
| A | Another user wants to use me as a deputy. | ||
| A1 | Menu bar | 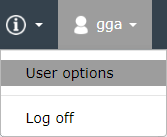
|
Mouse movement on the Registered User button and click on User Options. |
| A2 | The User options window opens. | 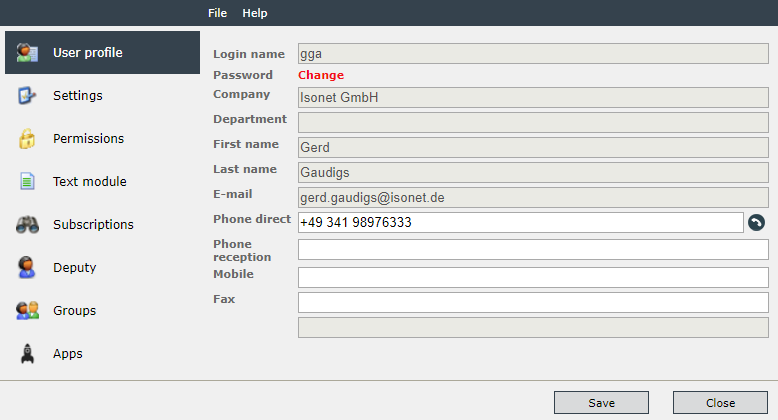
|
Select Deputy in the register on the left. |
| A3 | The Deputy window opens. | 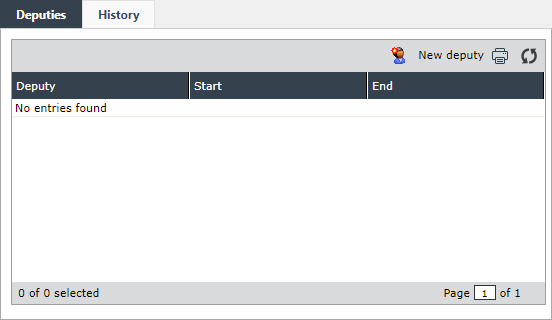
|
--- |
| A4 | Top right button New deputy | 
|
Click on the button. |
| A5 | The New deputy window opens. | 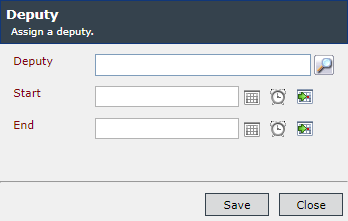
|
Enter the name of the new deputy (in this case my name - search via the magnifying glass symbol) and the validity period of the deputy function. Click Save to create the new deputy. |
| A6 | The new deputy appears in the list. | 
|
--- |
| B | I can use another user as a deputy. | ||
| B1 | The other user must have performed steps A1 through A6 on his account and saved me as a deputy. There will be no notification of a deputy beforehand. | ||
| B2 | Menu bar | 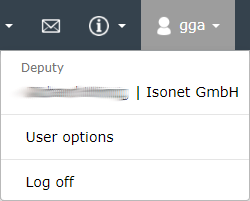
|
Mouse movement on the button Registered user and click on one of the available deputies. |
| B3 | The logged in user switches to deputy mode and is logged in as the user he has selected. | 
|
--- |
| B4 | Exiting the Deputy mode | 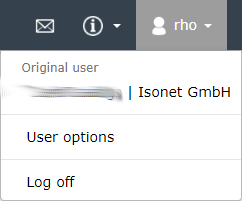
|
Click on the Original user. |
| B5 | The deputy will be logged out and my own account will be logged in and displayed again. | 
|
--- |
| C | I can use another user as a deputy. (446 Plattform Mobil) | ||
| C1 | The other user must have performed steps A1 through A6 on his account and saved me as a deputy. There will be no notification of a deputy beforehand. Currently, a new deputy can only be set up through the 446 Plattform. | ||
| C2 | Menu bar | 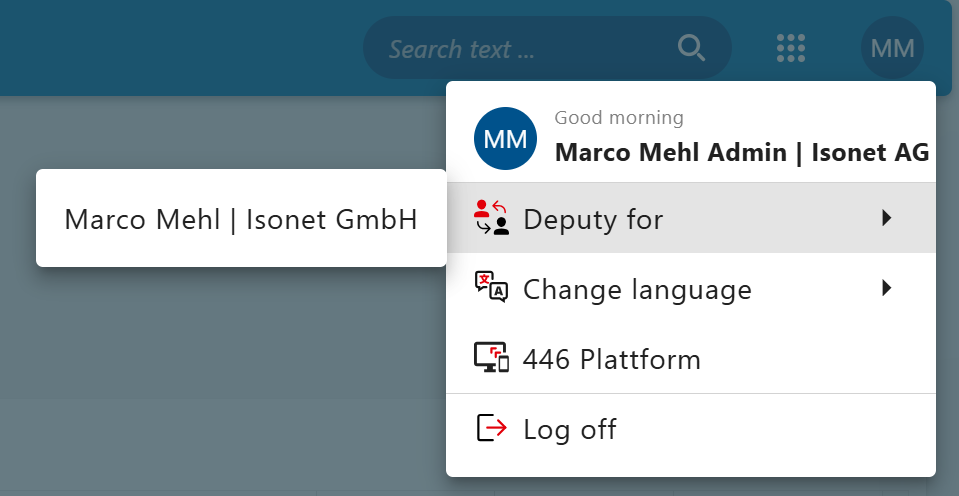
|
Click the user button in the upper-right corner of the application, hover over Deputy for, and click one of the available deputies. |
| C3 | The logged in user switches to deputy mode and is logged in as the user he has selected. | 
|
--- |
| C4 | Exiting the Deputy mode | 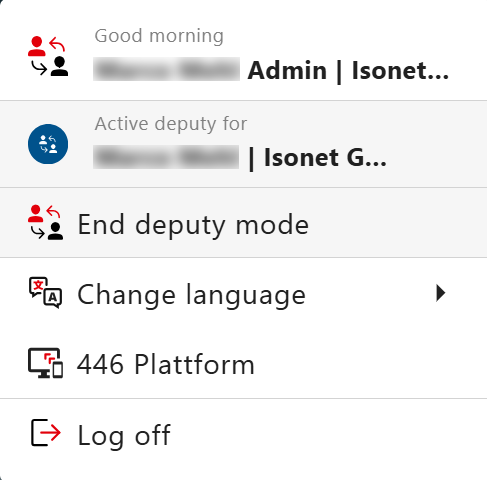
|
Click on End deputy mode |
| C5 | The deputy will be logged out and my own account will be logged in and displayed again. | 
|
--- |
Further information:
|
|||
| No. | Place |
Image |
Action |
|---|---|---|---|
| 01 | Side menu | 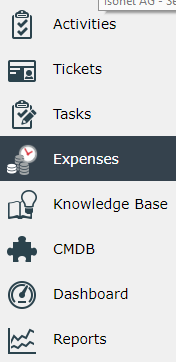
|
Click on Expences tab |
| 02 | The Expences page opens. | 
|
Click on the button New expense |
| 03 | A dialog for entering the booking data opens. | 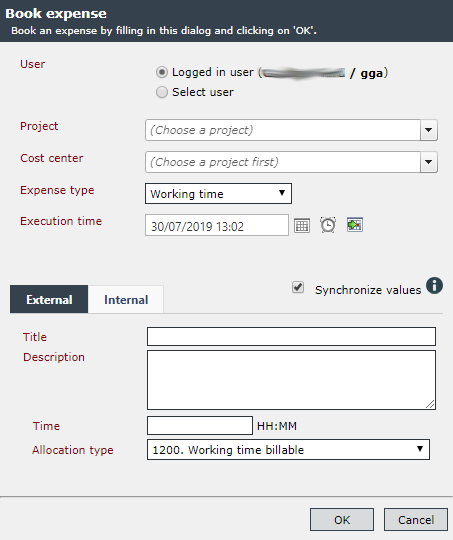
|
After you have entered the data, press OK to save them. |
| 04 | Using the Actions menu, you can trigger a particular activity after selecting an existing booking (multiple selection is possible for certain operations). | 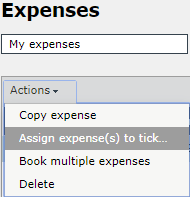
|
In detail is selectable:
Example: Click on Assign expense(s) to ticket |
| 05 | A window for assigning the expense to a ticket opens. | 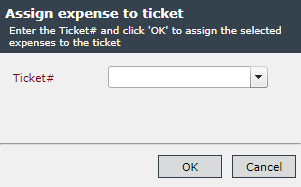
|
The ticket number is entered and accepted with OK. |
| 06 | After opening the expense (double click) the assigned ticket appears in the performance dialog. | 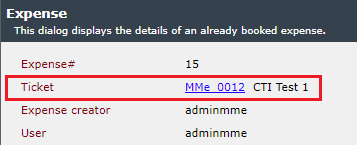
|
--- |
Further information:
|
|||
| No. | Place |
Image |
Action |
|---|---|---|---|
| 01 | Side menu | 
|
Click on tab Dashboard |
| 02 | Dashboard page opens > top left Add widget button | 
|
Click Add widget |
| 03 | A window with a selection tree of predefined widgets (created by the administrator) opens. | 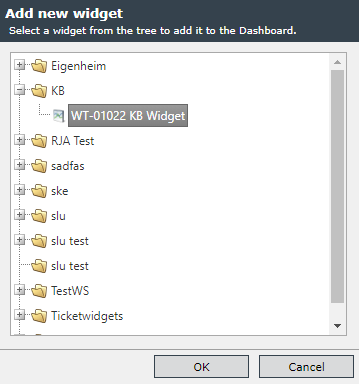
|
After selecting the desired widget, the selection is completed with OK. |
| 04 | The corresponding widget will be displayed on the dashboard. | 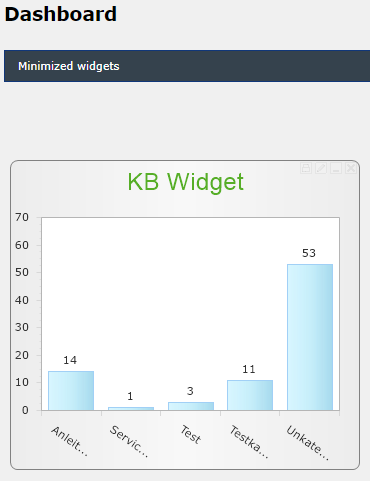
|
--- |
| 05 | You can change the size of the widget by dragging the lower right corner with the mouse pointer. | 
|
--- |
| 06 | Moving the mouse pointer over the upper right corner of the widget displays the configuration button. |

|
A widget can be printed, edited, minimized and removed from the dashboard. Example: Click on the pencil icon to edit. |
| 07 | A properties window opens, which can be used to make various settings for the search query and the design of the widget. | 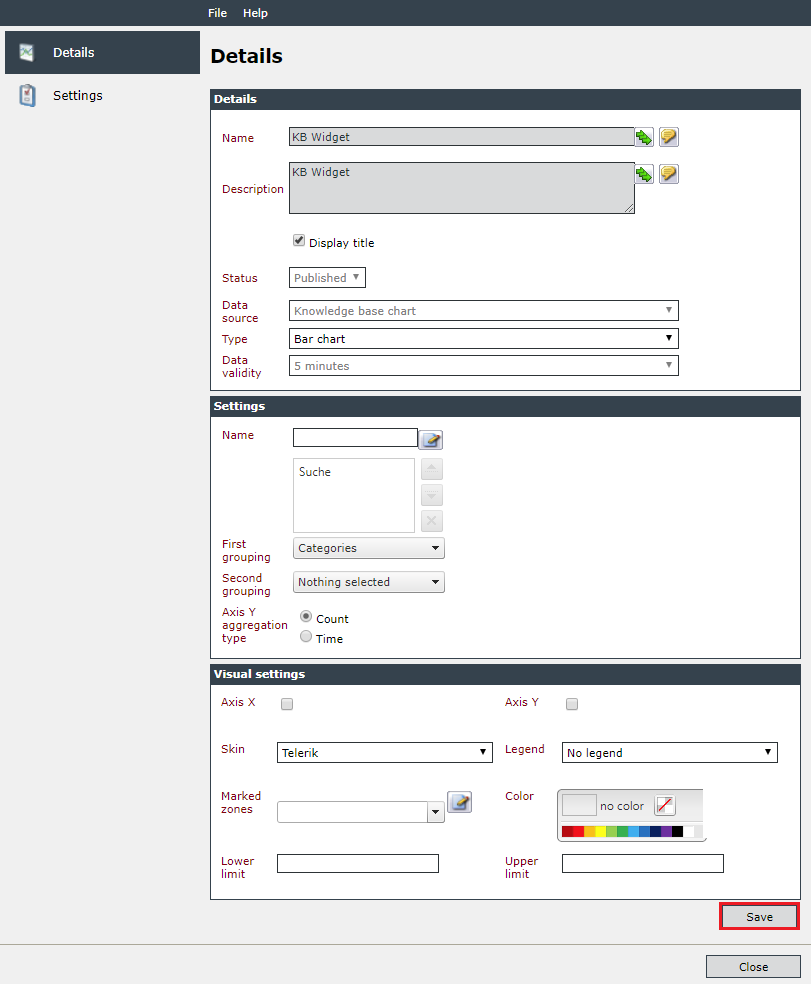
|
After the changes have been completed, they are saved by clicking on Save. |
Further information:
|
|||
| No. | Place |
Image |
Action |
|---|---|---|---|
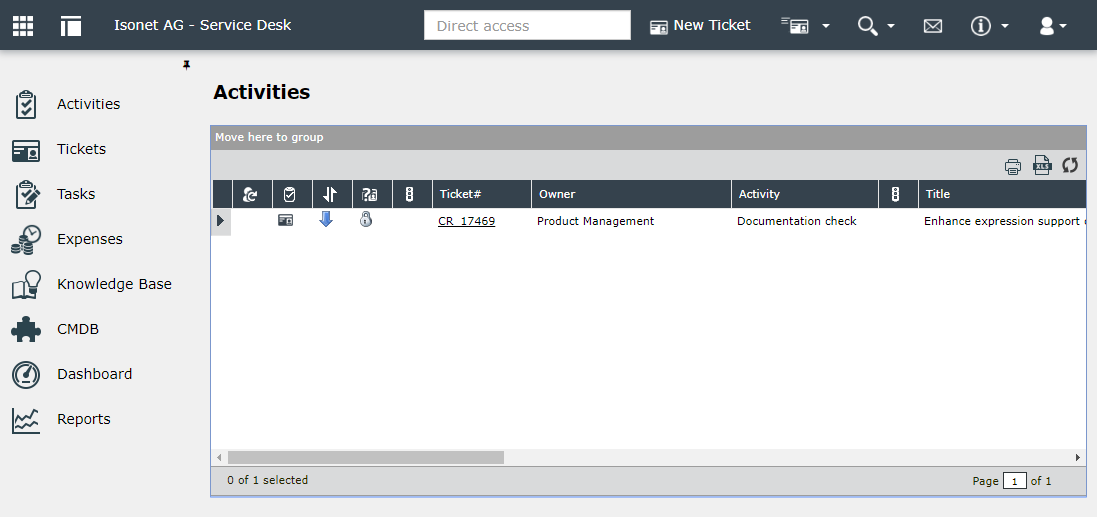
| 01 | In the activity list, existing or new (just created) entries are displayed. In contrast to the ticket list, only tickets that require processing by the logged-in user appear here. |
|
Select the entry and double-click it to open it. |
| 02 | The corresponding ticket detail dialog opens with the Actions tab. | 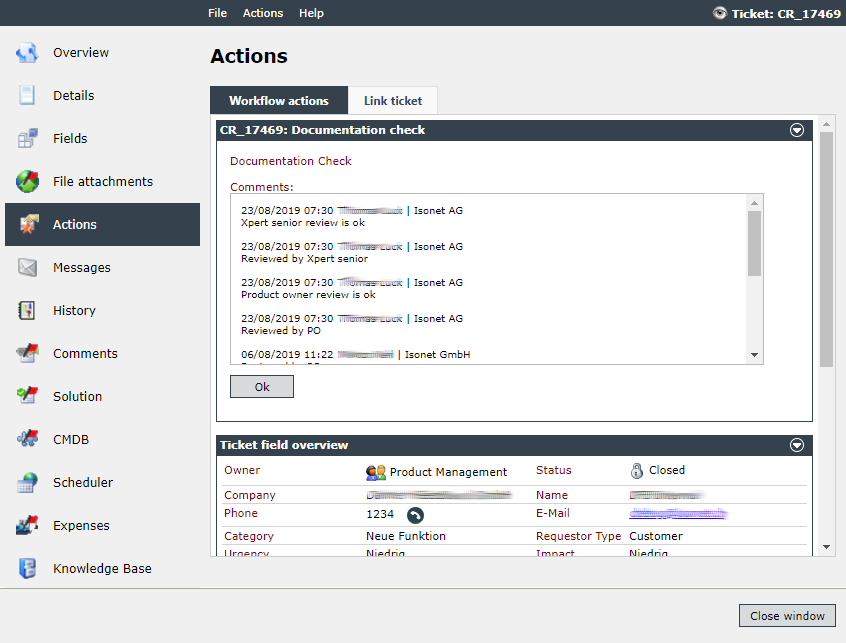
|
Depending on the configuration of the ticket scheme, workflow actions appear that must be processed and/or confirmed by the logged-in user. |
| 03 | In this example, after checking whether editing is necessary, you must close the action with OK. | 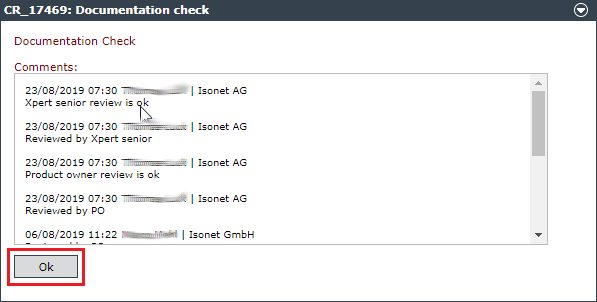
|
Click OK. |
| 04 | The edited action is completed by the system and the corresponding ticket is removed from the activity list. | 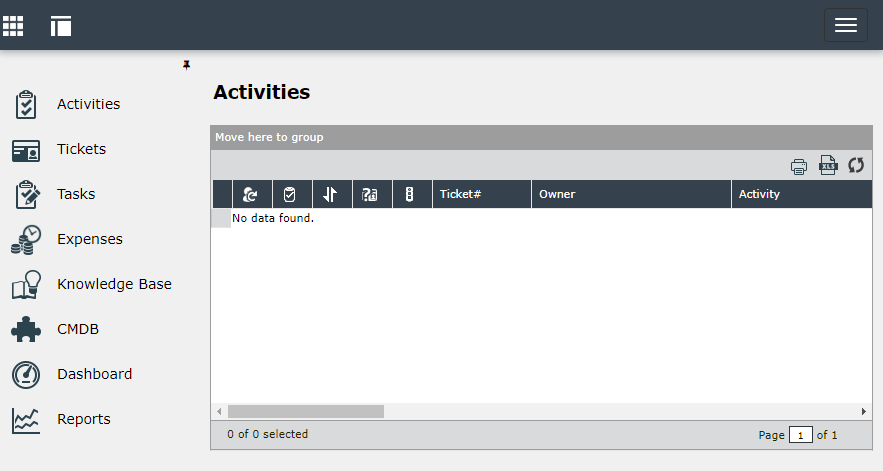
|
--- |
Further information:
|
|||
| No. | Place |
Image |
Action |
|---|---|---|---|
| A1 | Program start > Login window | 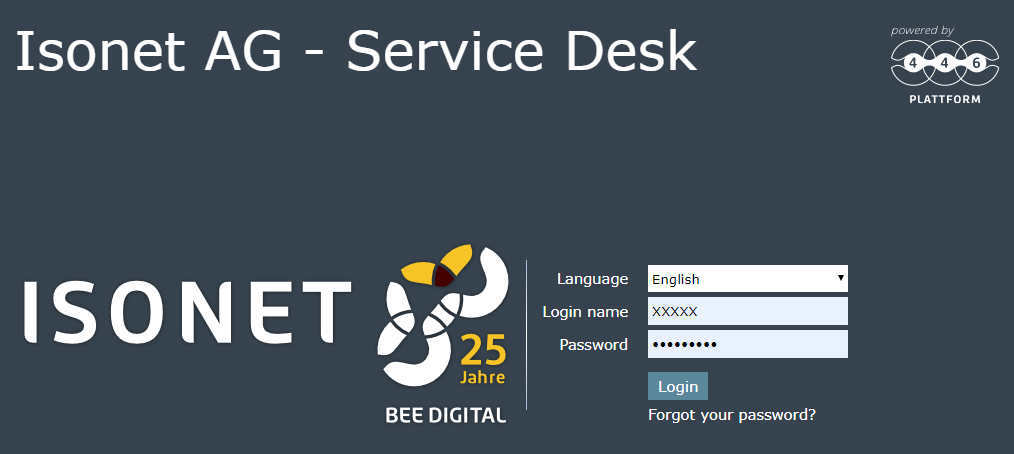
|
Enter password |
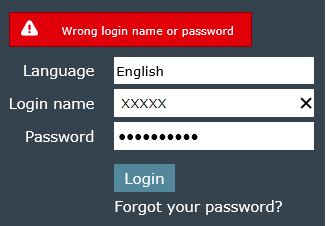
| A2 | The password is entered incorrectly. |
|
Enter password repeatedly. |
| A3 | The password is wrong again. The number of possible incorrect entries depends on the corresponding settings when the PasswordPolicy is activated. | --- |
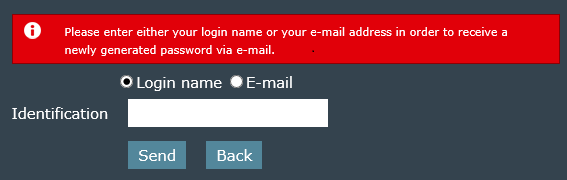
In order to avoid blocking the system, the Forgot your password function should be used (click on it). [However, the administrator must activate this function beforehand.] |
| A4 | It is possible to select an identification and request a new password. |
|
Select the Identification (Login name or E-mail) and click Send. |
| A5 | The new password will be sent to you by e-mail. | --- | Enter the new password and login to the system. |
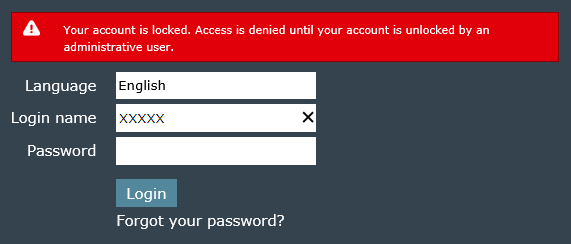
| B1 | If the maximum number of incorrect entries (with activated PasswordPolicy) is exceeded, your account will be locked. |
|
The administrator must unlock your account. Then you can login again with a new (or old) password. See points A3 and A4. |
| B2 | If the Forgott your password function is not activated, you must contact your administrator directly. | --- | --- |
Further information:
|
|||
| No. | Place |
Image |
Action |
|---|---|---|---|
| V | Requirements:
Administrator rights for unlocking
|
||
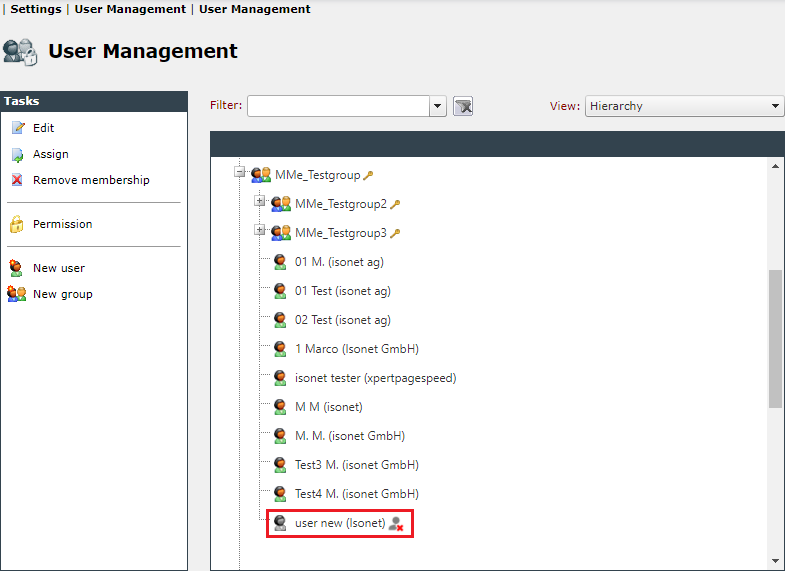
| 01 | Settings | User Management | User Management |
|
A locked user is indicated by a red cross. |
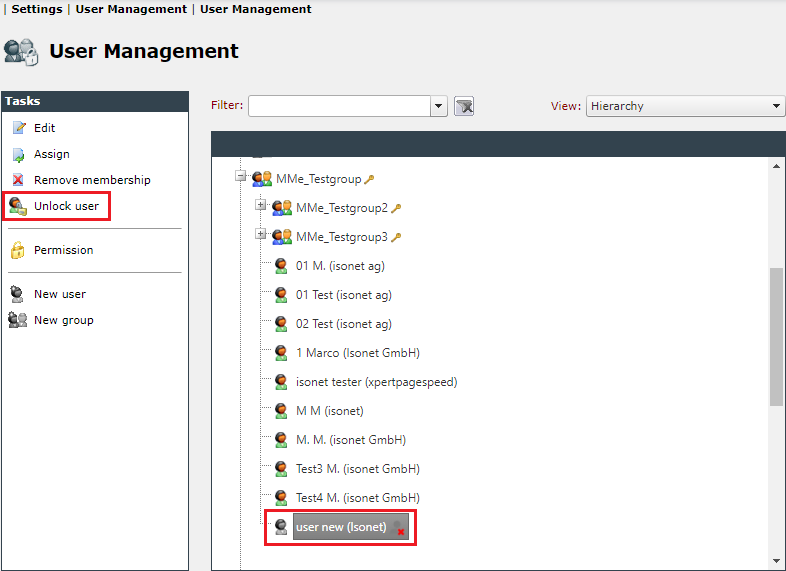
| 02 | The locked user is highlighted. |
|
An additional function Unlock user appears in the left tasks window. |
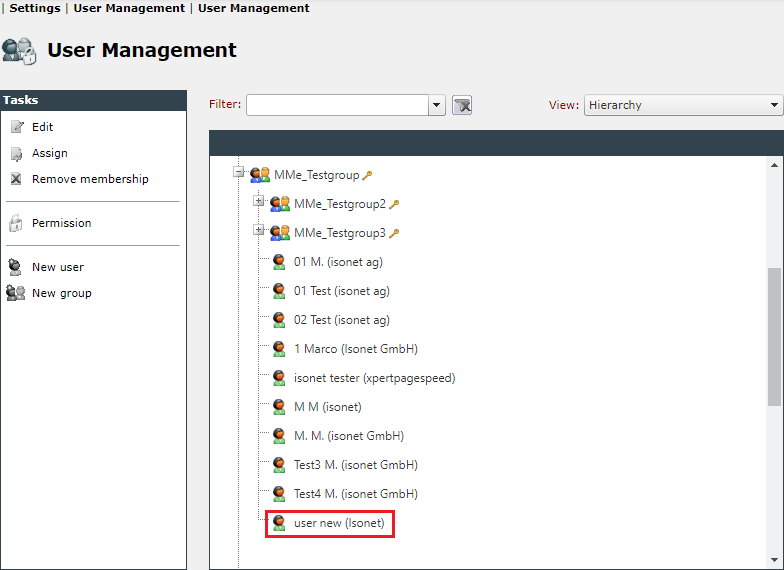
| 03 | Unlocking is done by pressing the button Unlock user and confirming with OK in the message window that appears. |
|
--- |
Further information:
|
|||
| No. | Place |
Image |
Action |
|---|---|---|---|
| 01 | Switching to the Knowledge Base tab | 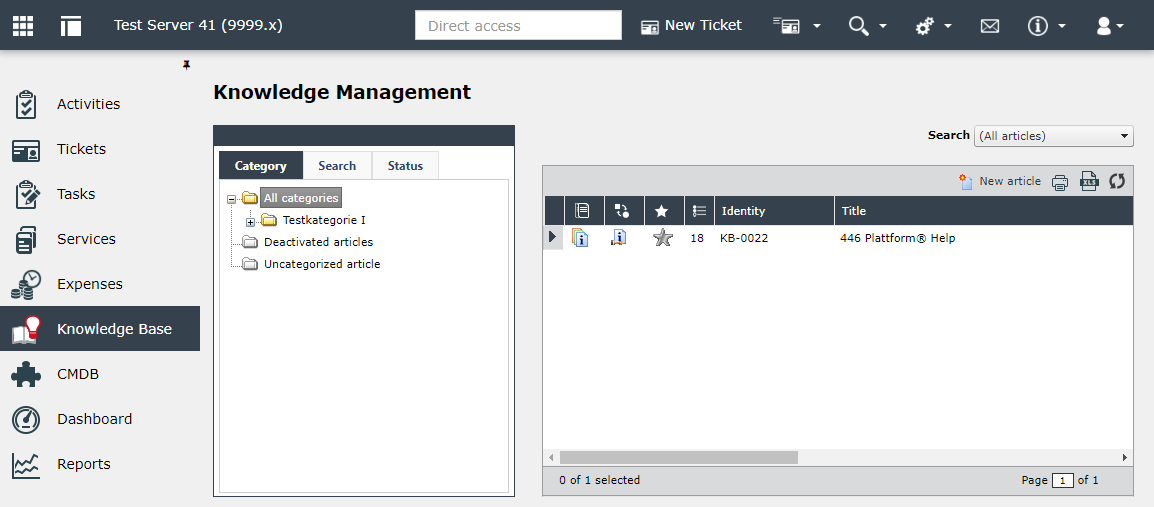
|
Double-click on the article to be edited |
| 02 | The KB article opens in a new window. | 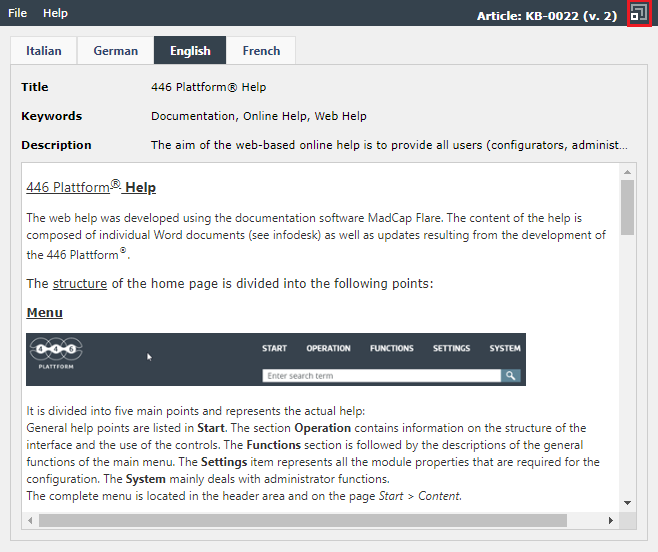
|
The button at the top right opens an extended window. |
| 03 | Select the Create new revision function from the File menu. | 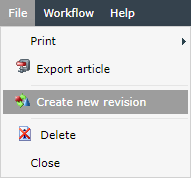
|
Another window opens and the new revision is ready for editing. |
| 04 | The KB article can be edited here. | 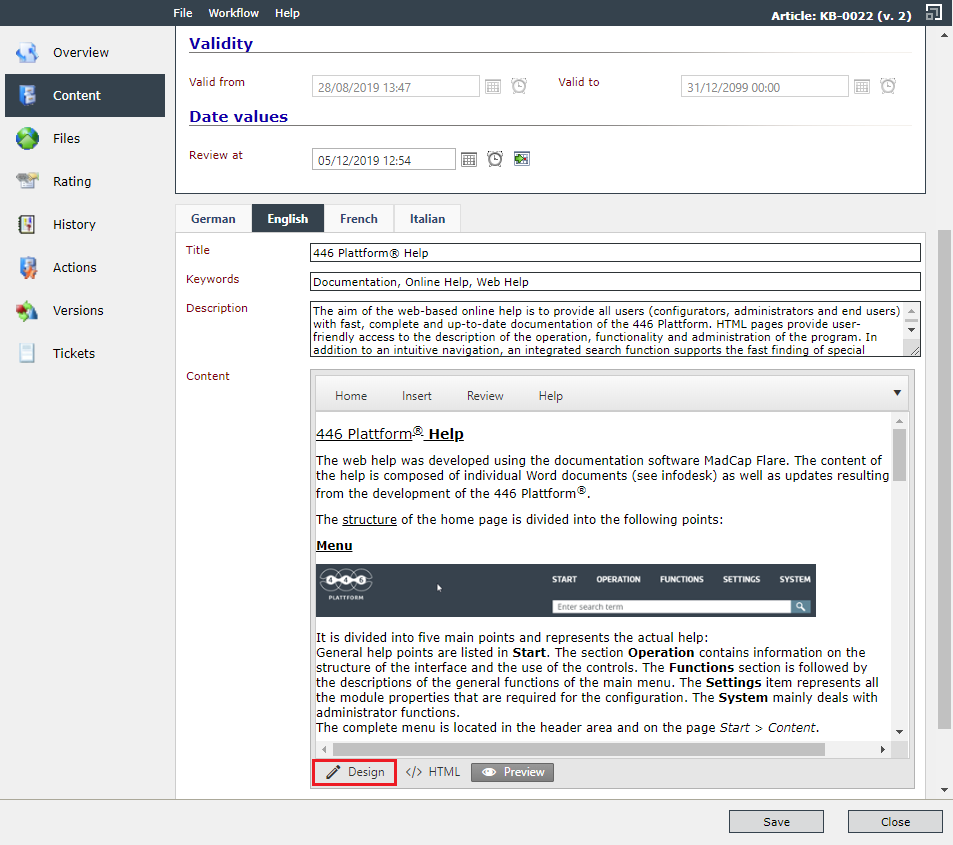
|
Please note that the button Design is activated. |
| 05 | The KB article can now be changed in all available languages. | 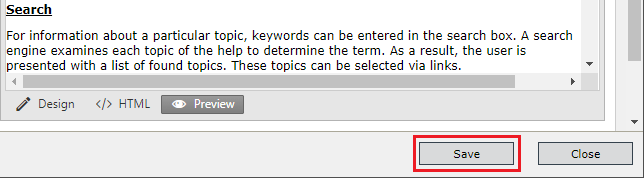
|
The changes are completed with Save. A successful saving is indicated by a note to the left of the Save button. |
| 06 | As an optional item, the revision can be forwarded for review. (Workflow menu > Submit for checking) | 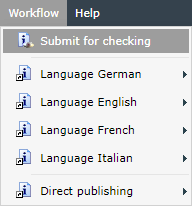
|
Once the review has been completed, the article can be published (or published directly without a review). |
| 07 | Workflow menu > Direct publishing > All languages (or each language individually) | 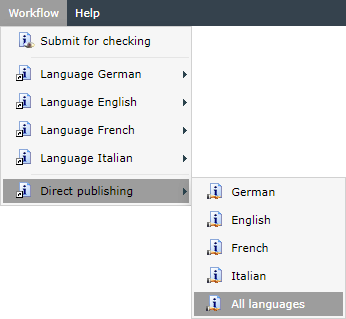
|
After a confirmation the article is published. Depending on the configured workflow schema, further actions may be possible (e.g. asking whether the article should be submitted to all users for information). |
| 08 | The new revision now appears in the Knowledge Base view. After opening the article, the version number is visible in the top right corner. | 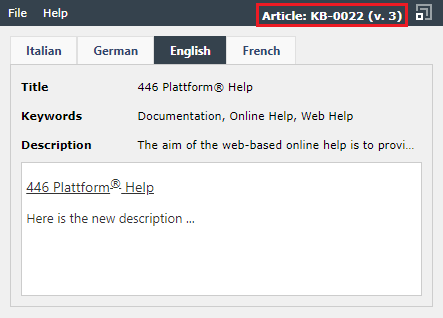
|
--- |
| 09 | An overview of the versions can be viewed in the extended view in the Versions tab. | 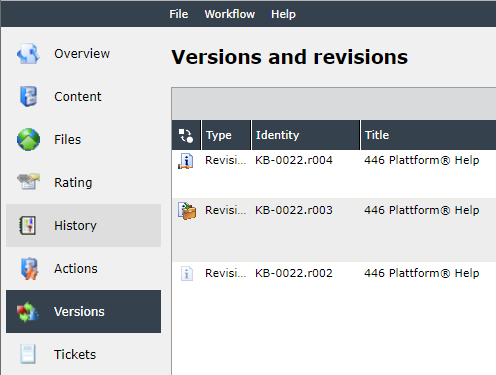
|
--- |
Further information:
|
|||
| No. | Place |
Image |
Action |
|---|---|---|---|
| V1 | Requirements:
|
||
| V2 | Content:
|
||
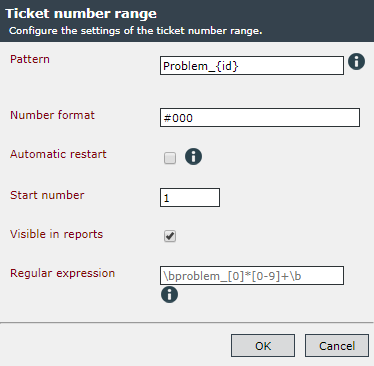
| 01 | Settings | Ticket Management | Ticket number ranges |
|
Select New ticket number range. The validity can be selected in the drop-down field Process schema (All, Global, Schemas ...). |
| 02 | The Ticket number range window opens. |
|
The required fields of the ticket number range are filled in and saved with OK. |
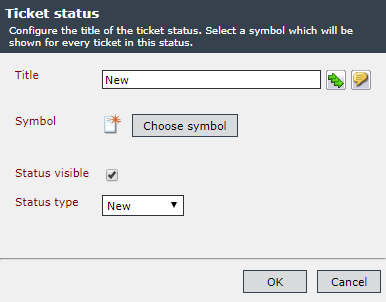
| 03 | Settings | Ticket Management | Ticket Statuses |
|
The required fields of the ticket statuses are filled in and saved with OK. |
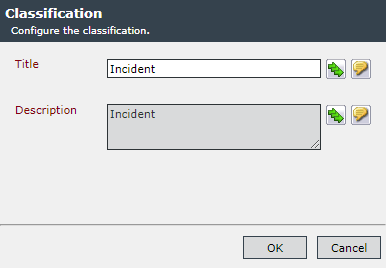
| 04 | Settings | Ticket Management | Classifications |
|
The required fields of the classifications are filled in and saved with OK. |
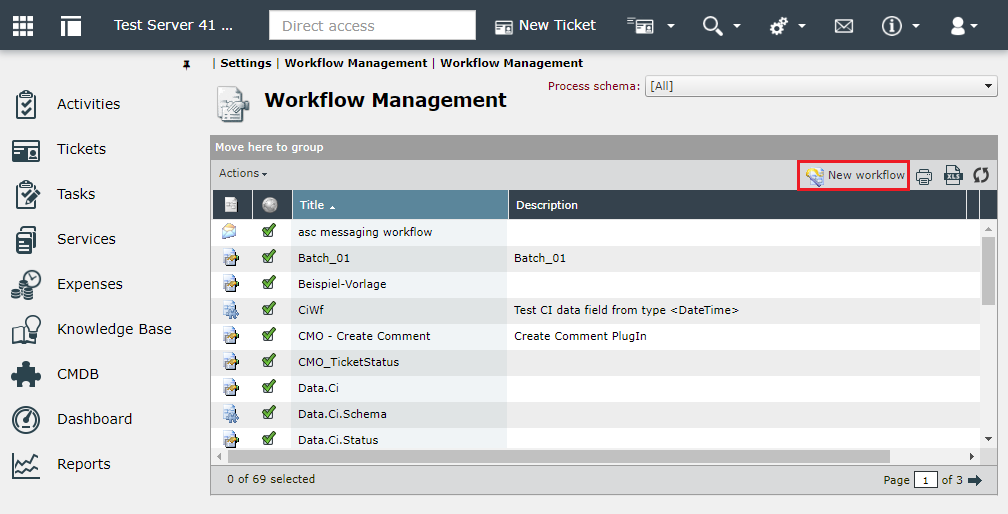
| 05 | Settings | Workflow Management | Workflow Management |
|
A new workflow is created (does not have to be complete at this point). |
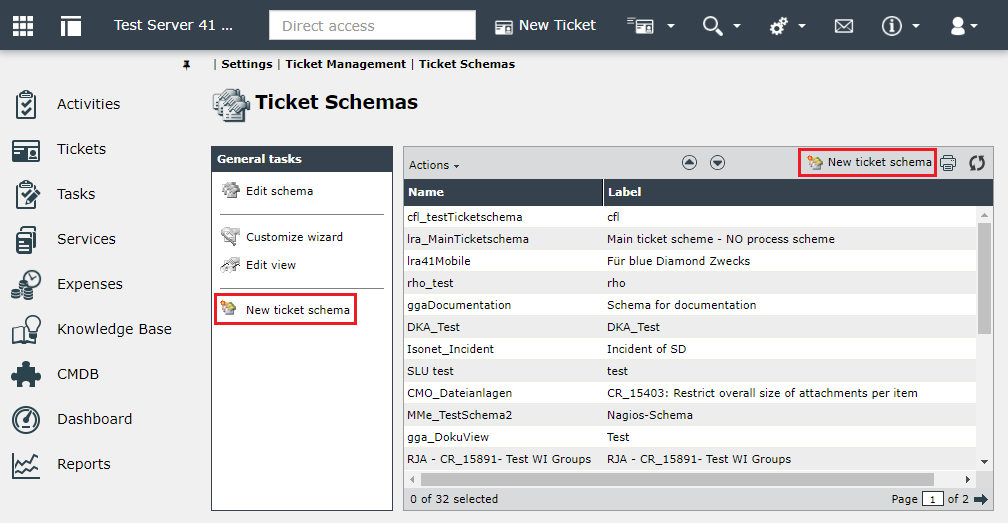
| 06 | Settings | Ticket Management | Ticket Schemas |
|
Select New ticket schema |
| 07 | The Ticket schema window opens |
|
The required fields of the ticket schema are filled in (Attention: deactivate checkbox Is process schema) and saved with OK. |
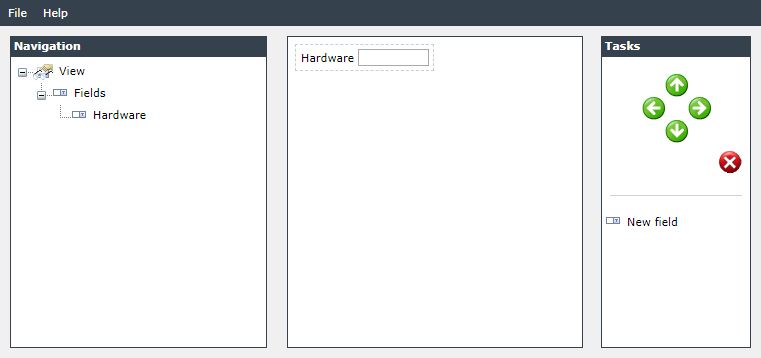
| 08 | Under General tasks, select Customize wizard |
|
Configuring the Ticket wizard:
|
| 09 | Under General tasks, select Edit view |
|
Configuring the view:
|
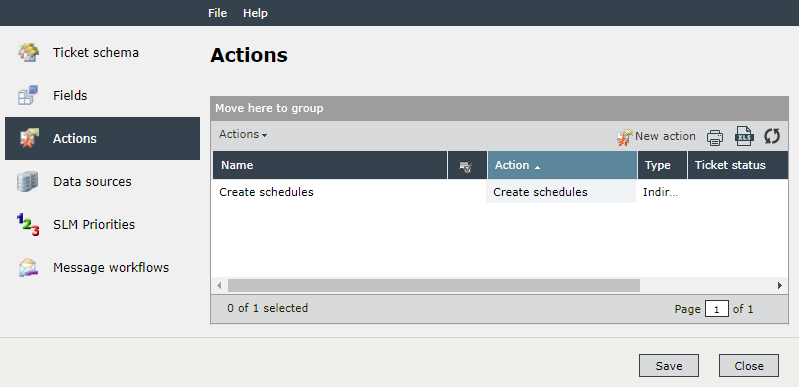
| 10 | Actions tab of the ticket schema |
|
Configuration of the actions in coordination with the workflows used. |
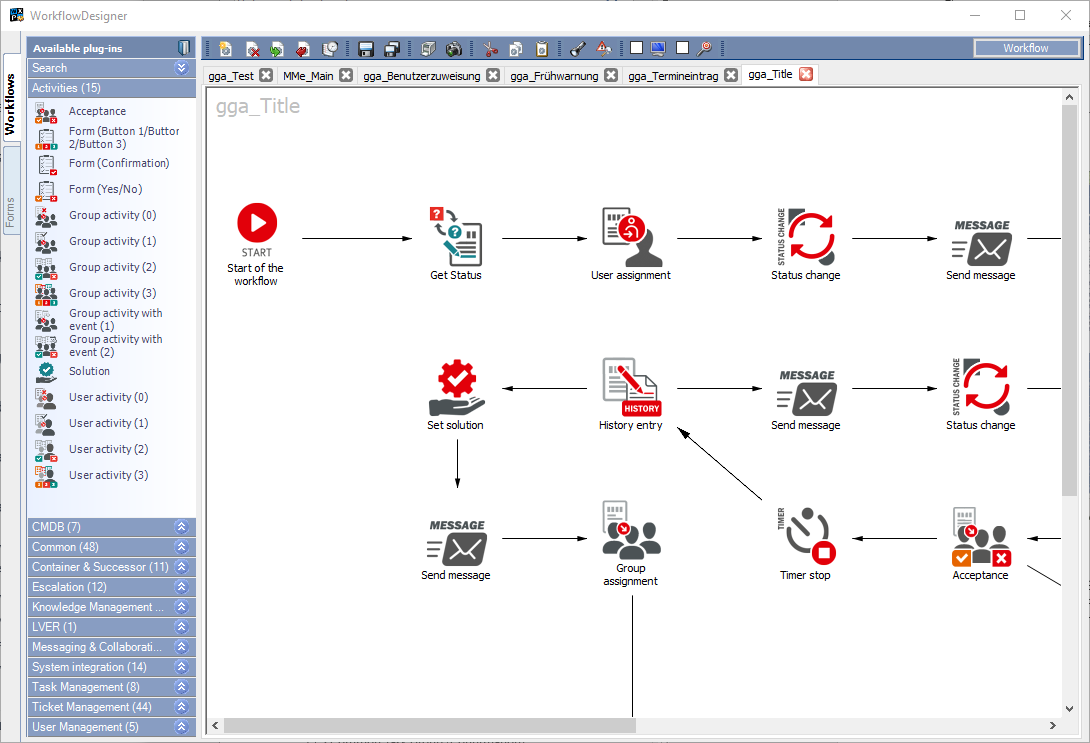
| 11 | Settings | Workflow Management | Workflow Management > Workflow |
|
Configuration of the workflow in coordination with the required actions. |
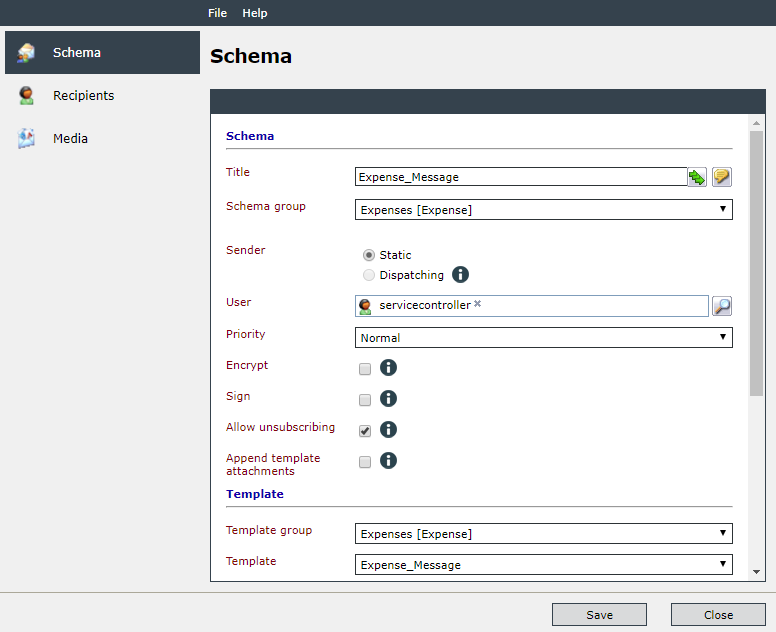
| 12 | Settings | Messaging & Collaboration | Schemas for Messaging |
|
Configuration of Schemas for Messaging |
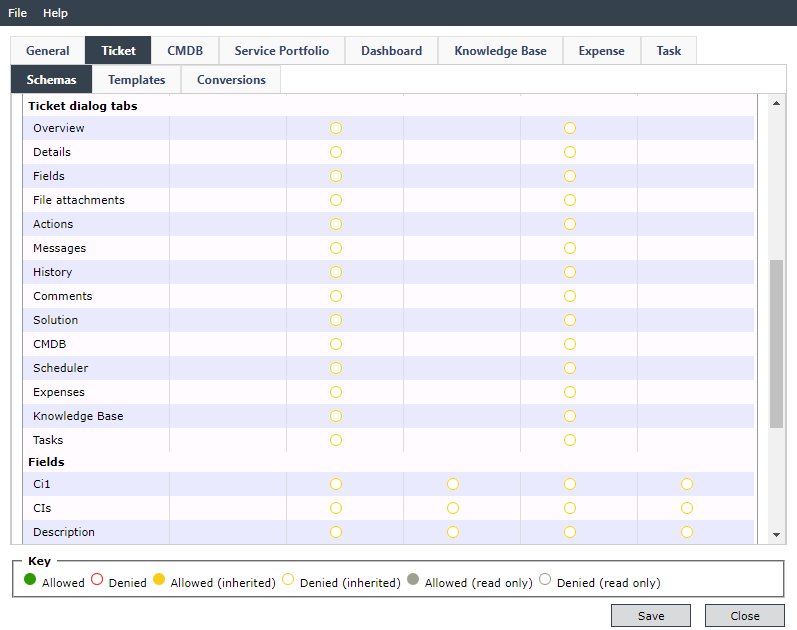
| 13 | Settings | User Management | User Management > Permission |
|
Assignment of authorizations for groups on ticket views and statuses. |
Further information:
|
|||



| No. | Place |
Image |
Action |
|---|---|---|---|
| V1 | Requirements:
|
||
| V2 | Content:
|
||
| 01 | Settings | Service Level Management | Service Level Management | 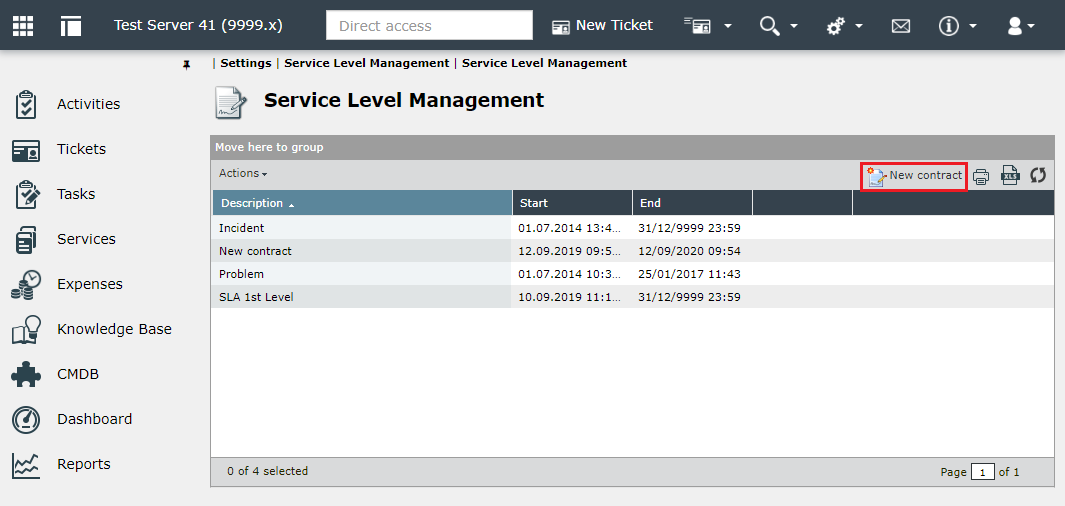
|
Select New contract |
| 02 | The detail dialog for a new contract opens | 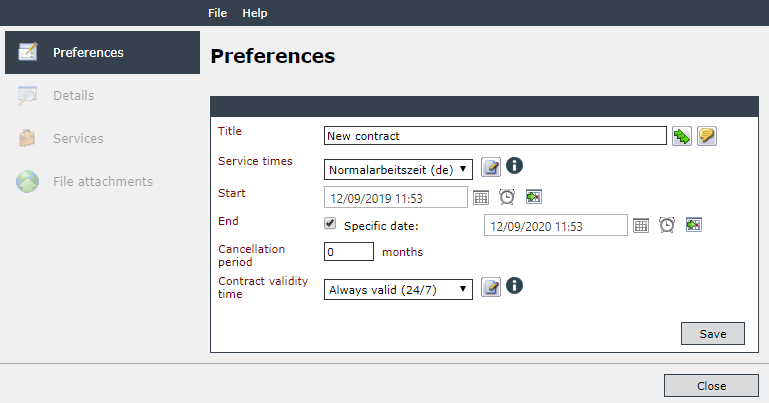
|
Create and configure the contract:
|
| 03 | Services tab of the new contract (only appears after Save) | 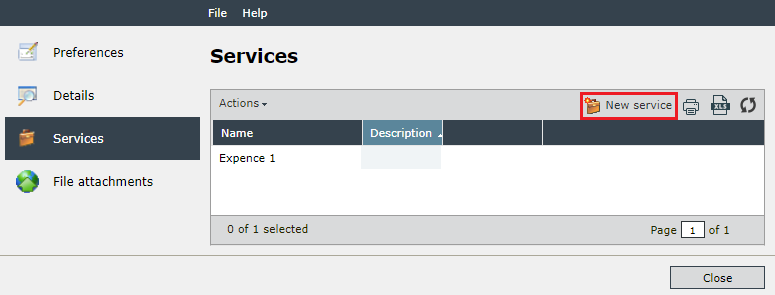
|
Select New service |
| 04 | The detail dialog for a new service opens | 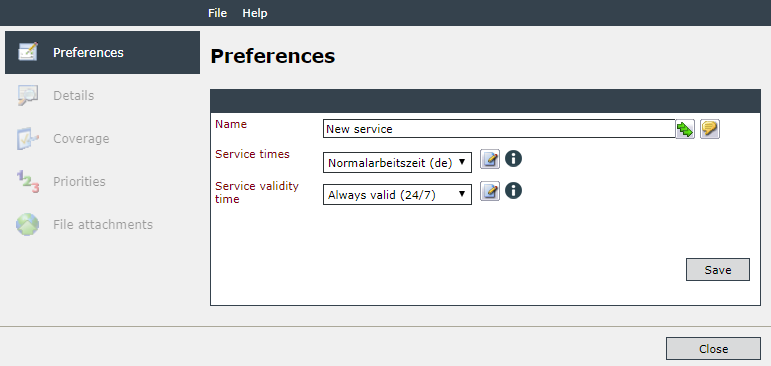
|
Enter the required information and create the service with Save. |
| 05 | Coverage tab > New assignment | 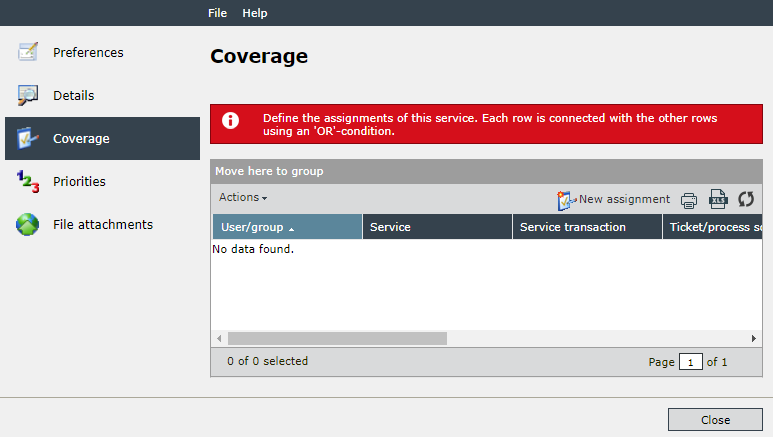
|
Define the coverage/assignments:
|
| 06 | Priorities tab | 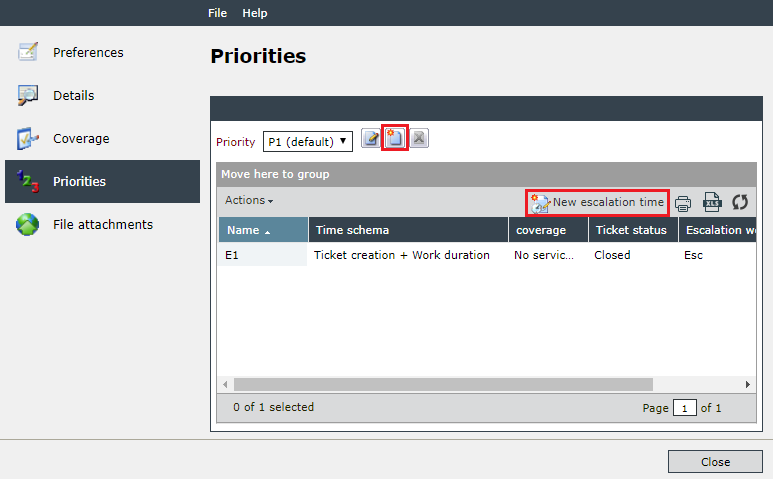
|
Define priorities and escalation times |
| 07 | Settings | Workflow Management | Workflow Management > workflow | 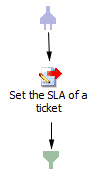
|
Configuring the plug-ins contained in (ticket) workflows for the assignment of SLAs. |
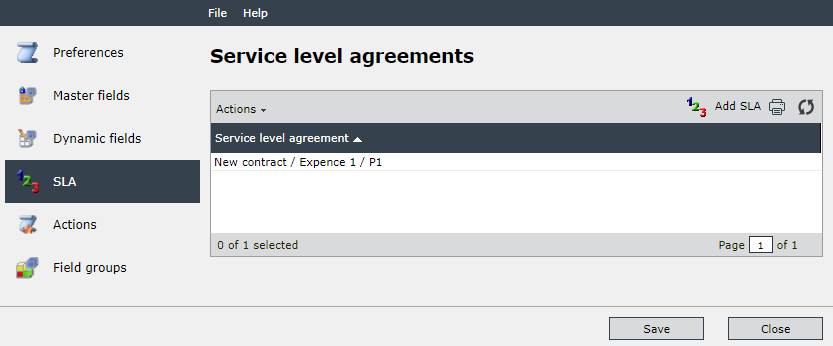
| 08 | Settings | Messaging & Collaboration | Mail2Ticket > SLM priorities tab or Settings | Configuration Management (CMDB) | CMDB Schemas > SLA tab and other modules |
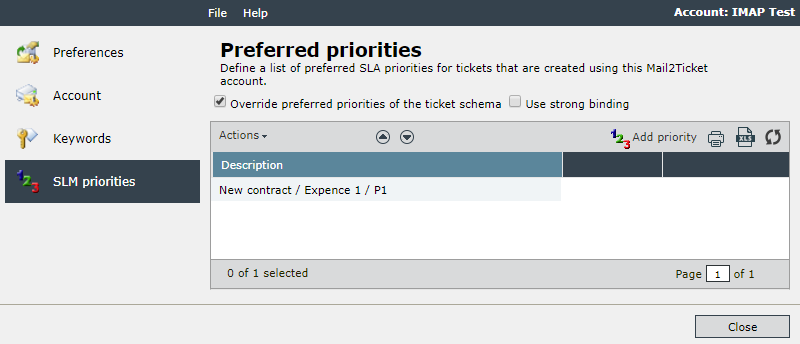
|
Adding the contracts, services and priorities for the Mail2Ticket account, the CIs, etc. |
Further information:
|
|||
| No. | Place |
Image |
Action |
|---|---|---|---|
| V1 | Requirements:
Optional:
|
||
| V2 | Content:
|
||
| 01 | Settings | User Management | User Management > New user/New group | 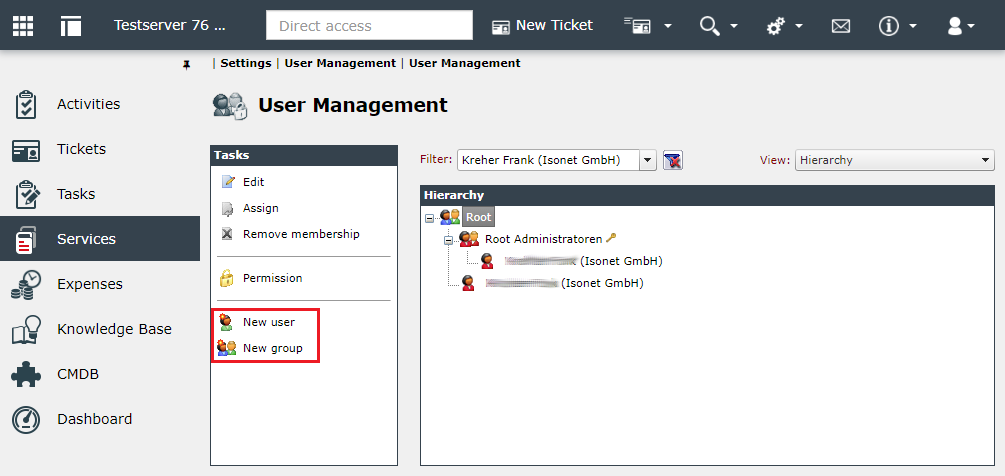
|
Create and configure the users and groups for the different managers/manager groups of the service portfolio. |
| 02 | Settings | Service Portfolio | Service Life Cycles | 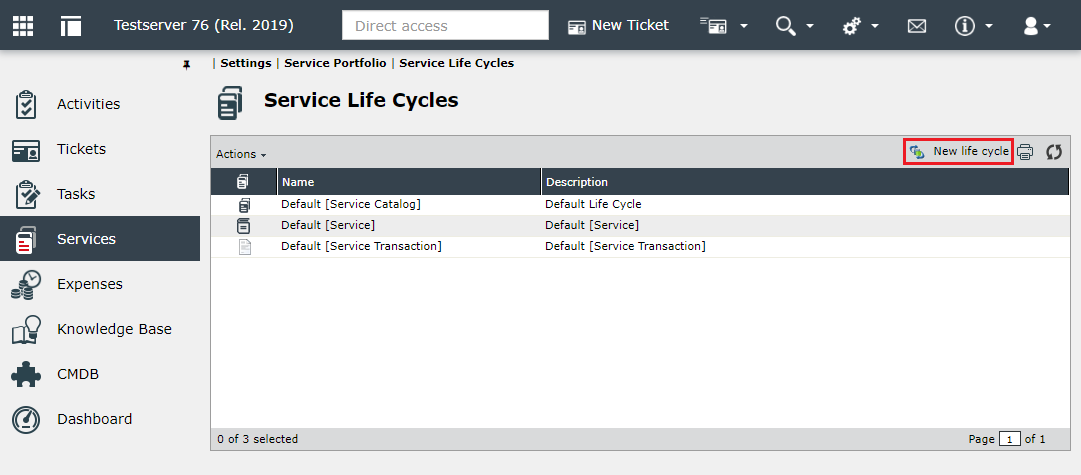
|
Create the required service lifecycles for:
|
| 03 | Double-click on a created life cycle > Status tab | 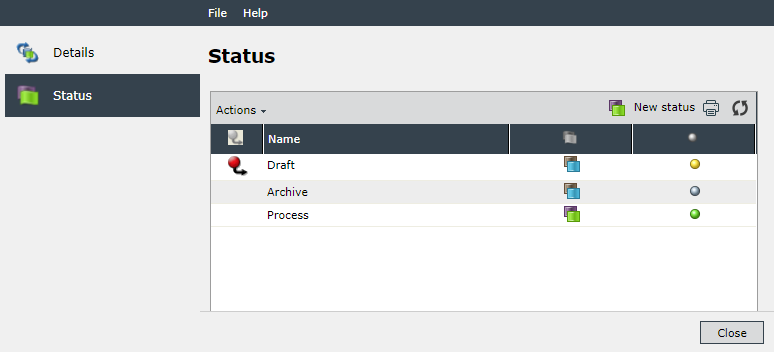
|
Create the required statuses (within the life cycle) |
| 04 | Settings | Service Portfolio | Service Schemas > New schema | 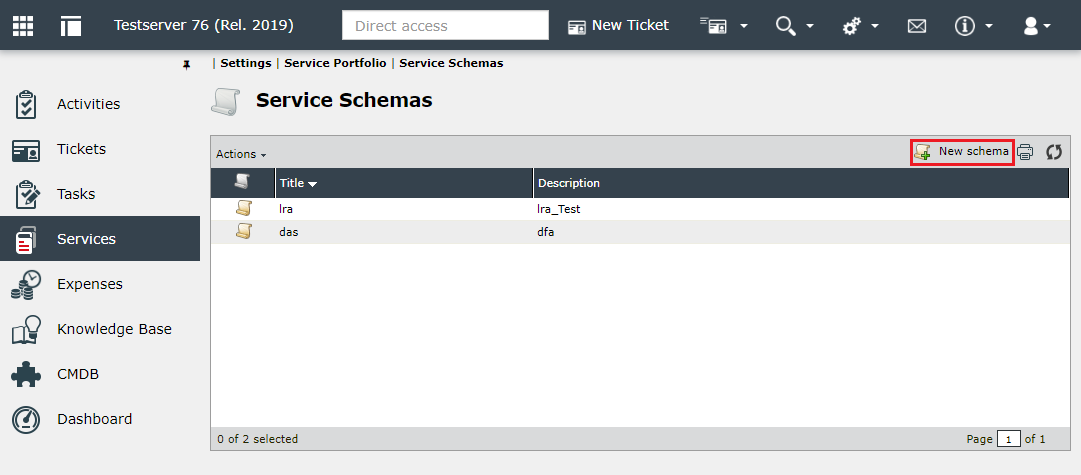
|
Creating the service schema(s) for the services |
| 05 | See: | --- | Creating the process schema(s): Attention: Activate checkbox Is process schema
|
| 06 | Select Services in the main menu > Create new service catalog | 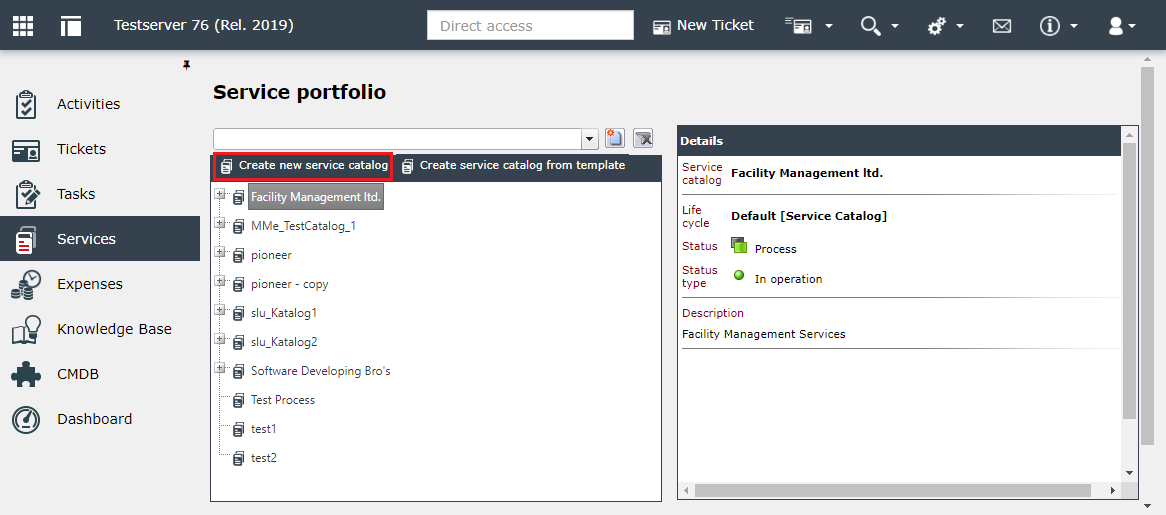
|
Create the tree structure of the service portfolio:
|
| 07 | Settings | User Management | User Management > Permission | 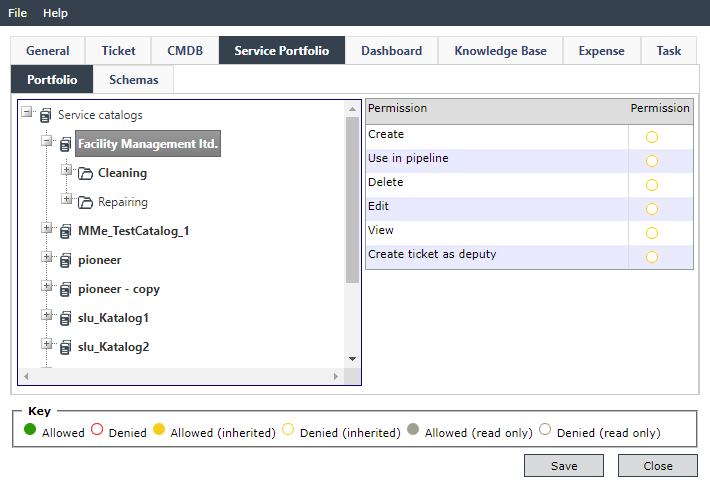
|
Assignment of the required permissions:
|
| --- | Note: A new ticket can also be created from the service tree. | 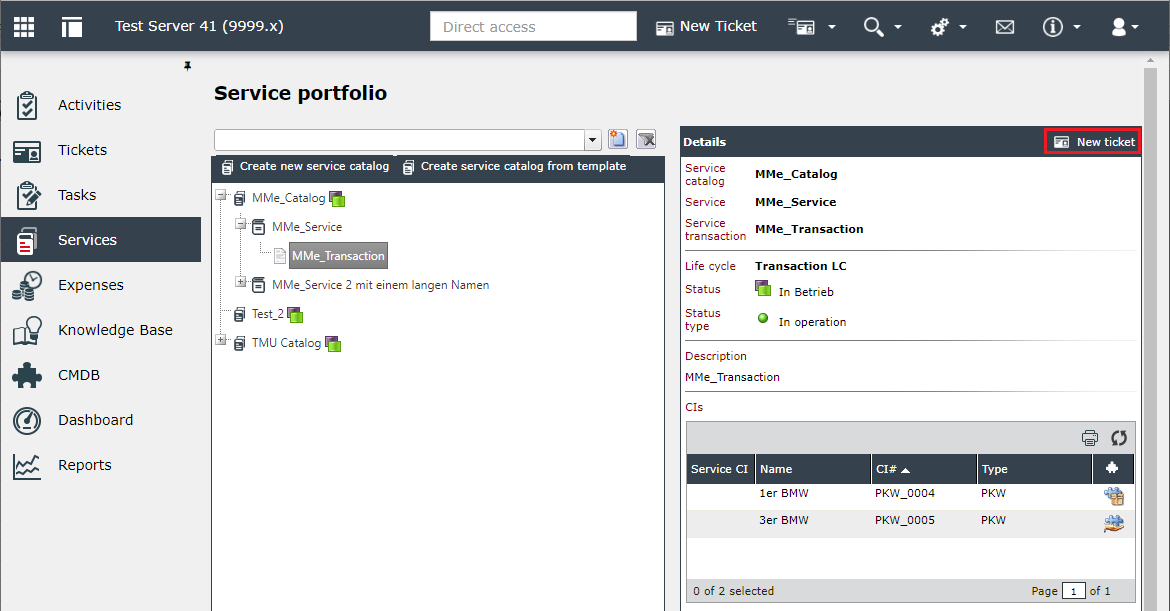
|
Selection of a service transaction > The New Ticket button appears at the top of the right-hand window With a click on this button a prefilled ticket can be generated. |
Further information:
|
|||
| No. | Place |
Image |
Action |
|---|---|---|---|
| 01 | Select CMDB in the left main menu. | 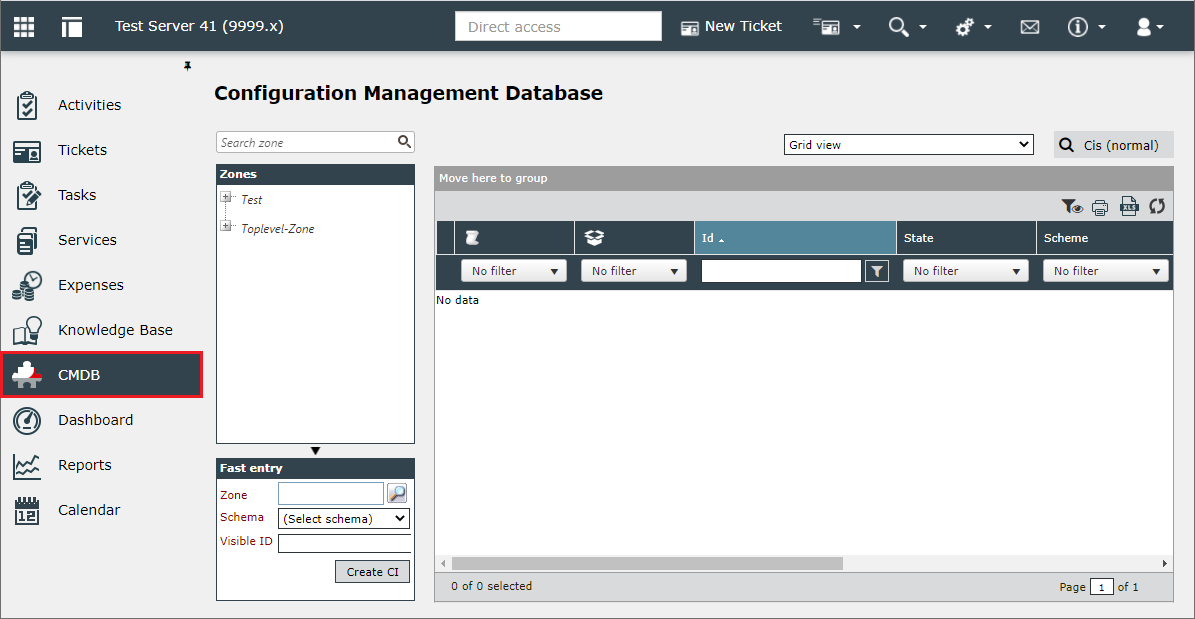
|
The view of the configuration item database is switched to. |
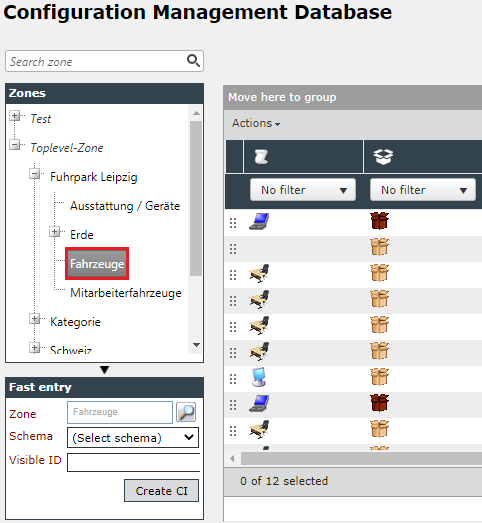
| 02 | A zone is selected in the zone tree. |
|
The CIs for the selected zone appear in the right window. |
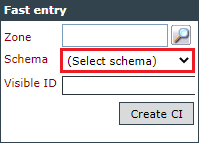
| 03 | A schema for this zone is selected in the fast entry. |
|
--- |
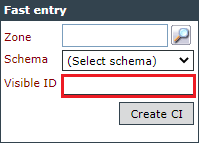
| 04 | Enter the Visible ID: For example, customer name or customer number. It can also be left blank and can be changed later. |
|
--- |
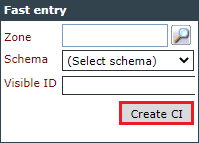
| 05 | Click on Create CI. |
|
The new CI is created and displayed in the CI list of the corresponding zone. |
Further information:
|
|||
- Deleting ticket schemas
Access to tickets after deleting a ticket schema:
Ticket view: Tickets are visible.
Direct access: Tickets are found with ticket number.
Extended search: Filtering by a schema is no longer possible because the ticket schema no longer appears as a filter criterion.
- Delete number ranges
Note:
A number range used in a ticket scheme cannot be deleted. It can only be deleted if it is not used by any schema and the schema has already been deleted.
After deleting the schema and number range:
Ticket view: Tickets are available and can be opened.
Direct access: Tickets are found with ticket number.
Extended search: The deleted number range no longer appears as a filter criterion.
-
Change of a number range for an existing ticket schema
This updates the IDs of all existing tickets. They can only be accessed via the new number (the old ID no longer exists).
Change number range and create new tickets:
Ticket view: The tickets (original and new) are displayed with changed number range.
Direct access: Tickets with old number range will not be found (only with new ones).
Extended search: Tickets are only found with a new ticket number.
- Deleting the ticket status
Delete ticket status of existing tickets in the preferences:
Ticket view: Tickets are displayed.
Direct access/Extended search: Tickets can be searched by ticket number (or other criteria), but not by status.
- Delete services from the portfolio
Services in the portfolio can be deleted even if existing tickets are active.
Note:
It is better to archive a service than to delete it.
Ticket view: Tickets are displayed.
Direct access: Existing tickets can be found with the ticket number.
Extended search: The tickets can be searched for using the criterion ticket schema.
- Deleting service agreements (SLA)
- Delete escalation times used
Ticket view: Tickets are displayed.
Direct access: Tickets can be found with the ticket number.
Extended search: The tickets are found via agreement, service and priority.
Note:
Existing tickets no longer escalate.
The following warning is displayed:
There is at least one priority without escalation times.
The warning only appears if all escalation times of a priority have been deleted. However, this can also be a valid status of a priority.
- Delete used priorities
Note:
A priority can only be deleted when all associated escalation times have been deleted. The button is inactive as long as escalation times still exist.
Ticket view: Tickets are visible and can be opened.
Direct access: Tickets can be found with the ticket number.
Extended search: The tickets are found via agreement and service (no longer via priority).
- Delete used services
Ticket view: Tickets are visible and can be opened.
Direct access: Tickets can be found with the ticket number.
Extended search: The tickets are only found via the agreement (not via priority or service).
Note:
A service can only be deleted once all associated priorities have been deleted.
In the ticket, the information about service, priority and escalation times is still available, although it has already been deleted in the service agreement.
- Delete used maintenance contract
Ticket view: Tickets are visible and can be opened.
Direct access: Tickets can be found with the ticket number.
Extended search: The tickets are no longer found using the SLA filter criteria.
The History table together with the HistoryPlaceholderTexts and HistoryPlaceholderValues attachments contains all the data for the logs of the respective entities (e.g.: tickets).
The following columns in the History table are important for evaluations:
-
DataId: Is only needed for the join to HistoryPlaceholderTexts and HistoryPlaceholderValues.
-
HistoryTemplateDataId: Defines the type of the entry, e.g. StatusChanged. Details can be found in the HistoryTemplates table.
-
TimeStamp
-
UserObjectGuid: The executing user, or system user
-
ObjectType: Type of entity, e.g. 1 for tickets. See below for details.
-
ObejctDataId: DataId of the entity, e.g. the DataId of the ticket
-
AffectedObjectType: If the log entry refers to another object, then this column defines its type.
Example:
TicketLinked: Ticket would be found here, and the DataId of the linked ticket in the column AffectedObjectIdentifier. The value can be NULL, e.g. for the entry that the entity itself was created or deleted.
-
AffectedObjectIdentifier: See above. AffectedObjectType and AffectedObjectIdentifier belong together, and must always be filtered together.
The HistoryPlaceholderTexts table contains the localized texts of each placeholder. Normally it is not used for reports.
The HistoryPlaceholderValues table contains the IDs (DataId, ObjectGUID or other) of the placeholder objects, if they have an ID. This table also rarely needs to be accessed in reporting, since the majority of use cases are already covered by the column pair AffectedObjectType and AffectedObjectIdentifier of the History table itself. Only in the case that a log entry refers to more than one Affected Object and one does not need the one from the History table itself, it makes sense to access the HistoryPlaceholderValues table.
List of currently used ObjectTypes:
-
BaseEntity = 0
-
Ticket = 1
-
CI = 2
-
CIZone = 3
-
Task = 4
-
KBArticle = 5
-
Expense = 6
-
User = 7
Note:
When querying history tables for a specific entity, ALWAYS filter both the ObjectType and ObjectDataId.
List of currently used AffectedObjectTypes:
-
public const string Expense = "Expense";
-
public const string Comment = "Comment";
-
public const string Field = "Field";
-
public const string File = "File";
-
public const string Status = "Status";
-
public const string Task = "Task";
-
public const string Principal = "Principal";
-
public const string Ticket = "Ticket";
-
public const string TicketLink = "TicketLink";
-
public const string Zone = "Zone";
-
public const string SchemaType = "SchemaType";
-
public const string Ci = "Ci";
-
public const string ServiceTransaction = "ServiceTransaction";
-
public const string TicketToDo = "TicketToDo";
-
public const string Form = "Form";
-
public const string MessagingTemplate = "MessagingTemplate";
-
public const string MessagingSchema = "MessagingSchema";
-
public const string Mail = "Mail";
-
public const string Result = "Result";
-
public const string Contract = "Contract";
-
public const string Service = "Service";
-
public const string Priority = "Priority";
-
public const string Escalation = "Escalation";
-
public const string Team = "Team";
-
public const string ClearingType = "ClearingType";
-
public const string ExpenseType = "ExpenseType";
-
public const string CostCentre = "CostCentre";
-
public const string Project = "Project";
-
public const string KbArticle = "KbArticle";
-
public const string KbLanguageStatus = "KbLanguageStatus";
-
public const string KbFile = "KbFile";
Queries - Performance
-
When filtering for a specific type of log entry: HistoryTemplateDataId column
-
For filtering by a specific entity, filter by ObjectType AND ObjectDataId in any case.
-
Filtering by AffectedObjectType and AffectedObjectIdentifier can ONLY be done in addition to ObjectType and ObjectDataId - never individually!
-
Filtering by TimeStamp and UserObjectGuid is possible at any time independently of other filters.
When debug mode is activated in Messaging Manager, all emails are sent to the debug address. This is useful for avoiding sending emails to real email addresses during the configuration or testing phase of a system or process. This mode can only be configured in the XPertMaster database (MessagingDelivererConfiguration table).
To activate debug mode, proceed as follows:
-
Open SQL Management Studio and select the XPertMaster database.
-
Open a new SQL query and execute the following SQL commands (after adjusting the values in the two declared variables):
CopyDECLARE @modus nvarchar(100) = 'True';
DECLARE @addr nvarchar(100) = 'email@debug.net';
UPDATE MessagingDelivererConfiguration SET [Value] = @addr WHERE [NameSpace] = 'Isonet.MessagingManager.Deliverers.HtmlEmailDeliverer' AND [Key] = 'DebugAddress';
UPDATE MessagingDelivererConfiguration SET [Value] = @modus WHERE [NameSpace] = 'Isonet.MessagingManager.Deliverers.HtmlEmailDeliverer' AND [Key] = 'DebugMode';
-
Then restart MessagingManager in the Services control.
To disable debug mode, simply set the key DebugMode to False.


 Copyright (c) 2000-2026 Isonet AG