Groups & Users
Via the module User Management, user accounts can be managed and pooled in groups. Simultaneously, permissions can be assigned for these groups, in order to guarantee an effective workflow in the helpdesk.
Chapters:
The User Management allows for creating various users and user groups and configuring individual permissions in order to ensure effective workflows.
The User Management can be accessed via Settings > User Management > User Management.
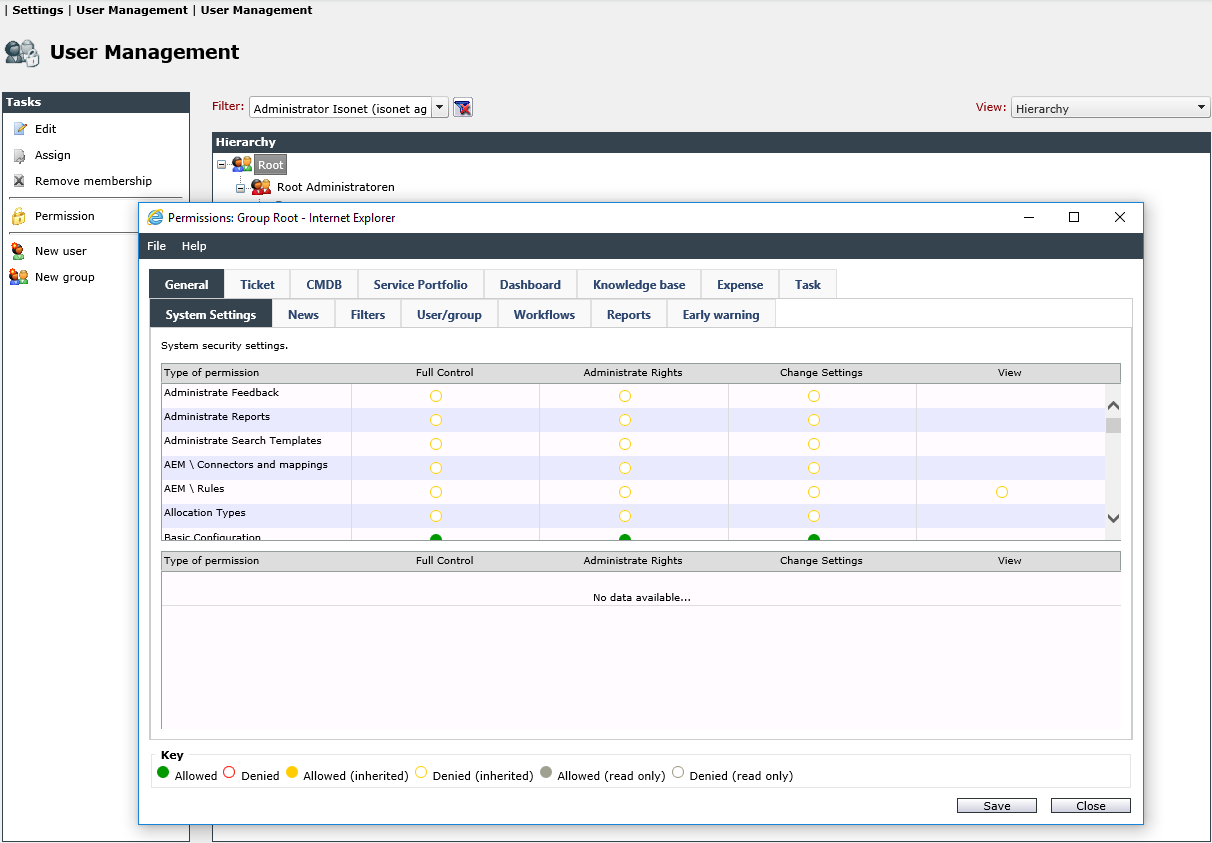
Here, new users and groups can be created, assigned to groups, group memberships can be canceled, and the access permissions of groups can be defined for the contained users and subgroups.
Views
For maximum efficiency in the management of users and user groups, there are three different views available for the User Management.
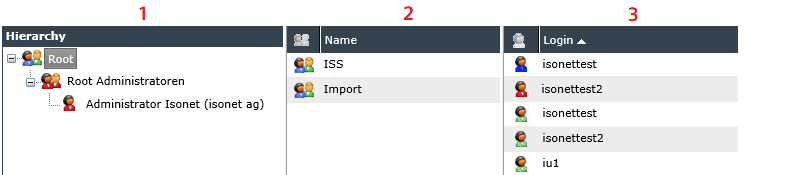
The three different views: hierarchy (1), groups (2), and users (3)
Hierarchy
In the hierarchical view, a tree diagram of the complete hierarchy is displayed. Groups, subgroups, and users are displayed on their respective level in the hierarchy.
In the hierarchical view, icons are displayed next to the names of some groups.
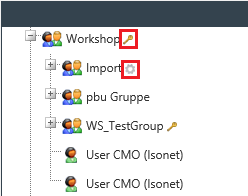
Key symbol: Permissions have been configured for this group
Gear wheel symbol: An import has been configured for this group - active or not active.
Note:
Groups within the tree structure for which the user has no right to see them are disabled and displayed under the static name Other group. Only the client root group is always displayed with the correct name, but is also deactivated.
Groups
In this view, only groups are displayed. All of the groups existing on the system can be seen here, regardless of their level in the hierarchy.
Using the bar at the bottom of the table, the groups can be filtered according to their initial letters.
Users
In this view, all of the system’s users are displayed, regardless of the group or hierarchical level they belong to.
Using the bar at the bottom of the table, the users can be filtered according to their initial letters.
Note:
This filter always filters according to the initial letters of the column the table is currently sorted by.
Icons
The following icons are used in the User Management:
| Icon | Description |
|---|---|

|
Group (not imported) |

|
Group (imported) |

|
Permission role group |

|
Administrator group (not imported) |

|
Administrator group (imported) |

|
User (not imported) |

|
User (imported) |

|
Administrator (not imported) |

|
Administrator (imported) |
Administrators
The administrator has all permissions to all objects and can edit the permissions of other users.
Warning:
Administrators can be deleted via the 446 Plattform® interface just like any other users and groups.
In order to convert a user account into an administrator account, any user can be added to the group Root administrators additionally to his main group.
Warning:
Generally, if a user is a member of the administrator group, no authorization check is performed. Please pay attention to the users you add to this group.
If a user is not to be able to execute all administrative tasks, it is advisable to create a separate group for him, e.g. only for the administration of a specific module.


 Copyright (c) 2000-2026 Isonet AG