Ticket
A ticket is merely a brief outline of a freely defined ticket workflow, e.g., a request, problem, order, reclamation, competition, change of address. These tickets are managed in ticket list.
Short instruction
Chapters:
The Ticket Overview is the first tab in the Ticket dialog.
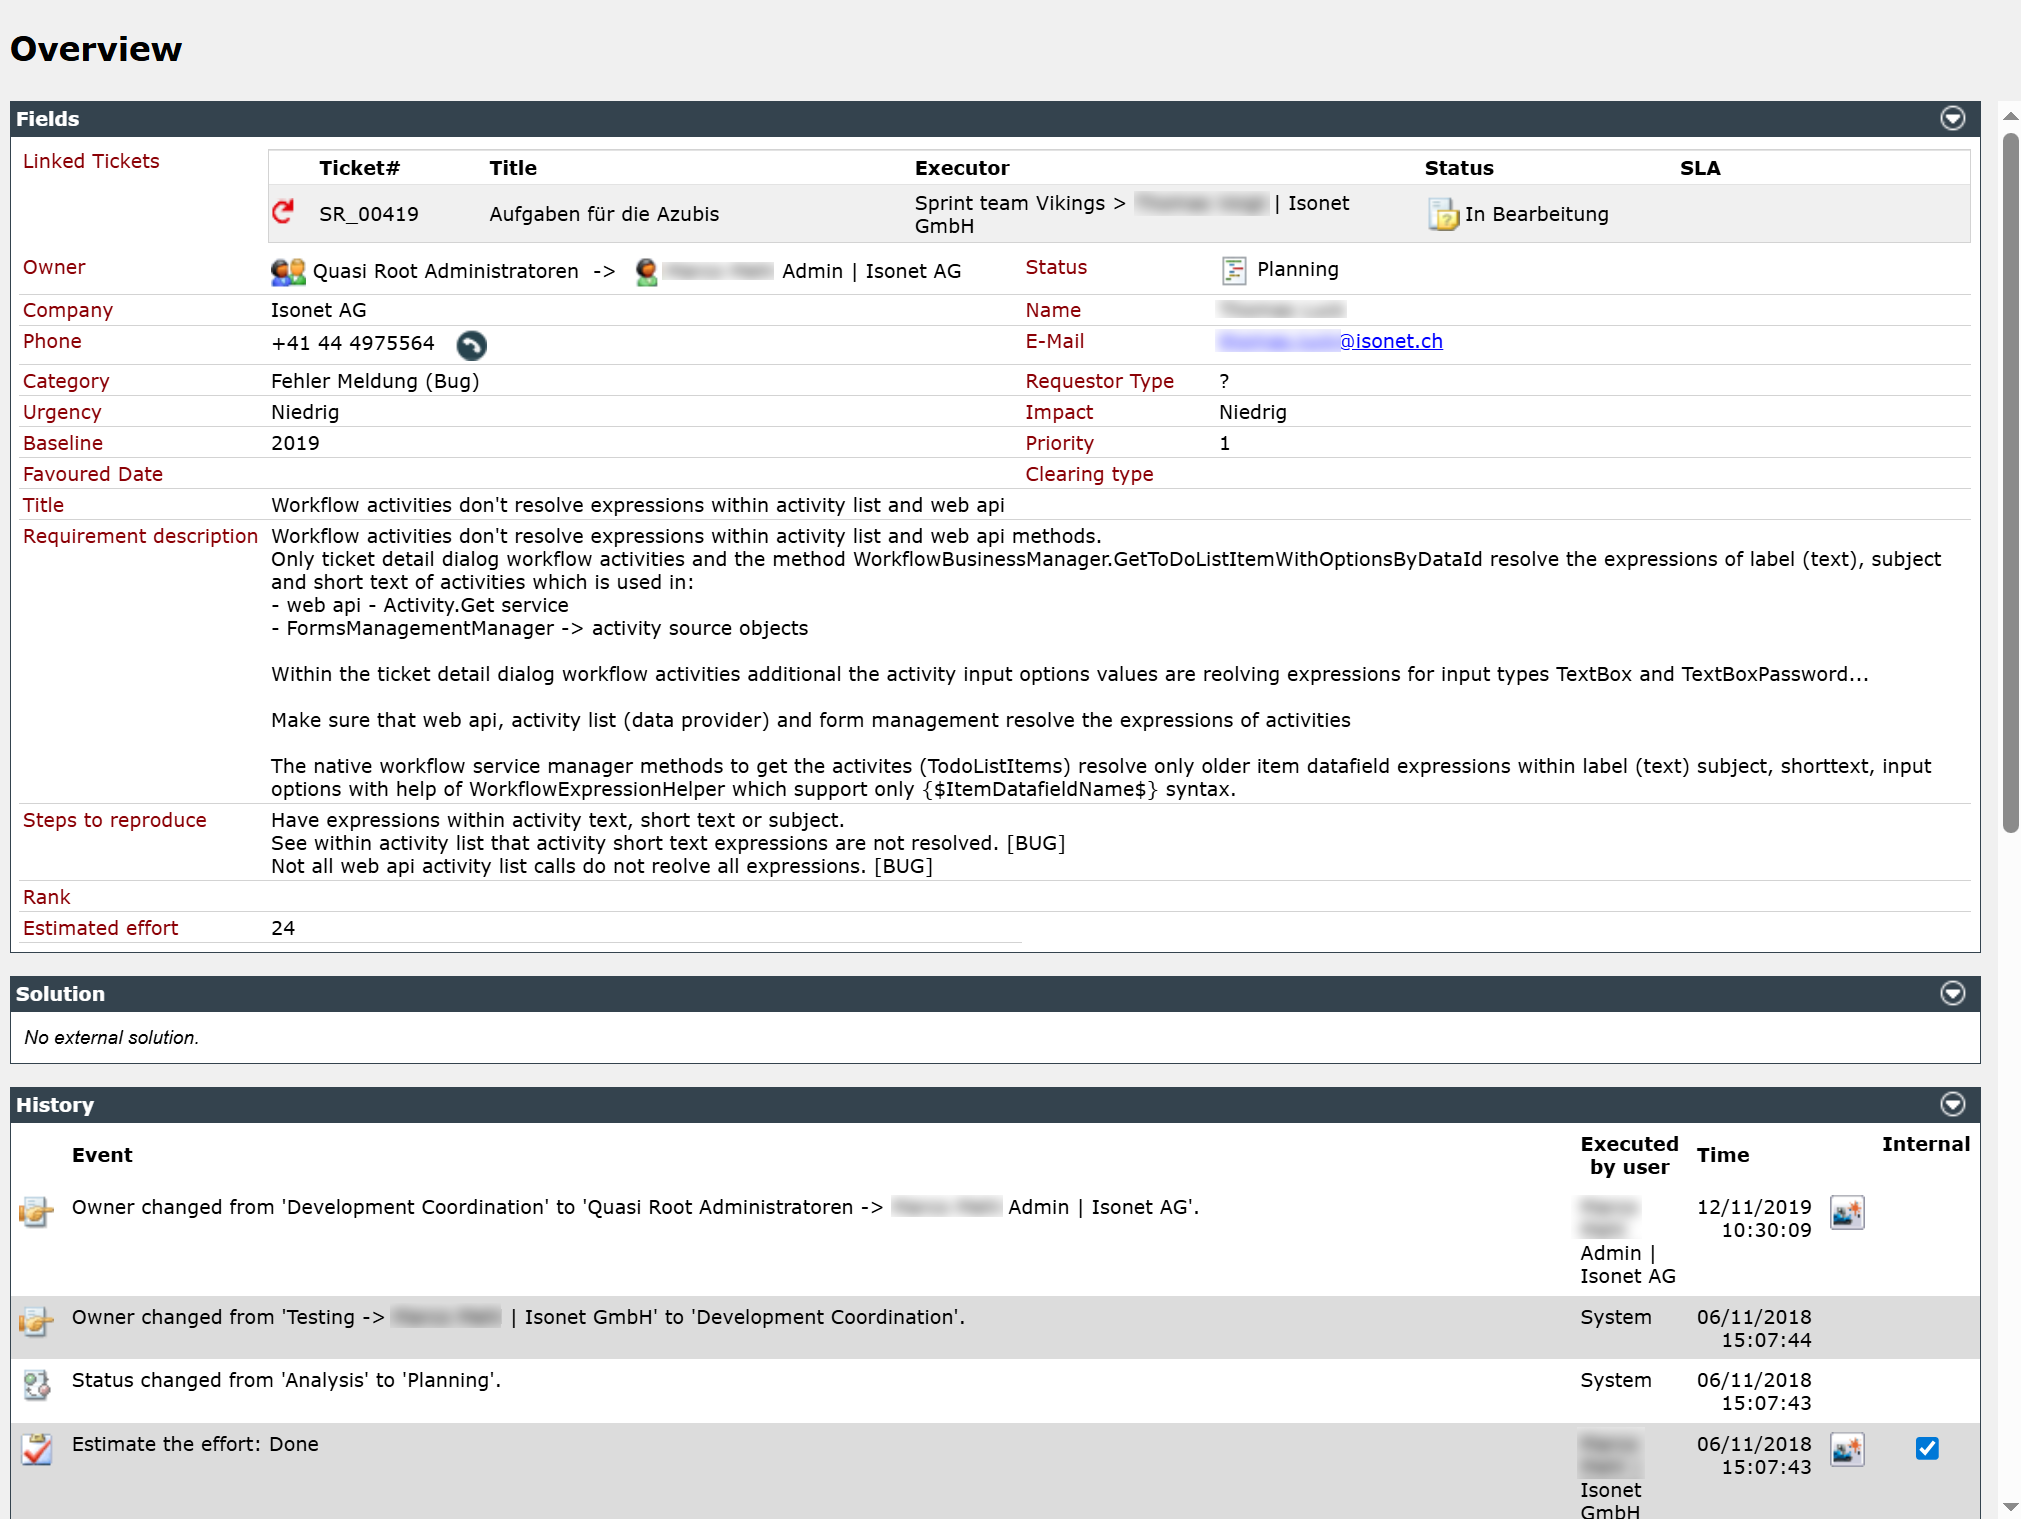
The overview consists of three sections:
Fields - Displays an overview of ticket fields. This section shows selected ticket fields that can be configured under Edit View.
Solution - The ticket resolution is displayed here if it is enabled for the ticket schema. For more information, see Ticket Schemas.
History - The history on the ticket overview displays selected entries from the full history. For more information, see Ticket Schemas.
If an email appears in the history, the sender's name appears on the first line, followed by the subject on the second line. Next is a portion of the email's content. Longer emails are displayed in an abbreviated form. The number of characters in the abbreviated view can be adjusted in the settings under Configuration settings (keys: OverviewProtocolEmailPreviewMaxCharacters and OverviewProtocolEmailPreviewMaxLines).
Ticket details are displayed as follows:

A user has access to a ticket or is visible to the user if one of the following criteria is met:
The current user
- ... is the owner of the ticket.
- ... is the affected user of the ticket.
- ... is the creator of the ticket.
- ... is a member of the team assigned to the ticket.
- ... has the right to see tickets from the ticket owner (user).
- ... has the right to see tickets of the ticket owner (group).
- ... has the right to see tickets of the affected user or group.
If the Affected Group feature is enabled (the group of the affected user can be selected when ticking), the affected user does not have any control over the access control (only the Affected group is relevant). That is, the current user has either the right to see tickets of the affected group, or is a member of the affected group. Without the affected group, only the Affected user is relevant.
- ... has a workflow activity in the ticket.
- ... is included in the list of other affected users.
- ... is a member of a group that is included in the list of other affected users.
- ... has the authority to see tickets from at least one other affected user.
The Service level agreement tab displays detailed information about the service level agreement. It also displays all escalation times assigned to the ticket and their statuses.
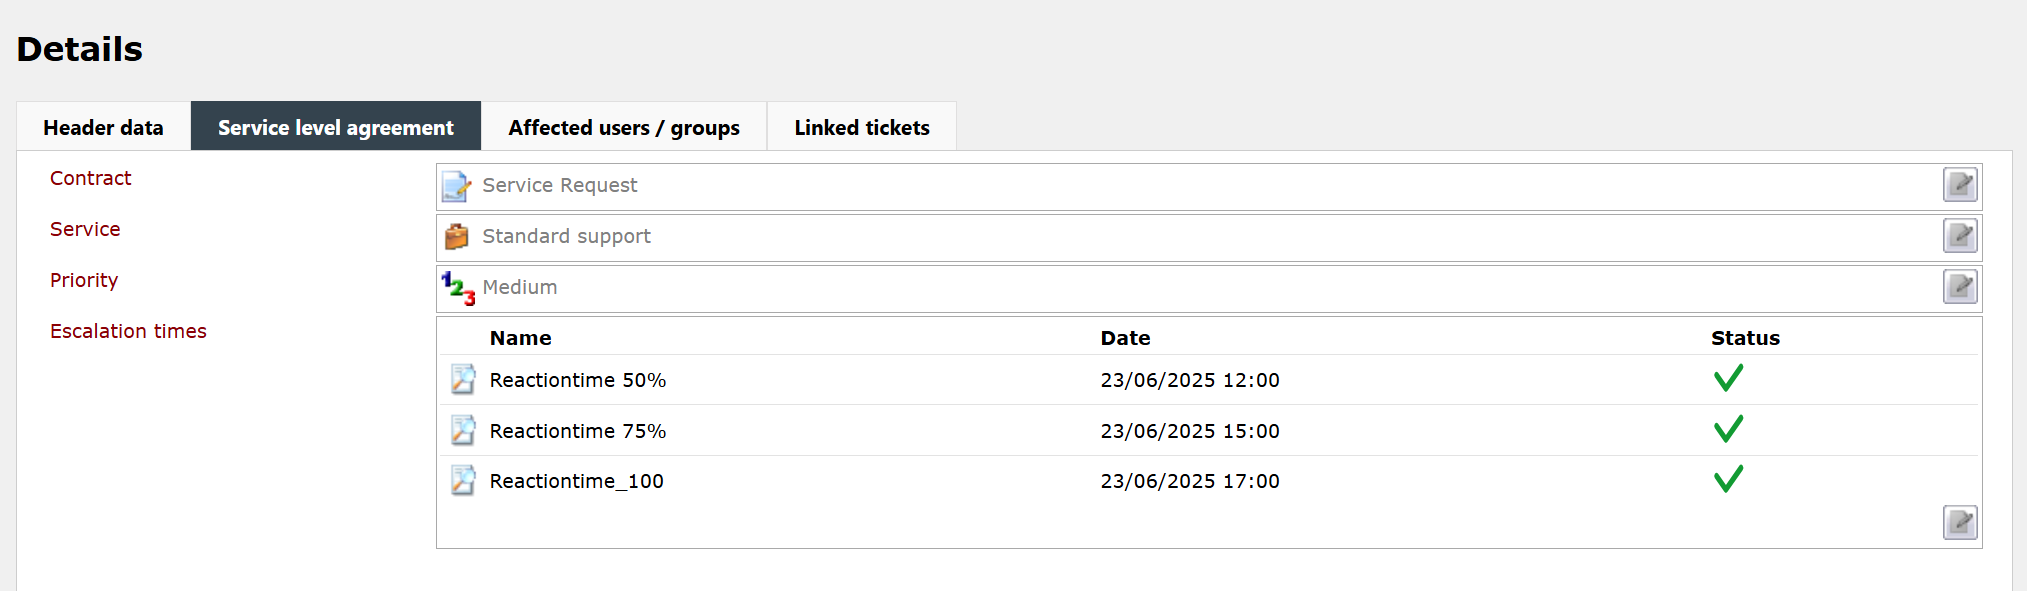
The contract, service, and priority assigned to the current ticket are displayed. Below that, a table shows all escalation times associated with the selected contract and its priority. The table lists the target time and status for each escalation time.
Different roles exist for tickets. These roles are configured for every ticket and allow for restricting ticket and workflow actions to certain roles or for dispatching messages exclusively to certain user groups.
The following tabs exist for every ticket:
Affected user: The affected user is basically the person affected in the ticket by the impact of the recorded error, by configuration changes etc.
Affected group: The affected group is basically the stem group of the affected user.
Owner: The owner is the user the ticket is currently assigned to.
Owner group: The owner group is basically the stem group of the processing user.
Creator: The person who created the ticket.
Responsible: The responsible of a ticket is basically that person who is responsible for the smooth operation. In a ticket, this may be either the person responsible for processes in and around a ticket or the SDU Manager of the respective transaction as soon as the Service Portfolio is used.
Ticket follower: This role enables to follow ticket progresses. Thus, at the top right corner of each ticket exists a button the following feature can be activated with.
For a better understanding, the different types of tickets will be explained in the following:
Ticket: A ticket is, for example, a problem to be solved or an operational instruction to be executed. The general process a ticket has to pass on and the ticket view are defined via ticket schemas in which also is deposited which user group needs to execute when which action in connection with the ticket.
Container ticket: containers are used for compiling multiple similar tickets in order to execute actions for these tickets simultaneously. If tickets exist in a container ticket, they will not be displayed individually in the activity list of the currently logged in user but as container. However, they are individually visible in the ticket list.
Successor ticket/parent ticket: there are several reasons to use a successor ticket. For example, another problem may result from the solution of an original ticket. Thus it becomes immediately obvious how the problem has been triggered, it is possible create a successor ticket from an existing one (original ticket). Both tickets are now linked among each other and, thus, the information contained in them (e.g. solution of the original ticket) is easier to find.
The top menu is located in the upper area of the ticket detail dialog and includes the items File[1], Actions [2] and Help [3].
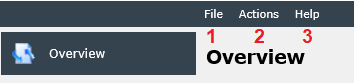
The menu item File provides functions for printing ticket details (e.g., field overview or ticket overview, including an overview log) and for closing the ticket detail dialog.
The Actions menu provides various, freely definable ticket actions (e.g. Follow Ticket).
By selecting Help the user can access the help pages for the current dialog and is informed about software version and license agreement by clicking Info.
The Overview tab contains general information about the ticket, e.g. the ticket category, information about the ticket creator, the priority and the status. The Fields area displays for example the ticket category as well as the creator and the ticket status. The Solution area displays the ticket solution which has been performed and recorded. The History shows modifications performed on the ticket. By clicking the symbol in the history the respective objects (e.g. expenses, KB articles) are opened directly.
Clicking on any user opens the user details dialog for that user (or the performing deputy).
Note:
The sort order of the “Related tickets” table is as follows:
-
Follow-up tickets, first the direct ones, then the follow-up tickets of the follow-up tickets (if configured recursively)
-
Cloned tickets in unsorted order (usually implicit: creation order)
-
Linked tickets in unsorted order (usually implicit: creation order)
-
Original tickets, first the direct one, then its original ticket, etc. (if configured recursively)
The Details tab shows additional information about the affected user, the owner, the creator and the responsible as well as about the used Service Level Agreement (SLA). The Responsible of a ticket (generally the creator) is filled in automatically. If the ticket is created with a service transaction, the owner of the ticket becomes the responsible of the ticket. If there is no owner, the creator is set responsible.
The Fields tab displays all information concerning the data the user entered on creating the ticket. This information cannot be modified after creating the ticket.
In the tab File attachments, it is possible to see what files have been attached on the ticket. In this tab, further files that may help solving the ticket can be attached, if needed. Depending on the workflow and the user permissions, file attachments can be uploaded via the same-named New file option and changed by double-clicking the appropriate entry in the data table
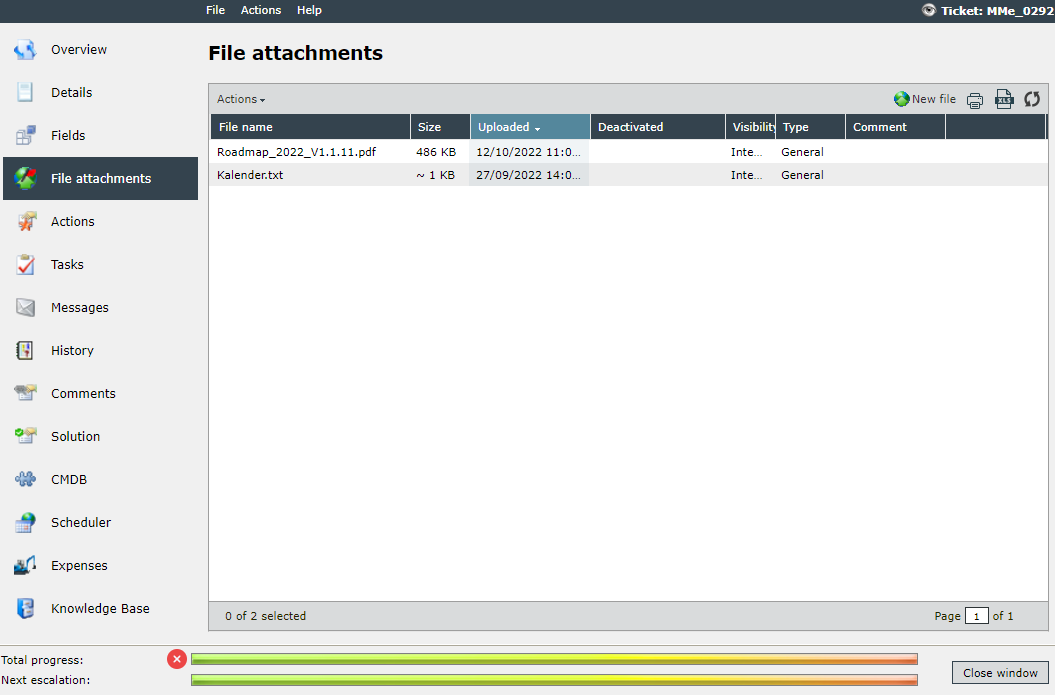
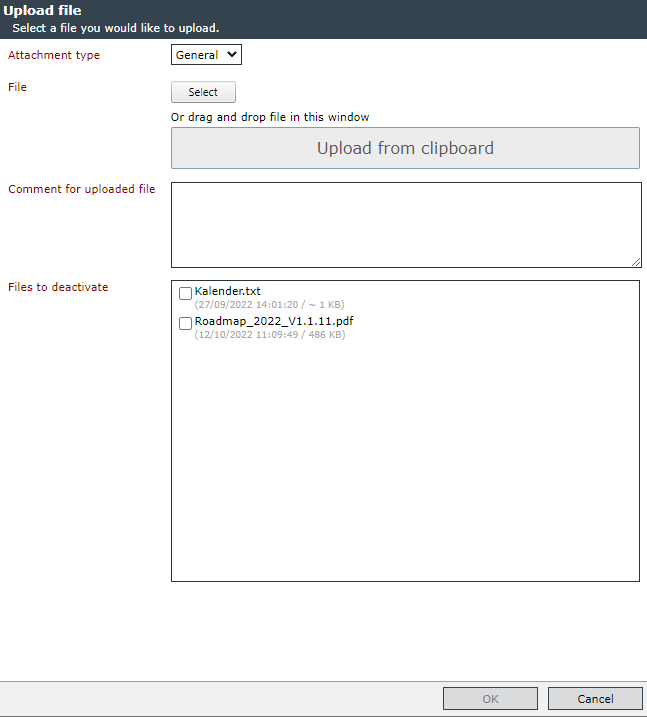
Attachment type let's you choose between General, Creation or Solution. You are also able to deactivate, delete or move existing files to another ticket here and to add a (optional) comment to your newly uploaded file.
With the configuration key 'EnableWipeTicketContent' enabled (see also Table: Configuration Settings - Client) there is an additional dialogue, who is asking you if the files should be wiped once for all or not:
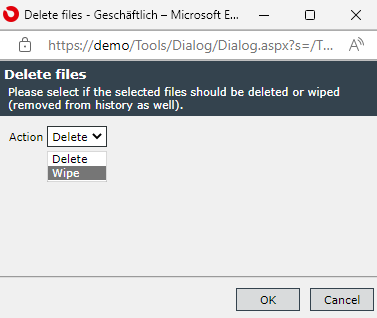
The Actions tab provides ticket actions (depending on the user and status) and workflow actions (depending on the current workflow), e.g. following a ticket or booking an expense.
Workflow information for experts
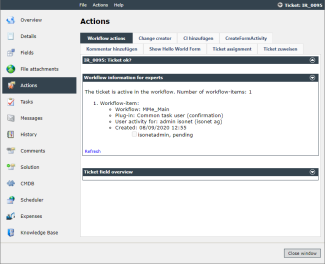
The Workflow actions tab shows (for root admin users only) a collapsible area with expert information about the ticket's workflow elements (if any). Six possible element states are interpreted:
Group activity
User activity
Wait when joining an item with another item
An item is paused (and until when)
An item is stopped (but not in a workflow activity) or paused
An item is in error condition with information about the error
In any case, the workflow and plug-in in which the workflow element is currently located is displayed.
An additional message is displayed:
Services are set offline in the database (e.g. when an X/PCM import is running)
The Workflow Manager is halted (after an upgrade, or by enabling that in the maintenance stage)
The SnailMode is enabled (items slowed down)
The Workflow Manager service is not running at all

In the Tasks tab, all tasks linked to the ticket and visible for the user are displayed. The tasks can be opened via double-click.
In the tab Work steps, all work steps concerning the respective ticket will be displayed. Furthermore, all work steps can be entered (see Comments).
The Messages tab depicts the e-mail communication within processing a ticket.
Message iconsIcons symbolizing the corresponding message type are displayed on the left side of the Message Center:
Icon Description 
An e-mail was sent/received automatically by the workflow. These system messages are only displayed for users with the appropriate permission. 
An e-mail was received from the ticket. 
An e-mail was sent from the ticket. Note:
The BCC field and its contents are only displayed if you are the sender of the email.
In the History tab all modifications performed to the ticket are listed.
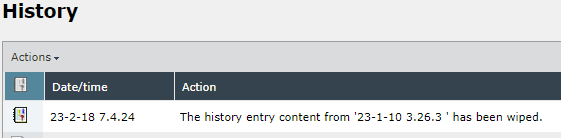
With the configuration key 'EnableWipeTicketContent' enabled (see also Table: Configuration Settings - Client) there is an additional Ticket Action, who let's you remove the content of the history:
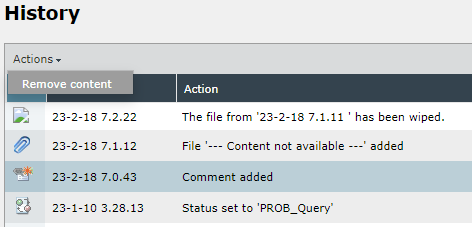
The change is properly being recorded in the history:
Event iconsIcons symbolizing the corresponding event are displayed on the left side of the history (selection):
Icon Description 
A CI was added. 
A comment has been written. 
A expense has been entered. 
A file attachment has been added. 
A KB article was rated. 
A KB article was created. 
An e-mail has been sent. 
A owner has been assigned. 
The ticket has been solved. 
The status of the ticket has changed. 
A successor ticket was created. 
A workflow activity has been answered. X About 200 further events are symbolized by icons.
In the Comments tab it is possible to display all comments concerning the ticket and (if the Action has been configured) to insert and remove new comments.
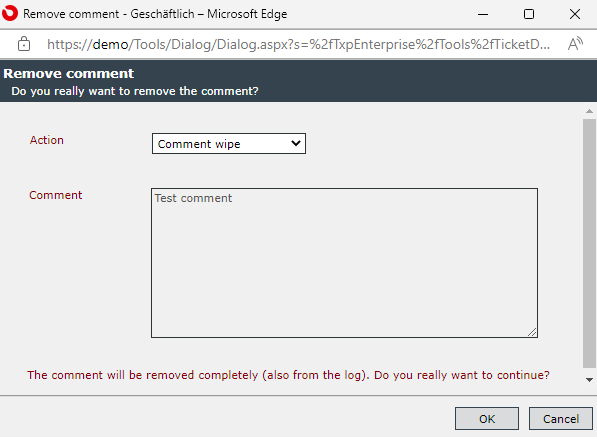
With the configuration key 'EnableWipeTicketContent' enabled (see also Table: Configuration Settings - Client) there is an additional dialogue, who is asking you if you want to add an (additional) comment or if you want to delete the existing comment from the history. Please pay attention to the warning note in the dialogue window!
The Solution tab shows the solution to the ticket. The solution can be entered as a short summary and in the editor field as a detailed description. Below is another area that includes file attachments of linked KB articles. If a ticket has been linked to a KB article that contains file attachments, these attachments are displayed in the solution automatically. Depending on the user rights and the position of the ticket in the workflow a solution can be entered.
The CMDB tab depicts all CIs linked to this ticket. Moreover, configuration items can be added to the ticket. These can be selected using the Manage CIs button.

In the Scheduler tab all tasks and deadlines assigned to certain users can be created for a ticket.
If expenses are created for a ticket, they are displayed in the Expenses tab. New expenses can additionally be created, modified, moved ( ) and deleted here.
The Knowledge Base tab displays all KB articles linked to this ticket and allows for linking further articles to the ticket (see also Related Topics).
Note:
The number of the displayed and usable tabs in the function bar depends on the number of the licensed modules and authorizations.
Ticket actions can be configured in various manners in order to put them in certain ticket statuses at a user group’s disposal. Most of the interactions towards a ticket presented above base on those actions and depend on ticket status, authorization of the considering user and the ticket position within the workflow. Thus, it may happen that the ticket actions presented here will not be available.
It is possible to follow a ticket and thus get informed about changes (e.g. status changes, assignments, solutions etc.). Accordingly, users can understand the status and work progress for a ticket and retrieve tickets they are not directly related to.
Another advantage derives from the fact that all followed tickets can be displayed clearly structured in the ticket list which prevents from opening each ticket individually in order to retrieve its status and progress.
A ticket follower receives an e-mail for each working step that has been carried out with a ticket, if Follower has additionally been selected as a recipient of the e-mail.
Tip:
It is necessary that the privilege Follow ticket is set allowed in the specific ticket schema for to display the follower icons and menu items for the user.
Activating the Follower Mode
The follower mode can be activated and deactivated by clicking the follower icon (eye icon) in the upper right corner next to the ticket number in the ticket detail dialog. The user only defines himself as a follower.
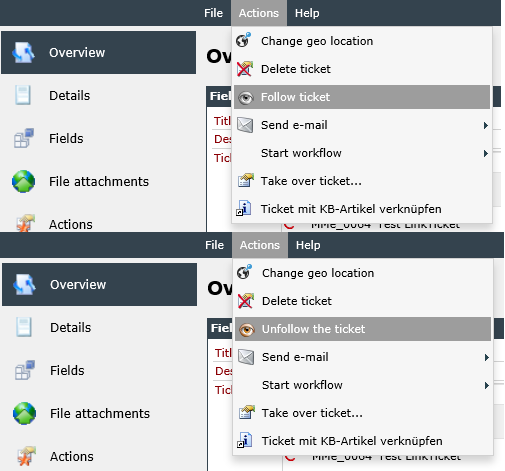
If the follower mode is activated, the background color of the follower icon changes in the ticket.

Using the Follower Feature
The ticket detail dialog shows all followers for a specific ticket in the Details tab under Follower.
If the option I am a follower of the tickets is activated under Folder "My Tickets" in the Settings tab of the ticket detail dialog, all followed tickets are part of the My Tickets filter and are thus displayed in the ticket list by using this filter.
Alternatively, the user can activate the option Followed tickets can be selected in the ticket filter of the ticket list to show all tickets followed by the user.


 Copyright (c) 2000-2026 Isonet AG