Backup MS SQL Server
This chapter contains general information on saving, restoring and maintaining the databases.
Due to relevance, only MS SQL Server 2005 and later are discussed here. The SQL Server 2000 is not supported any more.
Chapters:
Backup of a Database in the MS SQL Management Studio
The First Backup
Open the Management Studio of the MS SQL Server 2005 (or later) from the start menu. Expand the Databases node and highlight the database you want to back up.
Right click on the database name and select Tasks > Back Up…

In the following dialogue, you can now make several settings.
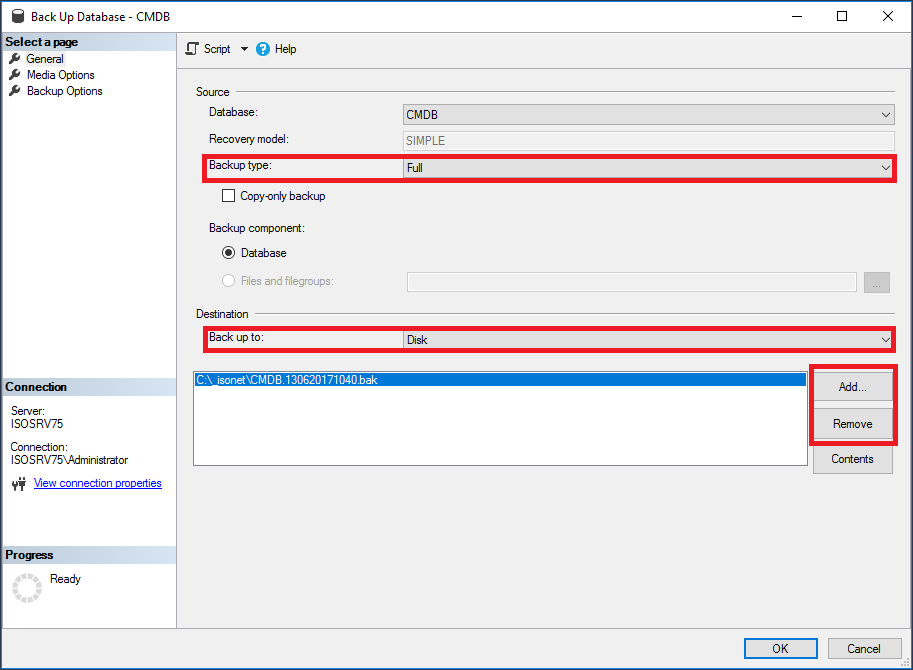
Select the backup type first. Please select the type Full when creating a first backup. Highlight Disk as the destination. If you do not want to use the preset path, remove it first and then add a new one via Add….
.
C:\Temp has been selected as a path and Backup_CMDB.bak as a file name.
After having selected a location and a name for the backup, click on Options on the left.
For the first backup, leave all the default settings unchanged. In the Reliability section, you can activate the option for verifying the backup after it has been finished. You do not have to activate it, but it is recommended in order not to archive any defective backups.
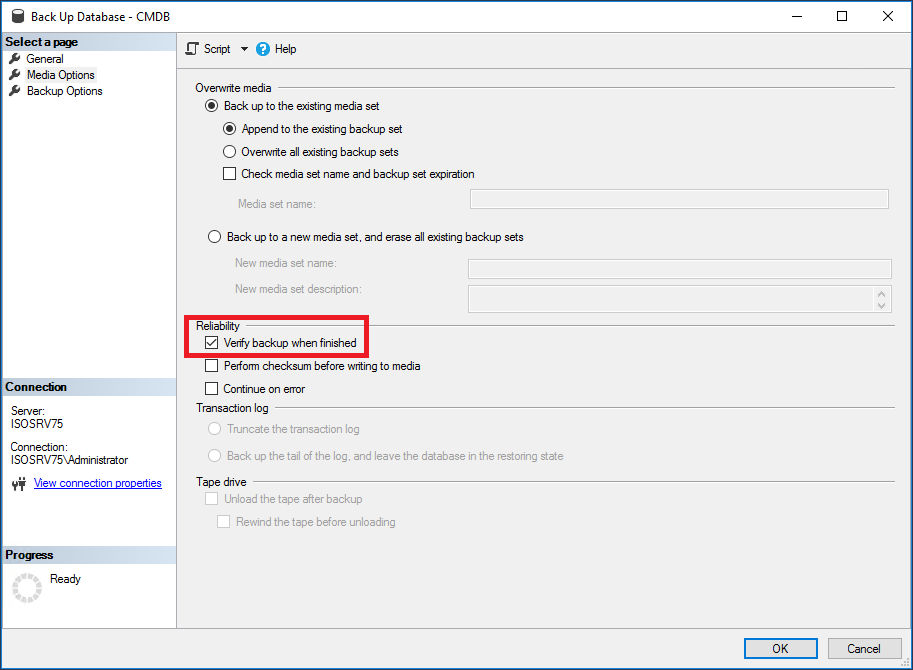
Click on OK subsequently, and the backup will be performed.
Further Backups
If you want to perform further backups of this database, you have now the option to select Differential as a backup type.
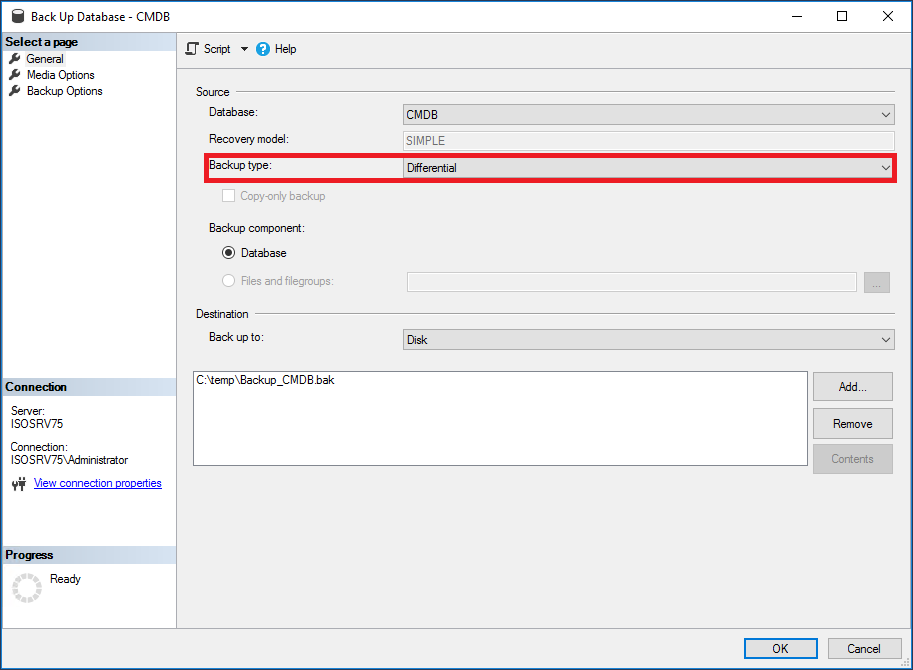
Leave the destination unchanged on the same file.
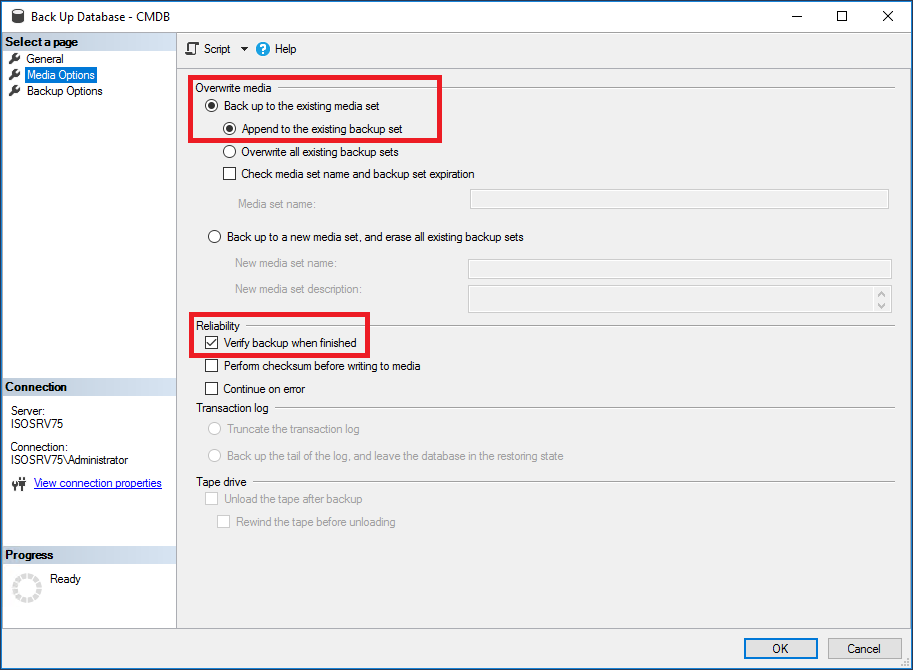
Mind not to overwrite the first backup, and select Append to the existing backup set instead, in order to add the new data to the first backup. Moreover, you should generally activate the verification of the backup for increased data security.
If you now open the backup dialogue once again, you can view the contents of the backup set you created. For this purpose, open the backup dialogue and click on Contents.

Hints on Disk Space
Pay attention to the destination data medium having enough free disk space during the creation of backups. According to experience, database backups can become very big.
If you automate the backups and run them every night, for example, it is more favorable not to use backup sets. Their disadvantage is that you cannot compress and then delete them afterwards, because of the SQL server trying to expand these sets every time.
Thus, for automated backups, it is preferable to create backups always having the date and time of creation in their file name. You can compress these and transfer them to other mediums (e.g. DVD) and then delete them from the original drive. Thus, you have enough free disk space left for the next backups.
Restoring a Database in the MS SQL Management Studio
Open the Management Studio of the MS SQL Server. Right click on the node Database and select Restore Database. If you use the SQL Server 2008, select the following path in order to restore the database instead.

Enter a name for the database and select From Device in the following dialogue.
Subsequently, click on the button with the three dots in order to search for the file containing the backup.

Select the directory and the previously created backup file here. Subsequently, click on OK in order to close the dialogue. Also click on OK in the previous dialogue. Highlight all backup sets within this file and click on OK subsequently.
The Files tab allows you to change the paths under which the SQL Server stores the database files.

Now switch to the Options tab.
If you have already created an empty database, into which you want to import the backup, activate the option Overwrite the existing database.

Thus, you can select a different partition on the server providing you with more disk space if necessary.
The data will now be imported onto the SQL server and will be available afterwards again immediately.
Note:
We generally advise you against storing the database files on the system drive. Thus, after a system crash, database files can be directly imported onto the server after a new installation without having to input a backup (which may no longer be up-to-date).


 Copyright (c) 2000-2026 Isonet AG