Backup Plan
In this section, we assume that you are logged in to the SQL server locally.
Open the MS SQL Management Studio. Login in with an account that is sysadmin in the SQL group. Generally, all of the users belonging to the local administrator group are to be seen as such.
Expand the node of your server and then the Management node.
Now, right click on the Maintenance Plans folder and select New Maintenance Plan….

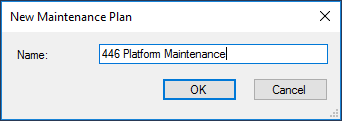
Assign a name to the plan and click on OK subsequently.
On the right side, you can now see the header of the maintenance plan.
Here, you can enter an additional description. Click on the Connections… button or, if you are using the SQL Server 2008, the Manage Connections… button subsequently.
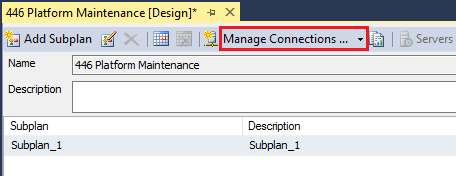
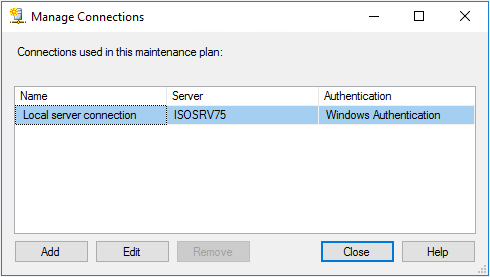
In order to prepare the connection for the maintenance plan, highlight the connection specified here and click on Edit.
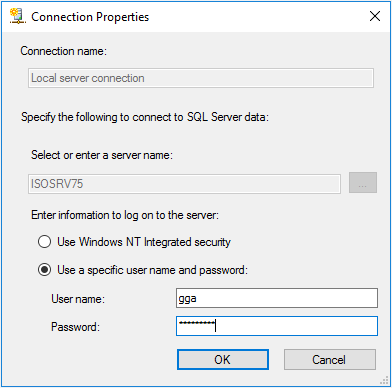
If you are logged in to the SQL server you want to create the maintenance plan on locally, the presettings of the connection are all right so far. Simply enter a user name and the corresponding password the maintenance plan is to be executed with here. Subsequently, click on OK in order to close the dialogue. Click on OK in the Manager Connections dialogue as well.
Now you still have to add execution times to the maintenance plan. For this, click on the button with the three dots behind the Schedule field. If you are using the SQL Server 2008, click on the date field instead.
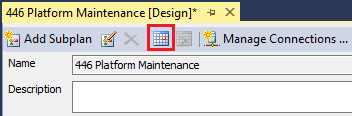
A dialogue for defining the execution times opens. Enter a name for this time definition into the uppermost field and select the entry Recurring under Schedule type.
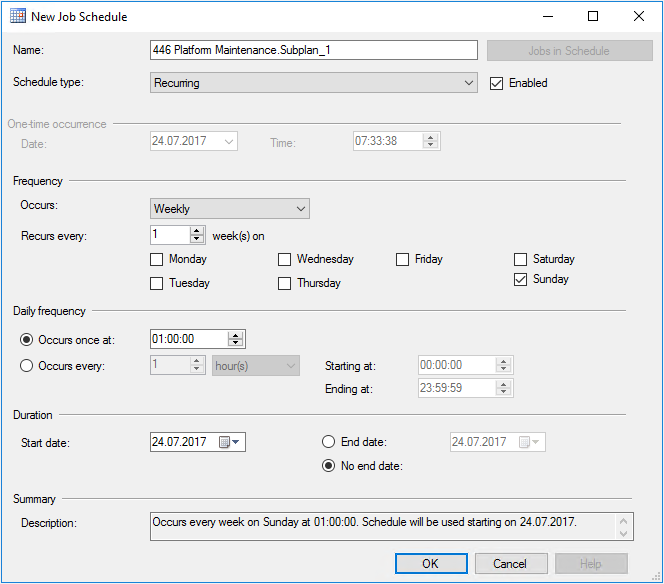
In this example, we choose a daily execution at 01:00 am. Thus, set the execution to Daily in the Frequency section. Leave the default setting for the entry Recurs every unchanged. This means that the plan will be executed every day.
Now, enter 01:00:00 in the Daily frequency section.
In the Duration section, set the start date of this plan to the current or a future date and check the option No end date.
After the specified settings have been made, your dialogue should look approximately the same as the one in the figure above. In the lowermost section, you can see a short summary of your configurations. Confirm this dialogue with OK.
Now, we still have to create the actual plan – i.e. what is to be made. For this purpose, you can see a bar with miscellaneous actions that can be strung together in a workflow on the lower left side.

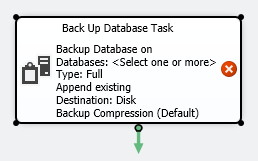
Move the action Back Up Database Task onto the work area on the right side via drag and drop. With this, you have inserted the first action.
Now, double click (left key) on the task symbol in the work area.
Select the databases you want to save under Databases.
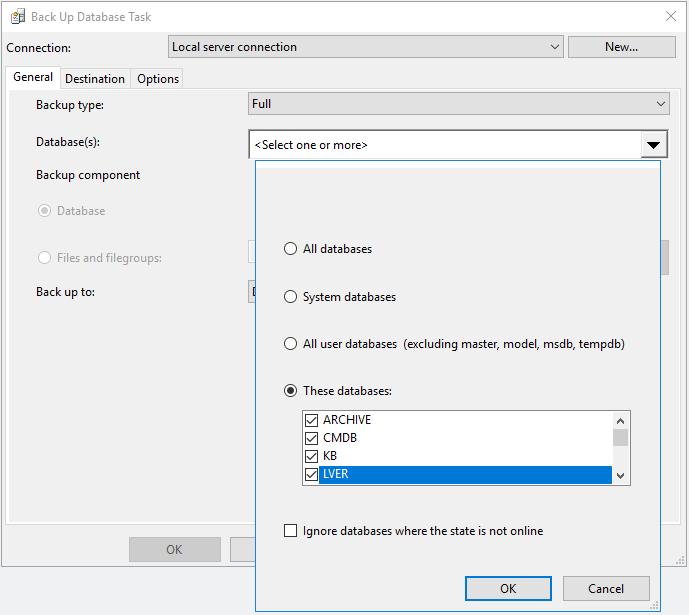
Only the four databases visible here have been selected in this example. Click on OK subsequently.
Select either Full or Differential as a Backup type (Tab General). Activate the option Create a backup file for every database (Tab Destination) and select Create a sub-directory for each database for a more clarity as well. Thus, you have a good overview over your saved databases. Finally, activate the option Verify backup integrity (Tab Options - see the screen shot) in order to recheck the backup after its creation. Close the dialogue with OK.
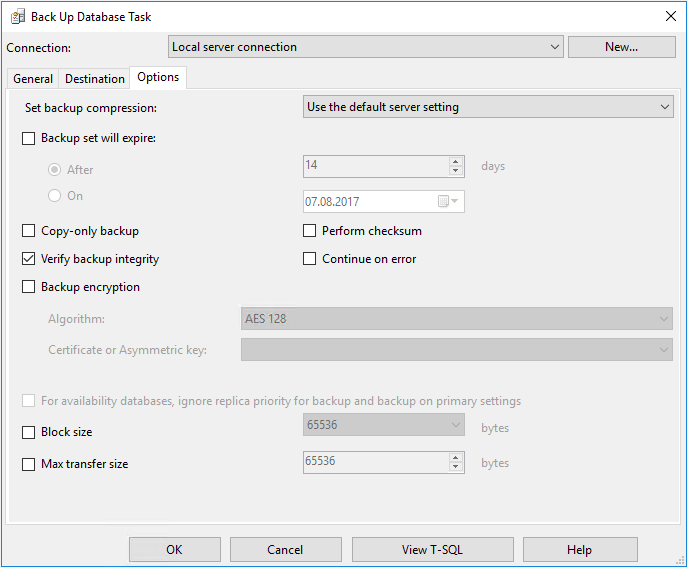
The red warning cross in the action should have disappeared by now. If you move the cursor over the action, you can receive information on possible misconfigurations in a tool tip.
After a backup of the database via the recently created task, the database can now be cleansed. For this, drag the action Shrink Database Task from the tool box into the work area with your cursor.
Highlight the action Back Up Database Task in the work area. Now, you can see a green arrow. Left click on this arrow and drag it over the action Shrink Database Task. Release the mouse key and you should see the following picture. The two actions now are interlinked and will be executed one after another.
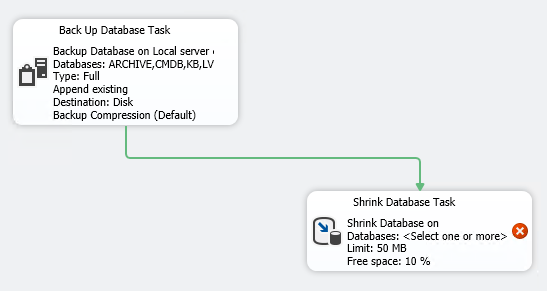
Double click on the action Shrink Database Task (or select Edit from the context menu).
Select your database connection and the respective databases in this dialogue. You can leave the further settings at the default values. Confirm the settings with a click on OK.
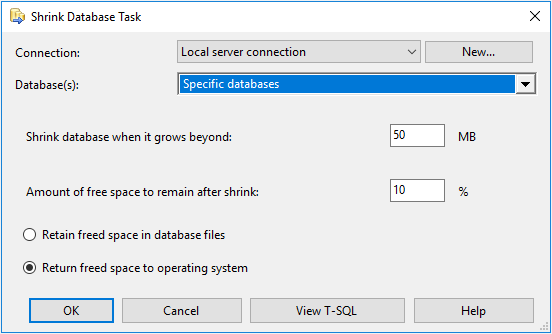
Click on one of the two diskette symbols in the tool bar above in order to save this backup plan.
Note:
Do not forget to start the SQL Server Agent. Otherwise the backup plan will not be executed.
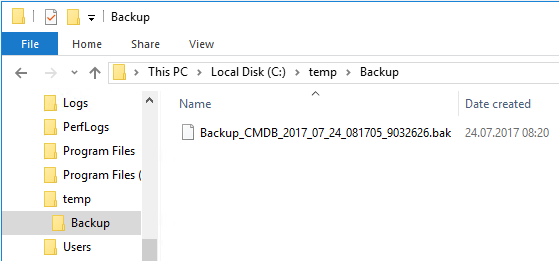
For testing and demonstration purposes, the backup time has been changed to the current time.
As you can see, a several numbers are attached to the backup’s name. They are composed of the following digits:
The first four digits denote the year (2017). The digits 5 and 6 depict the month and the digits 7 and 8 the day of the backup. The next six digits denote the time (08:17:05 in this example). The last seven digits are not to be minded for the time being.


 Copyright (c) 2000-2026 Isonet AG