Email accounts (mail reception)
Mail2Ticket offers an automated reception of e-mails and a transformation of e-mail content into a ticket via a Windows service. The mail service used for receiving e-mails (MS Exchange, POP3, etc.) is irrelevant here.
Warning:
If the Mail2Ticket Windows service is started while e-mails that have not been processed correctly can still be found in the inbox, the service will try to process these e-mails again. This may lead to new tickets being created and/or backup e-mails being sent.
Mail2Ticket has versatile uses including, for example:
- Receiving e-mail notifications from monitoring tools on server events,
- a global SMTP address for user, suppliers, or third parties involved in the helpdesk,
- connection to fax and voice mail systems.
Configuration of Mail2Ticket
The configuration of Mail2Ticket accounts can be accessed via Settings > Messaging & Collaboration > Mail2Ticket. An overview of all already created and configured Mail2Ticket accounts is displayed here. New accounts can be created via a click on New Account in the top right array. The configuration settings of existing accounts can be opened via a double-click. The Actions menu in the top left corner allows for deleting and copying accounts.
When an account is created, only the settings of the account information are available at first. After saving the account, the remaining tabs of the side bar will be available as well.
Chapters:
On the Preferences tab, the following general information and settings can be entered:
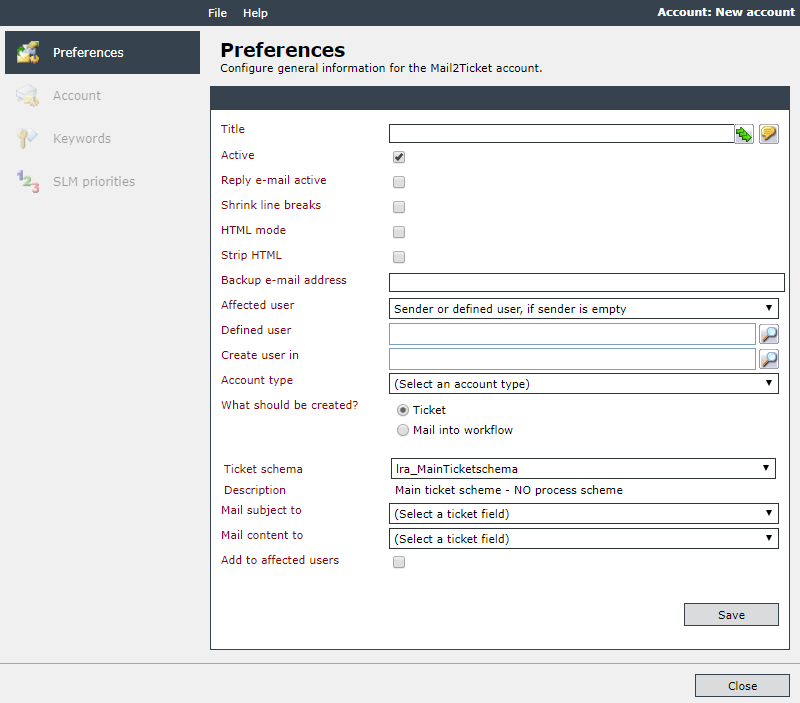
Title: The name for the respective Mail2Ticket account is to be specified here. The localization buttons are only displayed, if multiple languages are available.
Active: This checkbox defines whether the Mail2Ticket account is activated and thus the specified e-mail account is monitored. An individual account can be activated or deactivated while the system is running here.
Note:
It is not recommended to activate a Mail2Ticket account before all of the configuration settings have been specified and verified.
Reply e-mail active: If this operation is activated, all reply e-mails are checked for a corresponding ticket. If these e-mails contain a specific ticket token (which can be deposited there during the creation of e-mail templates), no new ticket is created and the e-mail is added to the existing ticket. The existing ticket is searched in the system via the specified ticket token. If a token is found, the e-mail is attached to the ticket. If not, a new ticket is created.
Shrink line breaks: Via this option, unnecessary line breaks can be deleted from texts before converting them into a ticket.
Shrink line breaks from reply e-mail: With this option, unnecessary line breaks can be deleted in reply e-mails before being attached to a ticket.
HTML mode: If this option is activated, e-mails are attached to tickets including their entire HTML formatting. If the option is deactivated, only the text of the e-mail is attached to the ticket.
Warning:
Graphics embedded in the e-mail are not added as a file attachments to the ticket.
Note:
Pasting graphics from the clipboard into an e-mail (HTML mode) may not work in Google Chrome. To do this, the key Isonet.TxpEnterprise > EditorStripFormattingOptions must be set to None under Administration > Configuration Settings (see also Configuration). If the value is NoneSupressCleanMessage, the control uses the browser paste function, which is not yet available in Google Chrome.
Strip HTML: With this option, any HTML code will be removed from e-mail messages and only the plaintext content will be written into tickets.
Warning:
The options HTML mode and Strip HTML cannot be used at the same time.
Note:
See also String Conversions of Sharp-Expressions.
Backup e-mail address: If the transformation of e-mails via Mail2Ticket fails, e.g. because of a faulty configuration, e-mails will not be converted into tickets but forwarded to this e-mail address.
Affected user: This selection controls the assignment of the e-mail to a user in the system. You can choose between the following options:
- Sender: The e-mail address that is in the From field. The Defined user is hidden.
- Defined user: A user can be defined.
- Sender or defined user, if sender is empty: Only if no sender (e-mail address) is available. If the sender is empty, the defined user is used, otherwise a user with the sender e-mail is searched for. If no user can be found, a new user is created.
- Sender or defined user: If a sender is available, this user will be searched for. If no user is found, no new user is created, but the defined user is used.

Defined user: If the option Sender under Affected user is not selected, the corresponding user can be entered here.
Create user in: If the option Sender or Sender or defined user, if sender is empty is selected under Affected user, this entry becomes visible. Here you can define in which existing user group a user is to be created if no e-mail address exists for this user in the system. These users are created later with the name of the e-mail address.
Account type: This option defines the account type used for receiving e-mails. The following account types are available:
- IMAP: With this account type, e-mails can be retrieved via IMAP/IMAPS (SSL encrypted).
- MSExchangeWebserviceConnector: This connector currently supports all Exchange Server versions from 2007 onwards.
- POP3: This account type allows for accessing all e-mail accounts that use the POP3 protocol.
Ticket schema: The ticket schema to be used for creating tickets from received e-mails has to be specified here. Tickets are always created via a ticket schema. If a specific ticket schema is necessary for the conversion of e-mails to tickets, it has to be created before configuring the Mail2Ticket account. For example, a specific schema may be necessary if key words are used. Alternatively, the Service Portfolio can be used here as well, if it is available on your system. In this case, the option to select a service transaction and a corresponding configuration item will be displayed additionally.
Mail subject to: Defines the ticket field the subject of the e-mail is to be written into during ticket creation.
Mail content to: Defines the ticket field the text (body) of the e-mail is to be written into during ticket creation.
Add to affected users/Excluded e-mail addresses: If the option Add to affected users is activated, the sender of the e-mail will be added to the ticket as an affected user automatically (including users corresponding to the CC addresses). Additionally, e-mail addresses or entire domains can be defined as exceptions.
After a click on Save, all configured options will be saved, all further configuration tabs will be available and the Mail2Ticket account will be created.
This tab displays various configuration fields, depending on the selected account type. More information regarding the configuration of email accounts is to be found in Configuration of email accounts. There you will also find instructions on how to use OAuth 2.0 for login.
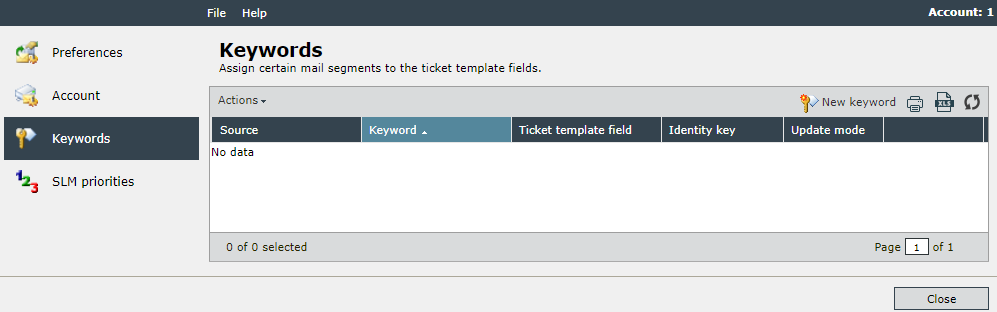
Due to the e-mail only consisting of a subject and a body, keywords can be defined in order to structure the text further. The individual ticket fields of a ticket schema can then be connected to keywords. Mail2Ticket scans the body or the header data for these keywords and pastes the following text up to the next keyword into the ticket field.
In doing so, it is also possible to configure multiple keywords for the same ticket field. However, it is necessary to make sure that more than one of these keywords are never used in one e-mail at the same time. Such a configuration is especially advantageous for automatically sent e-mails.
Note:
The settings for the keywords are also evaluated when attaching to an existing ticket.
New keywords for a Mail2Ticket account can be added top right on the keywords tab via the New keyword button. The Action menu on the left allows for deleting keywords.
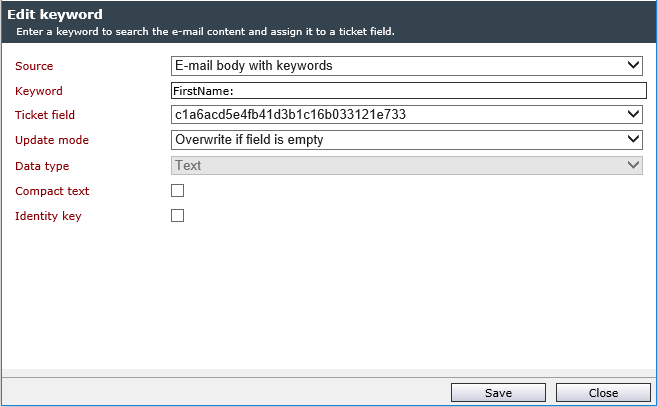
In order to define a keyword, the following options have to be configured:
Source: The keyword can either be contained in the e-mail text or a part of the e-mail header data.
Header data that can be adopted into a ticket field individually are:
Sender e-mail address
- E-mail body - content of the e-mail separated from the header via a blank line
E-mail subject
E-mail header
E-mail CC - recipient of a copy of the message
E-mail BCC - blind copy recipient of the message
Keyword Header data field: The keyword to be searched in the specified source is to be entered here. This text field is only necessary, if the keywords are to be searched in the e-mail text. If E-mail header has been selected as a source, its data can be selected here.
Ticket field: The text up to the next detected keyword will be written into this ticket field of the ticket schema defined in the account information.
Update mode: In update mode you can choose between three options how the text should be adapted to existing contents of the ticket field:
- No change
- Overwrite if field is empty
- Always overwrite
Datatype: If multiple data types can be written into a ticket field, the matching data type can be selected here.
Compact text: By checking this box, unnecessary characters are removed from the text.
Identity key: If this option is activated, the keyword is used additionally for determining the identity of the ticket this e-mail is to be attached to. If there are more tickets using this identity key, the first ticket found is used. The detailed assignment logic of Mail2Ticket will be explained in a later section.
On this tab, the priorities of tickets generated by Mail2Ticket can be configured and edited. In this process, preferred priorities will be saved here by default. This means that the priorities saved here will be assigned preferentially to a ticket, as soon as the automatic assignment does not yield a clear result.
Alternatively, strong bindings can be used for Mail2Ticket accounts in order to disable the automatic assignment completely.
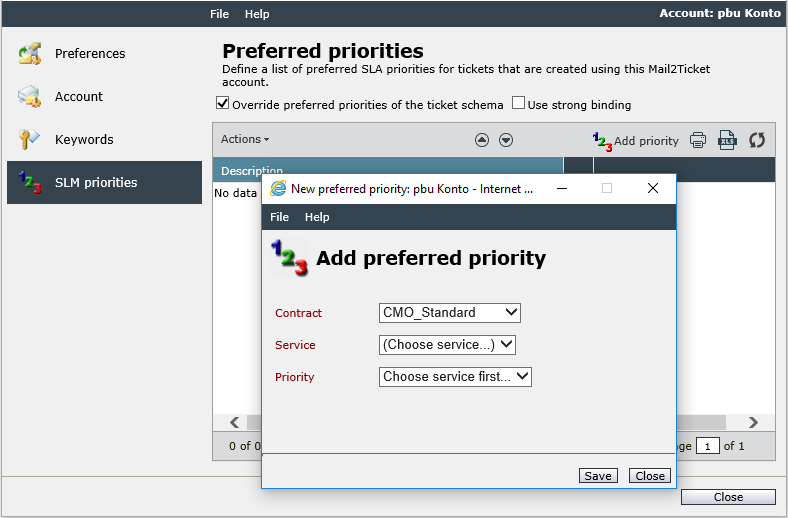
The preferred priorities for a Mail2Ticket account are a sorted list, in which the top priority of this list is considered first. In this process, the system checks successively whether the respective preferred priorities are included in the list of possible priorities that has been compiled based on the analysis of the coverage areas. If there is more than one priority in the result list, the priority at the top of the list of the Mail2Ticket account will be assigned.
As the Mail2Ticket account is always associated with a ticket schema, which usually contains its own preferred priorities, collisions may happen here. The option Override preferred priorities of ticket schema leads to the priorities of the ticket schema not being applied. Only the preferred priorities of the Mail2Ticket account will be used. Otherwise, the priorities belonging to the ticket schema will be preferred, if the ticket schema has preferred priorities itself.
An exception is the concept of the strong binding: If the list of preferred priorities consists of exactly one priority, the option Use strong binding can be used. If tickets are created via this Mail2Ticket account, they obtain exactly this one priority – irrespective of the possible result of the analysis of the coverage area.
Note:
A strong binding priority can only be used until the associated contract expires.
Via the button Add priority, existing priorities from SLAs can be added to the Mail2Ticket account. The following contract options have to be specified here:
Contract: The contract (SLA) containing the priority.
Service: The service from the respective contract the priority has been deposited in.
Priority: The desired preferred priority can now be selected here.
Via the Save button, the selected priority can now be added to the list.
Above the list, two arrow buttons can be found. They allow for moving the priorities upwards or downwards in the list, in order to vary their weight within the list.
Mail2Ticket uses its own logic for assigning e-mails to tickets.
First, the Message tag is searched in the e-mail header data and then in the normal e-mail text. This is a distinct identification for tickets. If an e-mail contains this tag, it can be assigned to a ticket. For an e-mail (e.g. a reply e-mail to an automatically sent e-mail) to contain this tag, it is advisable to use the expression {# Ticket.TicketMessageTag #} in message templates. Thus, the unique ticket identification will be written into the e-mail message.
Note:
Both 446 and TXP formats are recognized in the tags. The found reply e-mail tags are ordered as follows:
-
446/TXP-Tags
-
FullIDs
As a result, the mail is linked to the ticket of the first 446/TXP tag found, even if there are other FullIDs.
In this process, the scan option can be disabled for the e-mail body. For this purpose, the configuration key SearchTicketIDsInMailBody has to be set to False.
If no unique assignment of the e-mail to a ticket can be achieved, e.g. due to lack of tags, the CustomID will be searched subsequently. This is a special key set in the database.
Furthermore, it is possible to define an individual CustomID via the configuration keys EnableCustomIncomingTicketIdTag and CustomIncomingTicketIdTag.
Via those keys, the usage of an individual CustomID can be activated. The key CustomIncomingTicketIdTag contains a regular expression that is used for searching the token.
Finally, keywords configured as identity keys can be used for a distinct assignment.
Note:
Mail2Ticket tries to convert an e-mail into a ticket several times. If this conversion fails, the e-mail will be ignored in the future. In the table M2TProcessMailAttempts (TXP database) the number of failed conversions is stored in the column count. To reprocess an e-mail, the value in this column must be reduced when the maximum number of conversion attempts is reached.


 Copyright (c) 2000-2026 Isonet AG