Templates for Messages and Notifications
Message templates allow for creating templates for e-mails and correspondence, e.g. to customers or suppliers. If the respective messaging schema has been configured, a messaging template exists, and the respective action has been configured for a ticket schema (actions Reply e-mail, Send e-mail), predefined messages can be sent via this option. These messages can be sent from workflows automatically as well.
Functionality
A messaging template defines the actual message text, which can use dynamic placeholders and expressions. The messaging schema subsequently defines, how and to whom this text is to be sent. For this purpose, an arbitrary number of recipients (users or groups), a template for messages, and the preferred sending media can be defined. Via workflow plug-ins as well as Actions, messages can now be sent. The preferred media have to be specified for users and groups as well, so that the system will know which media to use for sending a message.
Messages can be sent automatically from the following workflow types:
- CI zone workflows
- Configuration item workflows
- Early warning workflows
- KB article workflows
- Message workflows
- Service transaction workflows
- Ticket workflows
- Task workflows
By using actions, a message can be sent from tickets.
Templates for Messages and Notifications
Templates for messages and notifications can be configured under Settings > Messaging & Collaboration > Templates > Templates for Messages and Notifications.
This stage can be used for creating, editing, and deleting templates for messages and notifications. In case of various events (e.g. New Ticket, Ticket assigned etc.; depending on the configured workflows and ticket actions), a message can be sent to the predefined recipients via different media (SMS or e-mail).
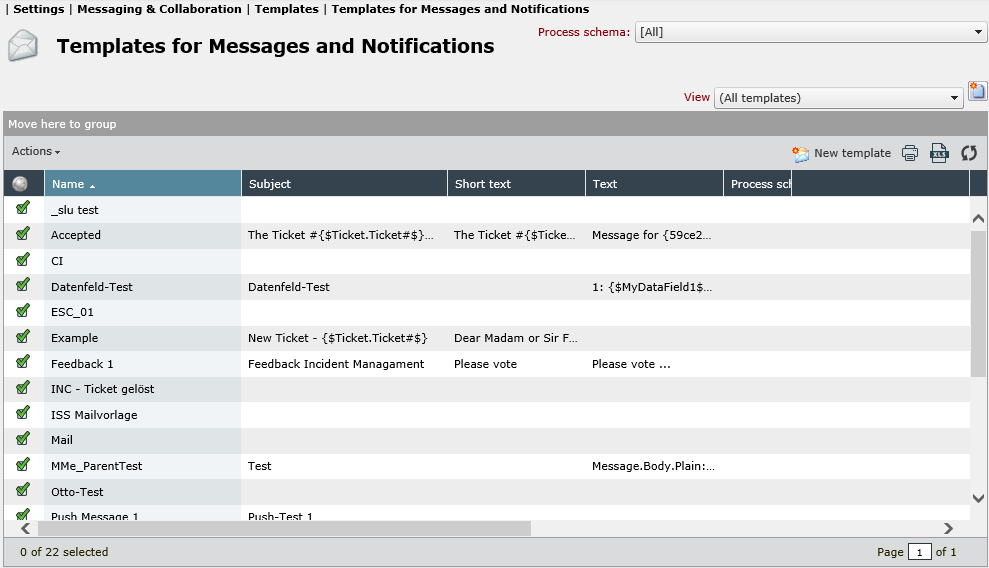
An overview of all templates created is shown in the stage. Via the button New template, new messaging templates can be created. Existing templates can be copied or deleted via the Actions menu.
Using a double click, an existing template can be opened and edited.
Template Groups and Process Schema Filters
Top right, the process schema filter can be found. It can be used to create individual templates for each process schema. Below, the group filter is located. Template groups for a better overview can be created and managed here. Additionally, the selection box offers the option (All templates) . If selected, all templates in the list will be displayed.
Note:
The process schema filter is only displayed, if the Service Portfolio has been licensed.
| Icon | Description |
|---|---|

|
Via this button, new template groups can be created. |

|
Via this button, template groups can be deleted. |

|
Via this button, template groups can be edited. |
A new template group can be created by clicking the button New group. Subsequently, a new dialogue opens, in which the name and type of the group can be specified.
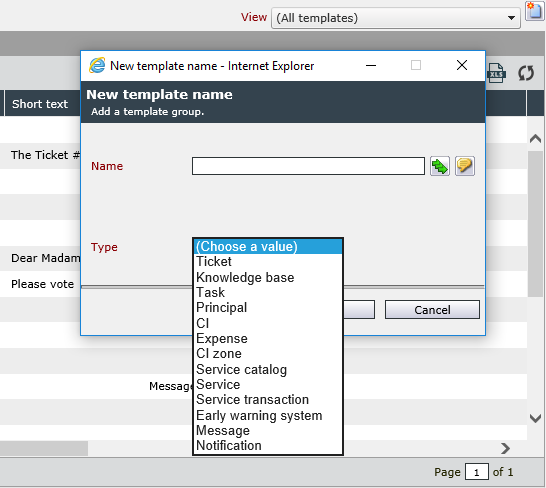
Available template types are:
- CI
- CI zone
- Early warning system
- Expense
- Knowledge Base
- Notification
- Message
- Service
- Service catalog
- Service transaction
- Task
- Ticket
- User
These templates are only available in the respective matching workflow types and modules. In a ticket or process schema, the only available messaging templates are templates contained in a template group with the type Ticket and available either globally or for the respective process schema.
Note:
For deleting template groups, it is necessary to delete all templates in the specific group first. Before that, a group cannot be deleted.
Creating and Editing Templates
Via the button New template, messaging templates can be created. Similarly, existing templates can be edited via a double-click on their name in the list. A detail dialog will open. Whenever a new template is created, only the tab Template is available until the template has been saved for the first time.
Template Tab
On the Template tab, the necessary information for the creation of the template is specified, so that it can be used after saving.
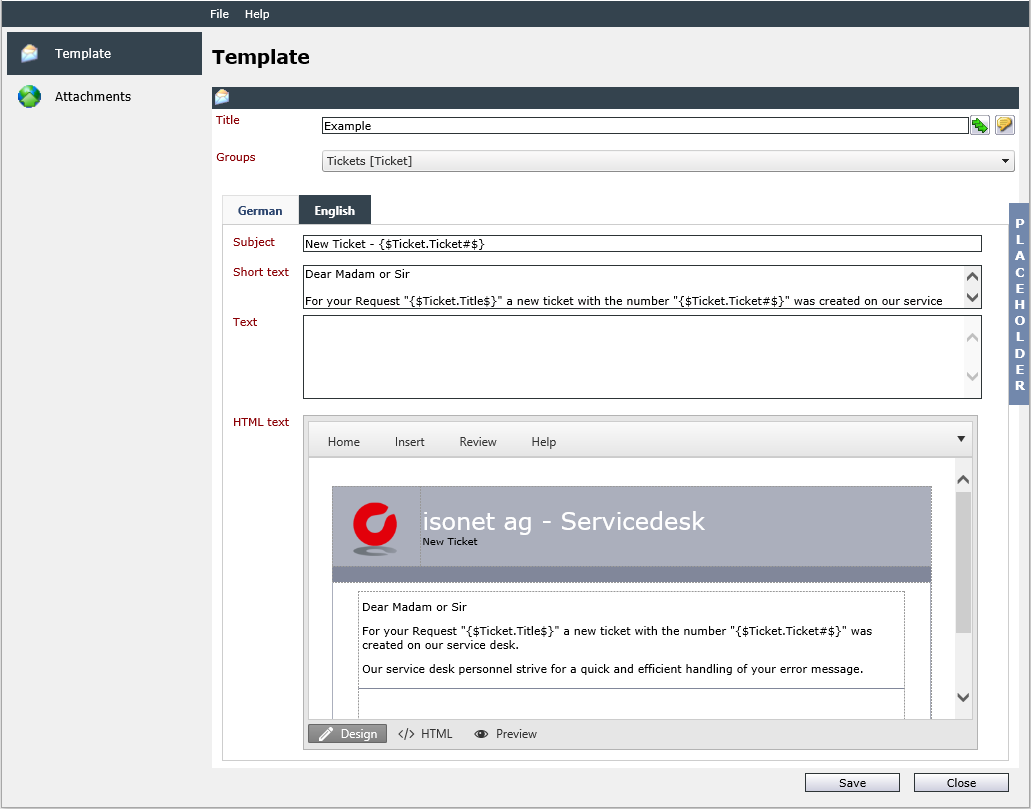
The following fields are available and have to be filled in:
Name: This is the name of the template. If multiple languages are available, the localization buttons will be displayed.
Warning:
Umlauts and special characters should not be used in the Name field, as this name (FriendlyName) will be used in SQL queries.
Groups: The template group can be specified via this drop-down list. The group membership of templates can be changed later on as well. In doing so, the template will only be available in the respective elements/workflows (ticket, task, etc.).
A tab is displayed for each language and has to be filled in separately.
Subject: This is the subject for the messaging template. It will be set as the subject in e-mails later on, for example. If an SMS is sent instead, the subject will not be needed.
Short text: This short text is sent as an SMS message (if configured). For this purpose, the medium SMS has to be configured for the recipient.
Text: This text is used for plaintext e-mail messages.
HTML text: This text field requires a formatted HTML text. For various formatting options, an editor is available. Alternatively, the editor can be switched from the design mode to HTML mode in order to enter HTML commands directly.
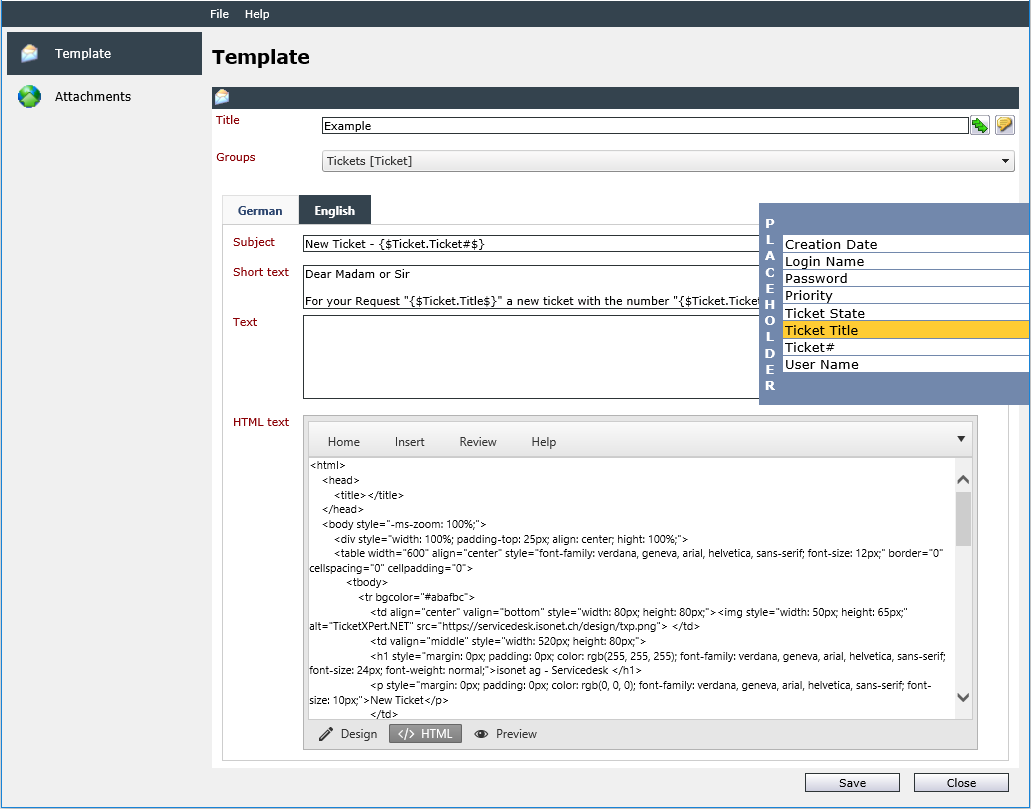
On the right, various placeholders for every message type are available in the placeholder bar. They will be replaced by the respective text during sending. The number of available placeholders varies, as they depend on the individual configuration of the expressions. The PLACEHOLDER bar is displayed on mouse over. By using drag and drop, the placeholders can be pasted into the various message types.
However, it is also possible to use different expressions not listed in the placeholder bar in the subject and text fields. Detailed information on the expressions can be found in the current Expression Reference.
Note:
Please contact the support or your project leader for the configuration of additional placeholders or expressions.
The preferred media for sending messages to the respective user or user group have to be set individually in the User Management. Depending on the message settings, multiple messages can be sent to this user. The following media are available:
-
E-mail
Sending e-mails with plaintext and HTML e-mail content; due to the individual configuration of the e-mail program, either one or the other part will be displayed.
- SMS
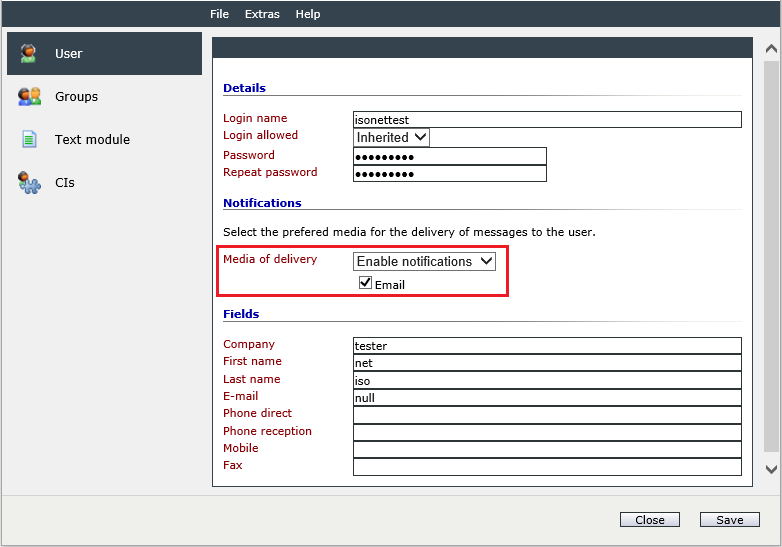
Message settings of a user in the User Management. For sending SMS, an additional SMS deliverer has to be configured
Warning:
For every user or group to receive messages, setting a preferred medium (Deliverer) is mandatory. Otherwise, the system can produce errors.
If an error occurs while sending a message, e.g. due to a missing e-mail address, the system will react as follows:
E-Mail without recipient address: The e-mail is removed from the message queue, the corresponding *.msg file is moved to
.../Isonet/MessagingManager/BadMessages
and a new entry is added to the log file.
E-Mail without selected deliverer: A new entry is added to the log file, but the message remains in the message queue. If the same problem still occurs after 10 retries, the message is removed from the message queue and moved to
.../Isonet/MessagingManager/BadMessages
and new log file entry is added in this case.
Further information on configuring the users and their preferred media, see also Related Topics.
Tab Attachments
On this tab, various file attachment options can be specified. They, however, only refer to e-mail messages.
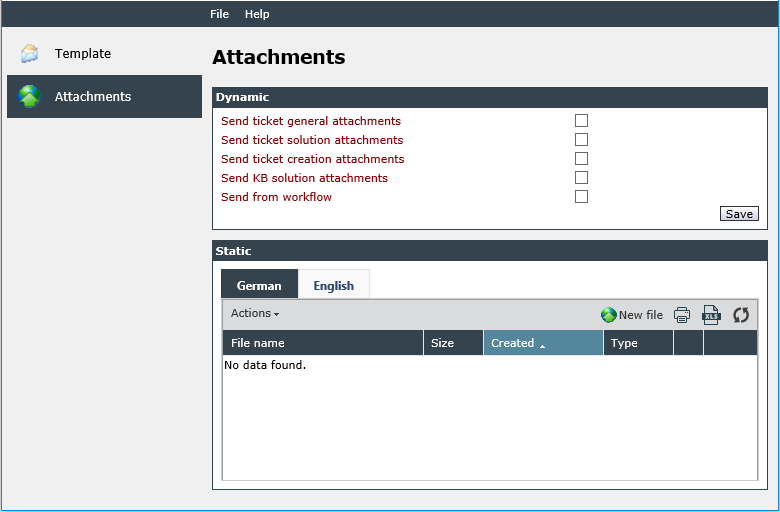
The following dynamic options are available here:
Send general ticket attachments: All ticket attachments marked as General in a ticket will be attached to the e-mail automatically.
Include deactivated files: Files marked Deactivated in a ticket will be attached to the e-mail additionally.
Send ticket solution attachments: All file attachments marked as Solution in a ticket will be attached to the e-mail.
Send ticket creation attachments: All file attachments marked as Creation in a ticket will be attached to the e-mail.
Send kb solution attachments: If a KB article has been linked with a ticket, all attachments of the KB articles will be attached to the e-mail.
Send from workflow: If this option is activated, a data field has to be specified. This data field has to be configured in the ticket action Start subworkflow first (option File attachment). When this action is configured correctly, the file attachment uploaded for this action will be attached to the template via the option Send from workflow as well. The data field may only refer to an attachment, otherwise nothing is sent. If you use the template in a ticket action where you can still view or edit the e-mail before sending it, the file is not yet displayed on the File Attachments tab (the file is not added until it is sent).
Warning:
Make sure that the file attachment or data field is deleted after sending. Otherwise, the same attachment will be sent again as soon as this template is used by the same ticket (workflow plug-in Delete data field).
If file attachments are to be attached statically instead of dynamically to an e-mail, this can be configured for every available language on an individual tab under Static. Via the button New file, the designated file can be selected. After a click on OK, it will be uploaded and attached every time this messaging template is used.


 Copyright (c) 2000-2026 Isonet AG