Configuration
Configuring a CI Type
CI types are used for creating hierarchies. Thus, Network printers may be found under Printers, which itself is subordinate to the type Devices, for example. Not every one of those types has to be assigned with a CI schema.
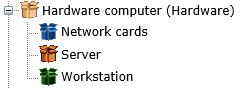
Figure: A CI schema with sub-types, which do not have their own CI schema.
For example, only the main type could be linked to a CI schema. The sub-types could then be configured differently than the main type but still use the same CI schema. Whenever a schema is created for one of the sub-types, it will be created as a sub-schema of the schema linked to the main type automatically. As long as a type is not linked to a schema, it can be moved within the tree hierarchy via drag and drop arbitrarily. The moved type will then use the respective schema of the new main type. As soon as a type and schema have been linked, the type cannot be moved anymore.
When a new type is created via the Tasks menu, a dialog for configuring the new type appears.
Name: The type’s name. The localization buttons will be displayed as soon as multiple languages have been activated on the system.
Import ID: This information can be left empty. Import IDs are used for a distinct identification. If imports are to be executed, further information can be found in Chapter Import.
Symbol: The symbol that illustrates the type. A predefined icon set is available, but other icons can be used as well. They have to be .GIF files at a size of 20 x 20 px.
After using the Save button, the Properties tab will be available. The visible tabs for this type can be configured here. In every detail dialog of a configuration item using this type, only the tabs defined here will be displayed. If, for example, the tab Attachments is not needed, it can be simply faded out here.
When changing the visibility settings for tabs and fields in a hierarchically superior type, the visibility settings can be applied to subordinate types as well.
The Fields tab cannot be used before a CI schema has been linked to the type. The dynamic fields of the schema can be faded in and out via checkboxes here.
Configuring a Schema
For the creation of a CI schema, it is necessary to have at least one existing type that has not been connected to a schema yet. If no free type is available, a new one has to be created. Only then a CI schema can be created for this type.

If types are available, CIs can be created for them. For this purpose, the type or the subtype the schema is to be created for has to be selected. A click on New CI schema in the Tasks section on the left will open a dialog, in which all of the required details for the schema can be specified. After saving, the remaining tabs will become available for the respective schema:
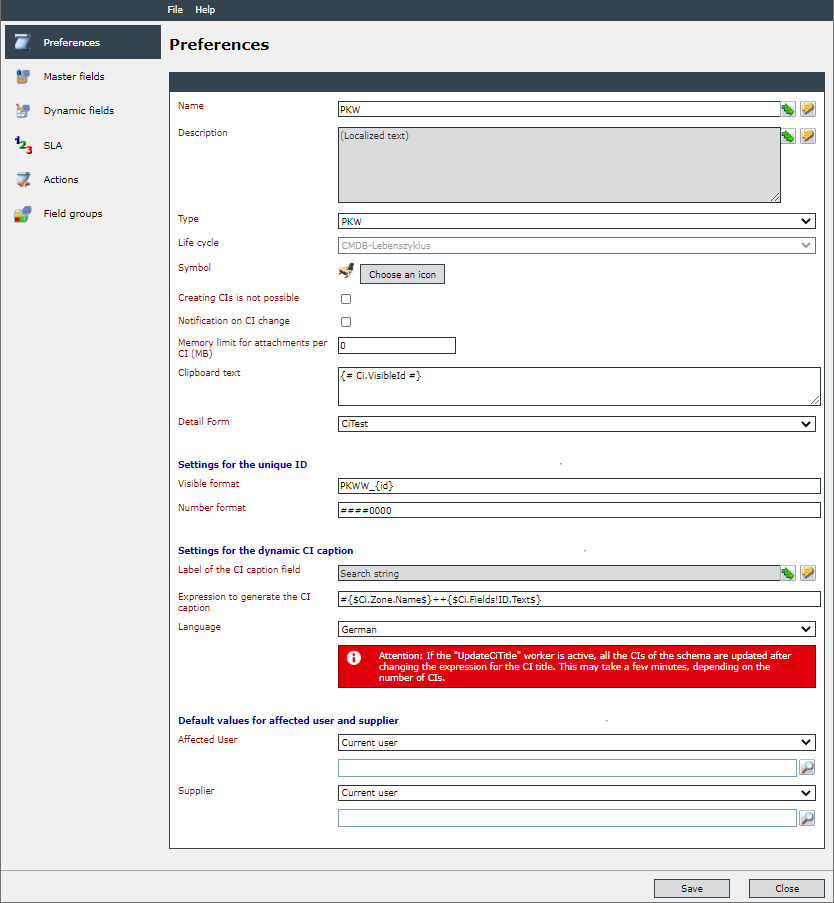
Preferences
On the Preferences tab, the only tab that has to be filled in before saving, the basic configuration of the CI schema has to be selected:
Name: The name of the schema. The localization buttons will be displayed as soon as multiple languages have been activated on the system.
Description: The text stored here is purely descriptive and describes the schema. The localization buttons here will be displayed as soon as multiple languages have been activated on the system as well.
Type: Select the respective type of the schema here. If there is no sub-type available for the selected type for the schema, this entry can be ignored. If there are sub-types available, they can be selected here as an alternative. The CI schema will then be linked to this type.
Life cycles: Defines a corresponding previously created life cycle.
Warning:
If CIs have been already created with this schema, the life cycle cannot be changed any more.
Symbol: An icon illustrating the CI schema. Alternatively to the already existing schema icons, further icons can be uploaded.
Creating CIs is not possible: This option prevents CIs being created with the schema. This option can be used if this schema is only to be used for importing CIs. Otherwise, this setting can be ignored.
Notification on CI change: This option activates the notifications if changes are made to the CI.
Memory limit for attachments per CI (MB): With a value greater than zero, the limit of all files to be uploaded is specified in MB. If the value is zero, the upload is unlimited.
From
: If the field remains empty, the limit is set to unlimited. Previously configured schemas are updated to empty to remain unlimited. Using a 0 is still a valid input, but it is treated like other numbers and limits the file to be uploaded to 0 MB.
Clipboard text: A text can be stored that is copied to the clipboard when the ID in the upper right corner of a CI detail dialog is clicked (default is the visible ID of the CI). Sharp-Expressions are supported.
Detail Form: It is possible to select a form of the type View and the Configuration Item entity. This form is displayed in all CIs of this schema if the user is authorized to view the CI Form tab page of the CI Details dialog. The view permission can be defined in the user management.
Settings for the unique ID: This option configures the display format and the number format for every CI schema individually (cf. numerical ranges for tickets). The default settings can be used or customized.
Note: Unique ID and Visible ID
Expenses use a serial ID solely composed of numeric characters - without a prefix or suffix. Thus, alpha-numeric values should be used during the definition and assignment of IDs to CIs. If only numeric characters are used as the serial ID, it may happen that the CI instead of a possibly existing expense with the same ID will be preferred when opening it via the direct access. Thus, it may become impossible to open the expense via the direct access.
Settings for the dynamic CI caption: In this input group the Label of the CI caption field (label field in the CI detail dialog), the Expression to generate the CI caption (specification of a CI expression) and the Language for the expression are defined.
Note: Dynamic CI caption
The worker Isonet.Workers.Cmdb.UpdateCiTitle is required to use this function. By default, the update interval is every minute. The frequency can be configured.
An expression is defined in the corresponding schema. The worker then creates the corresponding description. If the expression is changed or removed, the name will be updated on the next run. If there are changes to zones or the zone hierarchy (by shifting, possibly also by CI changes), the expression is evaluated again for the affected CIs.
Depending on the number of relevant CIs, the worker can be busy for longer.
Default values for affected user and supplier: Here, defaults can be set for affected users and suppliers. (Which affected user, which supplier, or which owner is to be set in new CIs if no other selection has been made?)
After all specifications have been made, clicking on Save will save the settings for this schema. Now, all the other tabs on the left side will be available and can be configured:
Master Fields
This tab allows for creating master fields and for displaying inherited master fields. Master fields are used for entering information that cannot be modified during CI creation later on and is valid for all CIs of this schema, e.g. telephone numbers of the service provider for CIs of this schema.
The button New field allows for creating master fields. The Name of the master field has to be defined here as well as the Value for the field (e.g. a hotline number) are to be defined. If the option Inherit is activated, this master field is inherited by all schemas that are below this schema in the hierarchy.
If master fields have already been created, they can be deleted via the Actions menu.
Inherited master fields: On this tab, all the master fields inherited from superordinate schemas will be displayed. They cannot be changed on this tab. In order to change them, the respective superordinate schema, in which the master field has been created, has to be selected.
Dynamic Fields
On this tab, dynamic fields can be created and inherited dynamic fields can be displayed. Dynamic fields are used for data that is different for every CI. Dynamic fields function similarly to the ticket fields, i.e. all the fields to be available for dynamic data to the future CIs have to be defined here.
The button New field is used for creating the required dynamic fields.
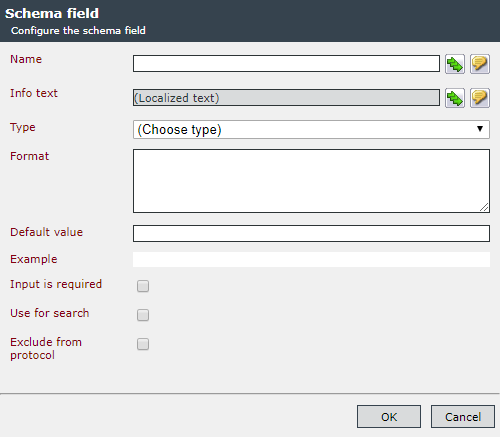
The following information for the respective dynamic field is to be entered here:
Name: Specifies the name of the dynamic field as displayed left of the dynamic field in the CI.
Info text: This text is displayed as a mouse over text for the question mark symbol, which is located right next to the dynamic field in the CI.
Type: The following predefined field types can be selected here:
- CI browser With this selection the user gets a CI browser. Via Choice limitation you are able to limit the selection for the user by Schema, Status and Zones. Additional options like Visible field, Edit behavior, Relation type of the CI link and Allow multiple selection are available at the bottom of the dialogue window.
- Date: Only date values can be entered via a date input field here.
- Expression This type let's you set expressions for CIs. CIs will be evaluated according to the specified pattern. Via Language you can limit the selection for the user by language. By selecting Forcing generation, CIs will be evaluated within the next execution of the Update worker using the defined expression. Caution: activating this options may lead to performance issues if many CIs of the schema exists.
- Image: This allows an image to be selected and displayed in CI.
- IP Address: This field type allows for entering an IP address. It is necessary for the action Start external application, for example.
- Link: Via this type, a link can be entered into the field. If an arbitrary text is entered into the dynamic field, it will be automatically transformed into a link after saving the settings.
- Localized text: This type allows for entering text in multiple languages into the field.
- Localized textarea: Via this field type, larger amounts of text in multiple languages can be entered into the field.
- Number: Only numbers can be entered into this field.
- Selection field: This type can be used to create a preconfigured list from which an entry can be selected during CI creation.
- Service time: This field allows for selecting a service time for the Service Level Management.
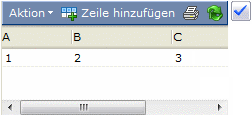
- Table: This field type is used to create a table with multiple columns. In the zone, multiple rows can be entered for every column.
- Text: Any text can be entered into this field.
- Text Area: Instead of a text field, a larger text area is made available, which is able to contain larger amounts of text.
- True/False: The dynamic field is turned into a checkbox that can be set active or inactive. If an entry for this field type is necessary, this checkbox always has to be activated.
- User Browser: Via the user browser, users can be entered into the dynamic field.
Format: If a certain format is to be specified for the selected type, it can be entered here.
Possible formatsA predefined input format is allowed for each attribute of a CI schema.
Data type Format Input mask Date Date values can be displayed in various formats. Standard formats and user-defined formats can be used. 
Field with multiple selection The columns of the field are defined by the rows, the texts serve as column names. 
Image The maximum height and width of the image can be defined as the format. If the selected image is larger than these values, scroll bars help to display the entire image.
For this the keywords max-height and max-width are used, each in a new line followed by the corresponding value.
max-height 100px
max-width 100px
Number Using the number format, the input value can be limited to numbers (decimal numbers and decimals). Standard formats and user-defined formats can also be used. For example, with the pattern ###00.00 for the value 2 the output 02.00 can be reached. 
Table The content of a row in the configuration will be displayed in a column later on. Column 1 Column 2
Column N
Text A pattern containing the variable '{0}' can be used as format. Example:
Format: Test_{0}
Field value: 01
Output: Text_01

True/False Logical entries can be made using checkboxes. No format is specified for this selection. The default values are True (activated) and False (not activated). 
The exact format strings can be found at the following address:
https://docs.microsoft.com/en-us/dotnet/
standard/base-types/formatting-types



Default value: If a preset value is to be displayed in this field later on, it can be entered here.
Input is required: If this field is activated, the dynamic field turns into a required field and has to be filled in before the CI creation can be completed.
Use for search: This option is not required.
Exclude from protocol: When activated, no log entries are written for this CI. 
Inherited dynamic fields: Dynamic fields will be passed onto CI schemas subordinate in the hierarchy automatically and will be displayed in those. However, they are not editable there.
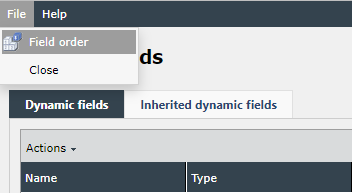
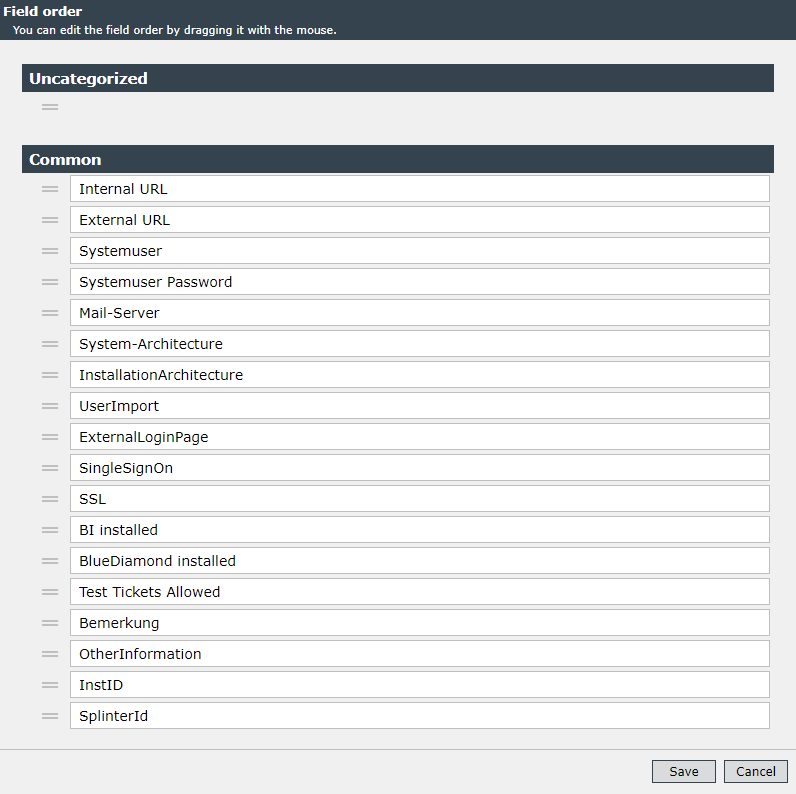
Dynamic fields can be arranged in field groups. If field groups have already been created, they can be customized via the top menu of the schema dialog. Fields can be assigned to field groups via drag and drop.
SLA
The SLA tab allows for creating one or multiple Service Level Agreements in a CI schema. If a SLA service or priority is specified here, it will be taken into account for new tickets as soon as a CI using this schema is included in the ticket.
Note:
During the later calculation of SLM priorities, SLAs of linked CIs will be taken into account as well.
Actions
This tab allows for adding actions to a CI schema, comparable to ticket actions. They can be used in CIs depending on the status and user.
The actions to be configured on this tab are detailed in Chapter CI actions of this document.
Field groups
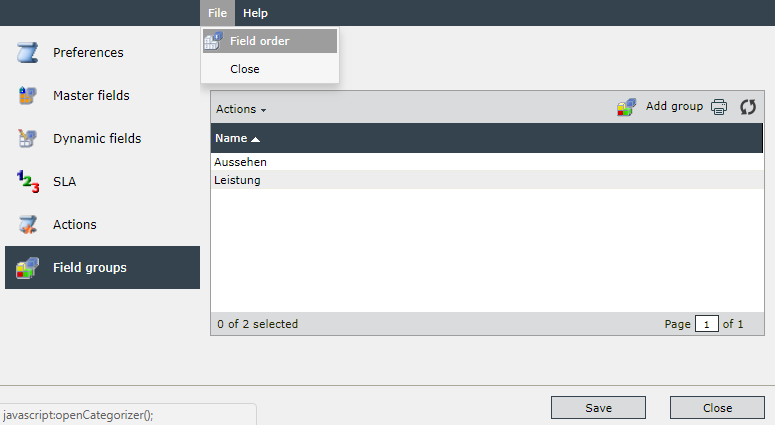
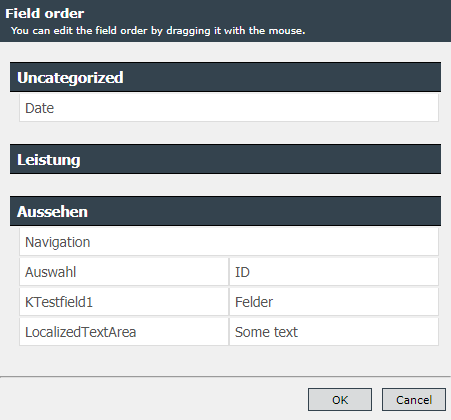
Field groups can be added via this tab. As soon as these field groups have been created, the existing dynamic fields can be grouped into these field groups. In a configuration item, these field groups will be displayed as tabs under Fields > Dynamic fields.
The field order can be accessed via the File menu.
The user can rearrange groups and drag and drop rows or columns using the column layout in the Designer.
After the configuration of the schema has been finished, clicking on Save and then Close closes the window.
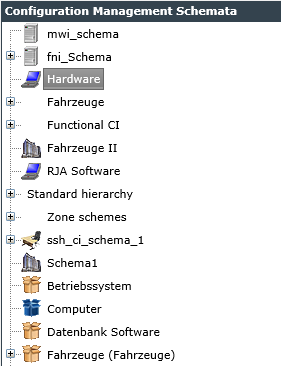
In the schema overview, all of the created schema types and CI schemas will now be listed independently from each other.


 Copyright (c) 2000-2026 Isonet AG