Managing the Knowledge Base
The setting options for the Knowledge Base can be found under Settings > Knowledge Management.

Knowledge Categories
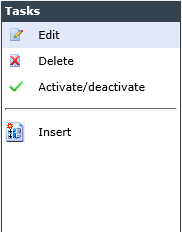
This menu allows for creating new categories and subcategories via the Insert button. Furthermore, existing categories can be edited via the Edit button (e.g. changing the name and description) and activated and deactivated via the Activate/deactivate button.
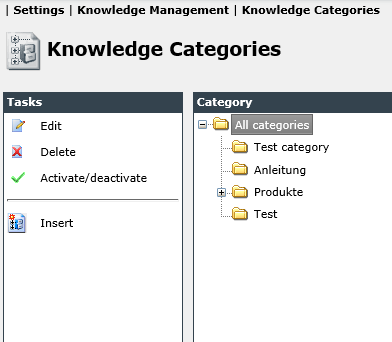
Until  :
:
The green arrows in the Tasks menu (not shown in the pictures) allow for moving categories upwards or downwards in the hierarchy and within a category as well.
From  :
:
The categories are automatically sorted according to the alphanumeric code (standard). This sorting is effective in both main and subcategories.
Moving categories within the KB category tree is possible by drag and drop.
Deactivating a Category
A selected category can be deactivated by clicking on Activate/Deactivate.
The following is to be considered for inactive categories:
- An inactive category will be displayed to all users with the permission to manage the Knowledge Base. Whenever such a category is selected in the Knowledge Base in order to view the articles within, only the articles contained in the inactive and at least one active category will be displayed.
- Under the node Deactivated Articles, all articles contained in the inactive category will be listed.
- A category can only be deleted if it does not contain any articles, which means that all articles have to be deleted or moved into other categories in order delete the category after wards.
Knowledge Schemas
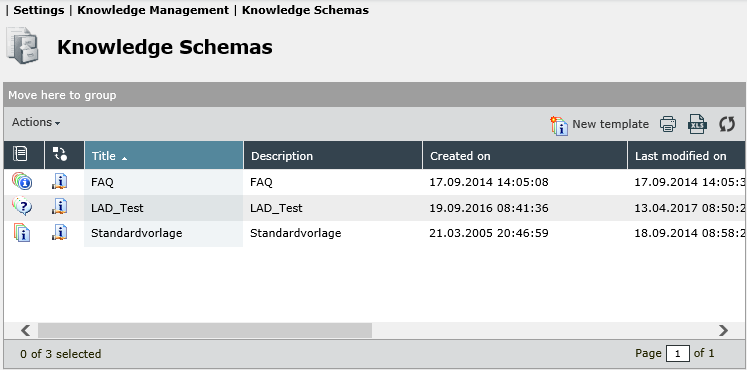
Under Knowledge Schemas, new schemas can be created or existing ones edited as well as deleted.
Common
When a schema is opened or a new one is created, the following configuration options are available on the Common tab:
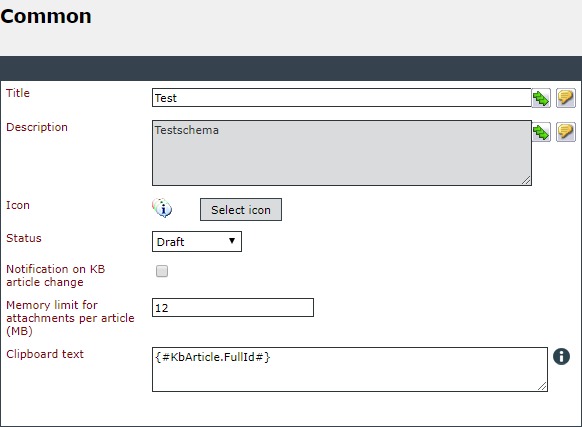
Title and Description: The name and description of the schema are to be entered here. Both have to be specified in all of the languages activated on the system.
Icon: A distinct icon can be chosen for the selected schema in order to identify articles that have been created with this schema more easily.
Status: Defines the initial status all of the articles created with this schema. If the status Deactivated is selected, no articles can be created with this schema.
Notification on KB article change: If this option is enabled, push notifications are displayed when the KB article changes.
Memory limit for attachments per article (MB): If the field remains empty, the limit is set to unlimited. Using a 0 is a valid input, but it is treated like other numbers and limits the file to be uploaded to 0 MB.
Clipboard text: This text will be copied into the clipboard when the user clicks on the KB ID of the KB article dialogue.
Validity
The Validity tab allows for defining whether articles that have been created with this schema should only be valid for a certain time period. After this period expires, the article will automatically be set to the status Archived.
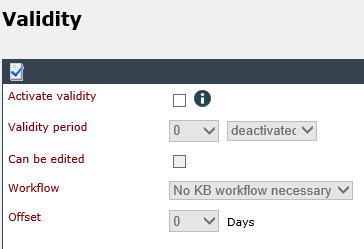
Activate validity: This option allows for determining whether articles of the selected schema will be subject to a specified validity period. At the end of this period, a workflow can be initiated, which executes a certain predefined action, for example.
Validity period: Selection of the validity period for the articles of this schema.
Can be edited: If this option has been activated, the validity of an article can be edited even after its creation. The start and end date can be reset.
Workflow: Defines the workflow to be initiated at the end of the validity period.
Offset: The offset controls how many days before the expiration of the validity period the specified workflow is to be triggered.
Note:
The KbValidityScheduledWorker worker must be activated to check and start the workflow.
Article Actions in a Schema
Article actions can be defined individually for every knowledge schema depending on the user group and article status.
Status
On the Status tab, the article status, for which an action is to be visible and usable for defined users, can be defined for every article action individually. By holding the [CTRL] key, multiple statuses can be selected simultaneously. The action will then be displayed on the Actions tab or the respective tabs in articles based on this schema and having the respective status.
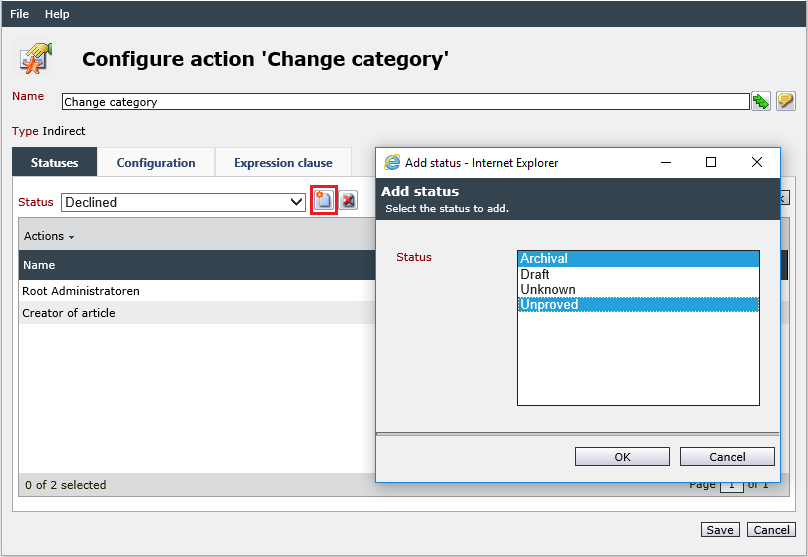
Select the desired status(es), for which the action is to be available, under Status. Then, add the users or groups with the permission to execute the action during the status via the button Add user.
If the action is to be available in other statuses for the same users as well, specify the new status and select the previous status under Take over from next to it. Then, click on OK in order to apply the user settings to the new status. Otherwise, add further users via the Add user button.
The following users and groups can be selected:
Knowledge owner: The user marked as the knowledge owner of an article can execute the action. The knowledge owner is equivalent to the owner.
Owner group: The entire group of the knowledge owner (usually his main group) can access the action.
Creator of article: Only the user who created the article has access to the action.
Editor: The user who edited the article last can execute the action.
Reviser: The user releasing the article after a revision can execute the action.
Select user: Via the button Select user or group, a user or group to be able to execute the action can be selected in a user browser.
Only groups and users are displayed that have the authorization Group visible to the executing user.
Whenever a user is to be added to all previously configured statuses, the option Apply to all statuses can be used. This option, however, only affects statuses that have already been configured. If another status is edited afterwards, the user or group will not be added automatically there.
Configuration
Under Configuration, various configuration options may be found, depending on the actions. They will be explained in the following sections.
Expression Clause
An additional expression can be specified here. In addition to article statuses and added users, the expression is the third option to display an action only to certain users and under certain circumstances.
The specified expression must only return True or False (boolean). If an expression returns True, the action will be displayed to the configured user(s) as soon as the article reaches a certain status.
Edit Category
This action allows for assigning new categories to an article subsequently.
Configuration
The only specification the configuration requires is whether a new KB workflow is to be initiated after the execution of the action.
Executing the Action
If a user has the right to change an article’s category, the category can be changed on the Overview tab in the article. A click able magnifying glass symbol can be found there. It allows for selecting all of the categories a user has the permission View on. Simultaneously, it is possible to display the article in subcategories. For this purpose, the checkbox Visible in subcategories can be activated.
Change Visibility
This action allows for changing the visibility of an article (internal or public).
Configuration
The only specification the configuration requires is whether a new KB workflow is to be initiated after the execution of the action.
Executing the Action
On the Overview tab, the option Internal can be changed by the selected users.
Change Knowledge Owner
Via this action, the knowledge owner of an article can be changed subsequently. Furthermore, the original KB creator of an article can be changed with this action.
Configuration
The configuration specifies whether a new KB workflow has been triggered after the action has been executed, and/or whether a comment should be written to the evaluation. You can also configure whether the action should be displayed in the Content, Actions, or both tab.
Executing the Action
On the Overview tab of an article, the user specified as the knowledge owner and creator of the article can be edited subsequently. For this purpose, a magnifying glass icon is displayed next to the respective fields. It opens a user browser. However, only groups and contained users, to whom the executing user has the authorization Group is visible, will be displayed here. If the action is also displayed in the Actions tab, a comment field can also be displayed by configuration.
Edit Validity
This action allows for editing an article’s validity subsequently.
Configuration
The only specification the configuration requires is whether a new KB workflow is to be initiated after the execution of the action.
This action, however, is only usable if the checkbox Can be edited has been activated in the validity settings in the schema configuration and if a general validity period has been defined.
Executing the Action
On the Overview tab, the validity of an article can be edited using from and to values via a drop-down list for selecting dates.
Create Comment/Rating
Via this action, comments can be added to an article and it can be rated as well.
Configuration
The only specification the configuration requires is whether a new KB workflow is to be initiated after the execution of the action.
Executing the Action
On the Rating tab, comments can be created and the article can be rated in the lower section.
Edit Article
This action allows for editing an article subsequently. Furthermore, this article action has to be configured for a schema with the status Draft. Otherwise, no articles based on this schema can be created.
Configuration
The only specification the configuration requires is whether a new KB workflow is to be initiated after the execution of the action.
Executing the Action
This action has a double effect:
First, the content can be edited subsequently within an article (title, key words, description, and content).
If the action is also configured for the status Draft for a particular user or group and if they have the permission to create articles, they will have the option to create articles with this schema and the New article button will be displayed above the KB article list.
Edit Text Module
This action allows for creating and editing text modules for KB articles.
Configuration
The only specification the configuration requires is whether a new KB workflow is to be initiated after the execution of the action.
Executing the Action
On the Text module tab in a KB article, text modules for each language activated on the system can be entered and edited.
Remove Attachment
Via this action, attachments can be removed from an article.
Configuration
The only specification the configuration requires is whether a new KB workflow is to be initiated after the execution of the action.
Executing the Action
The Files tab provides the button for removing files in the Actions menu.
Add Attachment
This action allows for adding attachments to an existing KB article.
For information on restricting file types, see FileUploadFilter.
Configuration
The only specification the configuration requires is whether a new KB workflow is to be initiated after the execution of the action.
Executing the Action
The Files tab provides the button for uploading files.
Review
On the Review tab, the settings for an automatic resubmission of articles can be made. After the configured time, for example, the article can be removed from the Published status and submitted to a previously defined user group for review.
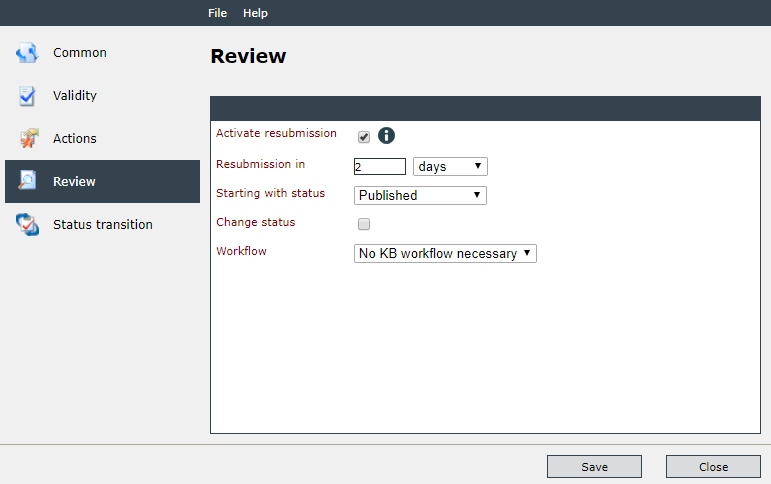
Activate resubmission: Defines whether the resubmission is to be activated.
Resubmission in: Specifies the time period after which the article is to be resubmitted automatically.
Starting with status: Defines a status that will start the resubmission. If this status has not yet been reached in an article, it will not be submitted for a review. For example, it does not make any sense to mark an article with the status Draft for an automatic review as it has not been finished yet.
Change status: This status allows the specified workflow to be triggered at the end of the configured period, but the status of the article does not change to Review. For example, a corresponding e-mail can be sent, but the article remains in Published status and can still be read by the users.
Workflow: If a workflow is to be initiated at the same time as the resubmission (independent of the status change of the article), it can be selected here.
Note:
The worker KbReviewScheduledWorker must be activated for automatic review.
The fourth tab, Status transition, allows for a definition of individual transitions from status to status. The overview lists all the already defined status transitions. For adding a new status transition, the button Add status transition is available.
A dialog will open, in which the following four options can be specified:
Old status: Enter the desired initial status.
Tip:
It is advisable to use the status No status, if a workflow is to be initiated for a KB article immediately after its creation. This status only allows a transition to the status Draft. The workflow selected here will be the initial workflow of the article.
New status: Specifies the desired target status.
Workflow: If a workflow is to be initiated by the status change, it can be entered here.
Type: Defines whether articles, revisions, or both can perform this status transition.


 Copyright (c) 2000-2026 Isonet AG