CI-Import
Before the CI import can be started, it is necessary to create the respective structure, consisting of the life cycles, schemas, zone schemas, and zones. The CI import is configured under Settings > Configuration Management (CMDB) > Import. Via the button New Import, a new CI import can be configured.
Import Configuration
Note:
The permission 'Change Settings' for the affected user or group is a requirement for the configuration of the import. Otherwise the dialog is only available in read-only mode. In addition, the proper settings for the CI schema and CI zone have to be set. More information regarding this is to be found within Permissions - CMDB
In the following dialog, the basic information for the import has to be entered:
- Name
- Description
- Import type: Import configuration items has to be selected here.
- Schema: Into which CI schema is to be imported?
- Zone: Into which zone are the CIs to be saved by default?
Note:
Doesn't the user has or the group have the permissions to view the CI schema or CI zone, then there will be an appropriate prompt displayed at this place:

- Method: Defines what will happen, if the imported CI does already exist in the CMDB:
Create new CI and don't update existing: A new CI is created, the existing CI is not changed.
Create new CI and update existing: A new CI is created, the existing CI is changed.
Create new CI: Creates a new CI in any case.
Create new CI and delete existing: A new CI is created, the existing CI is deleted.
Create no CI and update existing: No new CI is created, the existing CI is changed.
Create no CI and delete existing: No new CI is created, the existing CI is deleted.
- Data Source: Depending on the system, miscellaneous database selection options are available here.
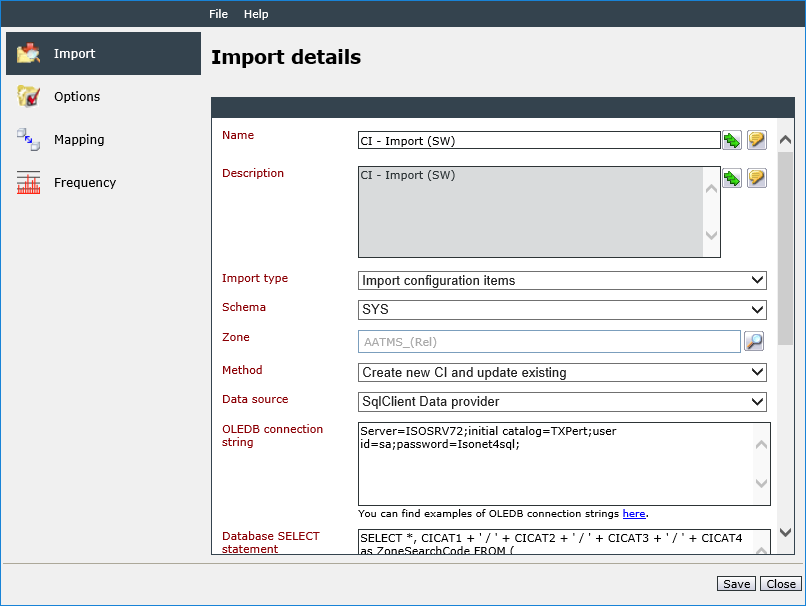
Depending on the data source, further information may be required.
Depending on the database type selected, a valid connection string is to be entered. Examples for connection strings are available under connectionstrings.com. In case of connection problems: The connection has to be established from the CMDB application server to the database server (service Isonet Agent). As the next step, a SQL query has to be entered for the import. An arbitrary amount of columns can be returned by the request, but there should be at least one distinct column, which can be used as a primary key.
The following data sources can be used:
- Active-Directory
- Excel CSV file
- Microsoft SQL Server Compact Data Provider
- ODBC Data Provider
- OLEDB Data Provider
- OracleClient Data Provider
- SQLClient Data Provider
As an example, Excel/CSV and Active Directory data sources will be illustrated here.
Excel CSV file: Simply select the Excel or CSV file, from which to import. For this purpose, click on Browse ..., select the file from the local computer, and confirm the selection with OK.
Active Directory: This data source type can be used for Active Directory and most of the other directory services as well. Here, it is crucial to enter the credentials for the LDAP.
access and to select an authentication type (for unsecured connection types, FastBind is recommended; in case of failure, contact the directory services administrator or try other authentication types).
Next, the LDAP path to the hierarchy level to be imported has to be entered as a Connection string. After a click on the Refresh LDAP Object-classes button, the available object classes will appear in the drop-down list. If an error is displayed in red, the entries have to be checked. In case of connection problems: The connection has to be established from the CMDB application server to the specified directory server (service Isonet Agent).
Options
After saving the data, the other tabs on the left side will be available. On the Options tab, the following settings are available:
Delete relations: The import makes sure that CIs will only have the newly imported relations. If this option is not checked, old relations will always be left unchanged.
Detect conflicts: This option activates the conflict detection system.
Mapping
The mapping makes sure that
- the contents of the various columns of the import data source are written into the correct fields of the CI schema,
- the uniqueness of the imported CIs is ensured (primary key column), and
- the connections between CIs will be established (foreign key).
Warning:
The user or the group is in need of the rights to view all configured entities which should be contained in the mapping. Otherwise the following message will be displayed:

Via the button New Mapping, new entry are created in the mapping table.
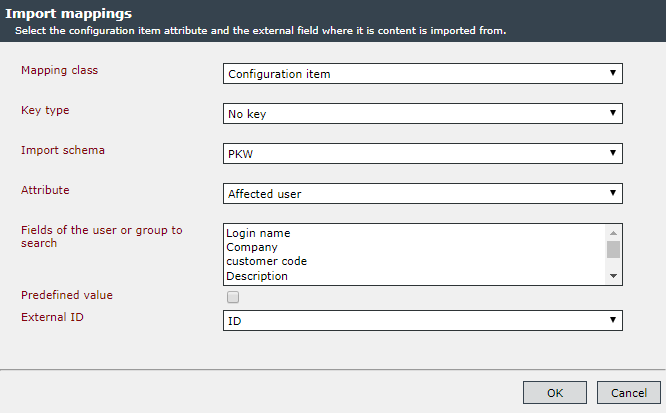
The following settings are possible:
Mapping class: The following classes are available:
Configuration item: The corresponding CI can be selected.
Configuration item schema: The schema for each data record to be imported can be set individually or the general setting of the first Import tab can be overwritten.
Zone: This class is required to automatically move a CI into a zone. Note that depending on the CMDB version, the mapping class Zone can only be used if the zones have also been imported.
Additional zone: A CI can receive further zone assignments in addition to the visible zone into which it is brought by Zone.
Key type: Various key types can be selected here:
- Primary key: The unique column of the import.
- No key: Use this key for filling in fields without a key function.
- Foreign key: Foreign key are used for establishing connections between CIs.
- Secondary key: Serves as an alternative primary key.
Primary Keys
An import that is supposed to create new CIs requires a primary key.
Note:
Make sure that the primary key can not exceed 100 characters.
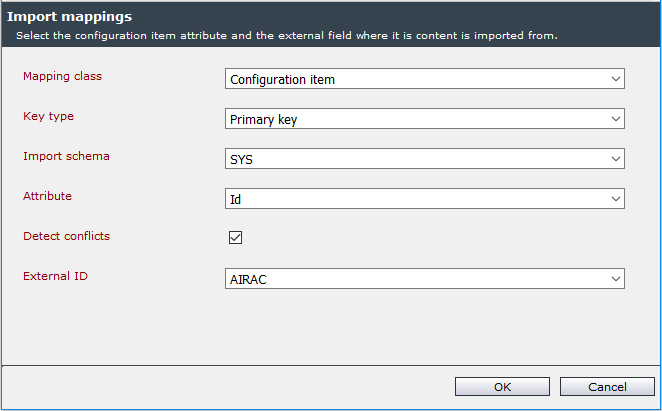
After changing the key type to Primary key, the following or a similar window can be seen:
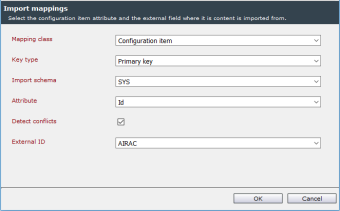
The following fields are required for creating a primary key mapping:
Import schema: The CI schema to be used.
Attribute: The dynamic field of the CI schema, in which the primary key column is to be imported, must be selected here.
External ID: The respective column in the import data source.
No Key
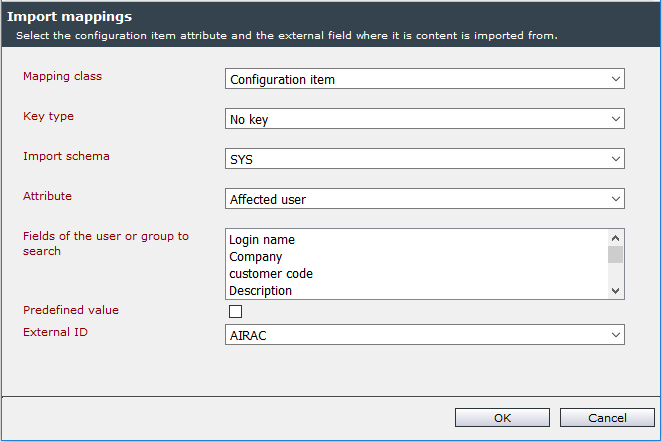
Presumably, there will be some columns in an import, which are only to be transferred into the respective dynamic fields. For this purpose, the key type No key has to be used:
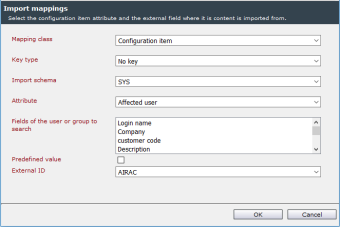
The following fields are necessary, in order to create a normal field mapping (without key):
Import schema: The CI schema to be used.
Attribute: The dynamic field of the CI schema, into which the field is to be imported.
External ID: The corresponding column in the import data source.
Predefined value: If this option is checked, a static value will be entered into the CI field. Then no column will be referenced from the import data source for the mapping.
At the beginning, the following special attributes are available in the attribute list:
Type: Sets the type of the CI to a type covered by the schema. The content of the import column (External ID) has to match the import identification of the type. Thus, each type to be set by the import has to have a matching import identification.
Status: Sets the status of a CI to a status of its life cycle. The content of the import column (External ID) has to match the import identification of the status. Thus, each status to be set by the import has to have a matching import identification.
Supplier: This sets the supplier of the CI. The supplier can be a user or a group. At least one attribute of the user or group has to be selected (multiple selection is possible), in which the system can search for the content of the import column (External ID).
Affected user: This sets the affected user of the CI. The affected user can be a user or a group. At least one attribute of the user or group has to be selected (multiple selection is possible), in which the system can search for the content of the import column (External ID).
Owner: This sets the owner of the CI. Only a group can be owner. At least one attribute of the group has to be selected (multiple selection is possible), in which the system can search for the content of the import column (External ID)
Visible ID: The visible ID is used for the user-readable (ideally: meaningful) ID of the CI. It is recommended to map a distinct column with the visible ID. If no visible ID is filled in, it will obtain the same number that is used for uniqueness internally (can be configured in the CI schema) automatically.
Note:
The visible ID mapping always has to be made in addition to other mappings (Primary key, No key).
Foreign Key
In order to create relations between various CIs, the key type Foreign key is necessary. It is possible to link any CIs to each other - the manually created ones as well.
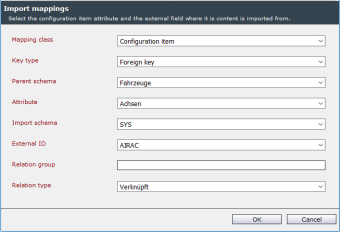
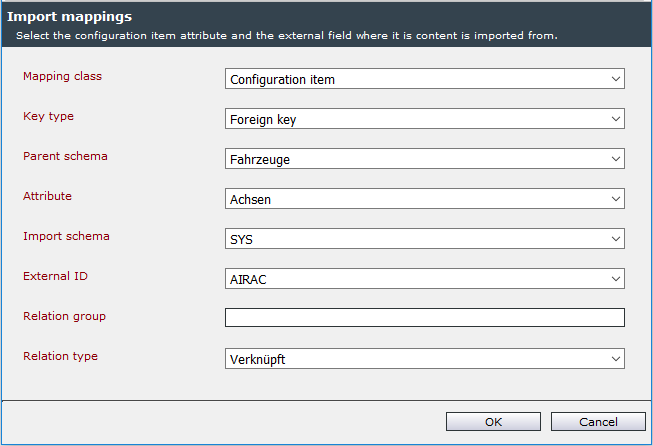
The following fields are required in order to create a mapping via foreign key:
Parent schema: The schema of the CIs to be linked.
Attribute: The attribute of the CIs to be linked, on which the connection is to be based.
Import schema: The schema of the CIs to be imported.
External ID: The corresponding column in the import data source.
Relation group: This option is used for grouping individual foreign key configurations. The field can be left blank.
Relation type: Specifies the relation type the CIs are to be linked with.
Please note, that a foreign key mapping only creates a relation, but does not fill in dynamic fields. If the column from the import source is to be filled into a field as well, an additional No key mapping is to be defined.
Secondary Key
Sometimes, a primary key does not suffice for the localization of existing CIs, e.g. if two separate imports, each with its own primary key, are to update the fields of the same CI. If an additional secondary key mapping is defined, the import first searches for an existing CI with the matching primary key, and if no matching CI can be found, via the configured Secondary key.
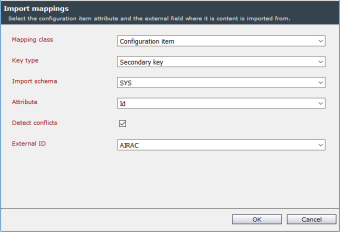
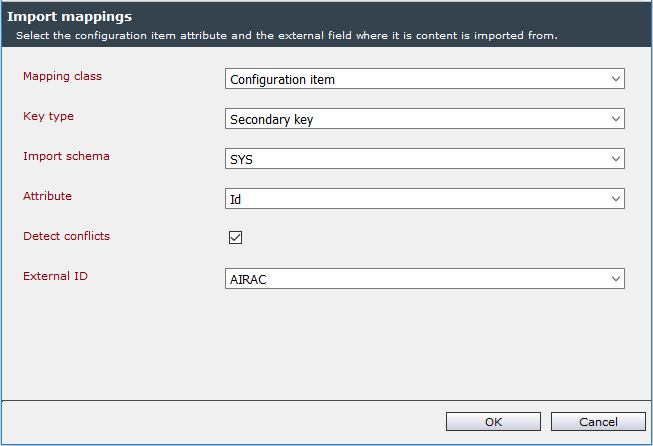
The following fields are required for a secondary key mapping as well:
Import schema: The CI schema to be used.
Attribute: The dynamic field of the CI schema, into which the secondary key column is to be imported, has to be selected here.
External ID: The corresponding column in the import data source.
Frequency
Another option is to set imports to be performed periodically. This tab can be ignored, if the import is only to be started manually.
In order to configure a regular automatic import, the option Active must be activated as a first step.
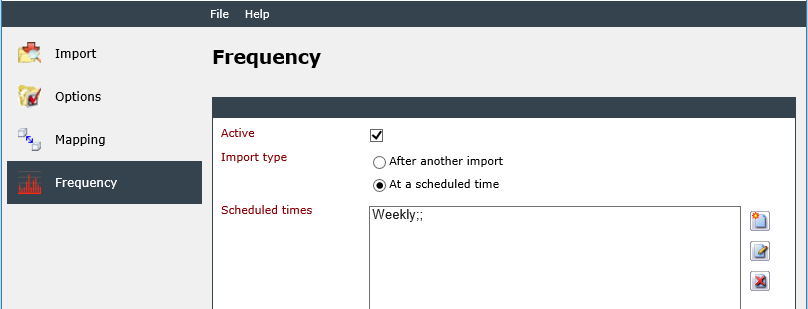
The following options are available for setting an exact time for the import:
After another import: The import starts as soon as the specified other one has been finished.
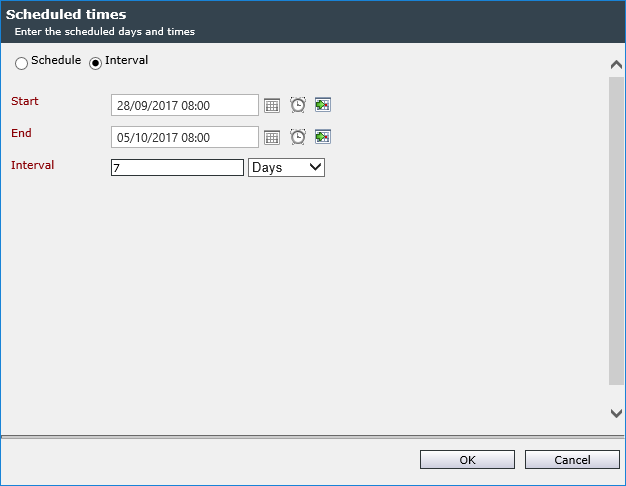
At a scheduled time: Here, an arbitrary amount of dates, on which the import is to start, can be defined as a schedule:
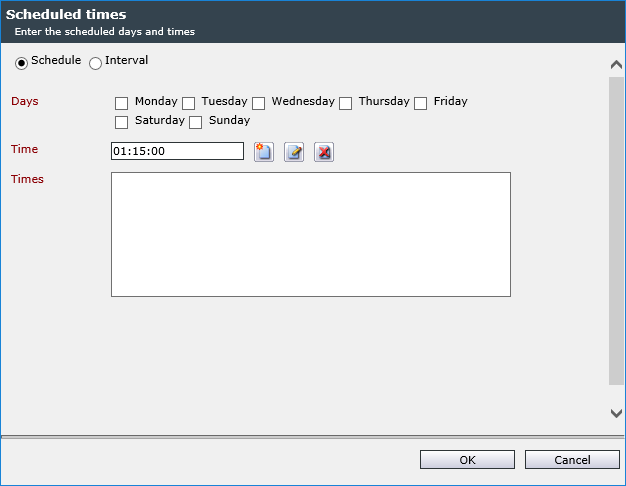
As an alternative, the time interval option can be used, as shown in the figure below:
Examples of Use for the CI Import
Importing CIs from a Data Source
The goal is to import CIs from an arbitrary data source, during which user-defined fields are to be mapped.
During the configuration of a new import, the zone the CIs are to be imported into is be selected, along with the desired data source (database, Excel, etc.). In this example, no automatic zone assignment is performed yet. Additionally, the schema the CIs are to be created for has to be selected.
For this purpose, select the option Replace all existing CIs or create new CI as a method. It is the recommended method for standard cases.
Using the Mapping tab makes sure that CIs are created the right way. First, a primary key mapping has to be created. For every dataset to be imported, the importer first checks via the primary key, whether a CI already exists. If no CI with the current value as the primary key exists, a new CI will be created. If, however, an existing CI is found, it will be overwritten. For this purpose, a column (External ID) is to be selected from the import data source, which is known to be distinct for the specified CI attribute!
Usually, additional columns of the import data source are mapped to certain CI fields. For this purpose, a mapping of the type No key has to be created for every field and the External ID (field from the data source) has to be selected as well as the field of the CI schema the data is to be filed into.
The visible ID is a specific feature: It is a special field for identifying a CI via a meaningful, preferably distinct key. It is not obligatory for the visible ID to be distinct for all existing CIs (the CMDB creates another distinct ID for each CI on its own), but it is recommended.
It must be ensured that a mapping on the visible ID has been created for every import that is used for creating new CIs. Of course, the visible ID can equal the primary key; however, a separate mapping must be created for the visible ID regardless.
Importing Relations Between CIs
Relations can be created by using the mapping key type Foreign key. For example, if computers and monitors have been imported, the field Display will be imported, in which the serial number of the connected display is specified – which matches the field Serial ID of the monitor CI. In order to connect these two CIs, a new mapping has to be created with the key type Foreign key for the computers during the import. The schema used for monitors is selected as a parent schema and the serial ID as an attribute. The import schema is left on Computer. Now the external ID (field in the import data source) must be set to Display (or the column containing the serial number of the display).
In the process, the field for the relation group can be ignored or any character string, e.g. the external ID, filled in.
Finally, the relation type has to be selected, e.g. Connected.
Importing CIs with a Data Crossover with Another Import
It may happen that a company has multiple databases, which return different information for the same datasets (CIs). For instance, the facility database of the accounts department can return different data than the automatic inventory scan software for IT equipment, regardless of the fact that both data sources partially refer to the same CIs.
Via the mapping type Secondary key, two imports can be configured, which maintain different fields of the same CI. It is, however, important that both import data sources have a corresponding field, in addition to their respective primary key fields.
Example:
Facility database: Primary key FacilitiesID
Inventory scanner: Primary key Hostname
Corresponding field: SerialNumber
For the primary keys, the data within the import is distinct; there are, however, gaps in the serial numbers - for some facilities, the serial number is missing, and the scanner cannot read out the numbers of all the IT equipment.
In the last step, two imports have been defined, Facilities data and IT equipment, each with the desired number of fields (No key) as well as one primary key each (FacilitiesID and Hostname).
In order to avoid that every import creates only its own CIs and instead only updates an existing CI’s data in case of matching serial numbers, a new secondary key mapping is created for each of the two imports. The goal is that every one of the imports searches for an existing CI via the serial number first, and if none can be found, the respective primary key will be tested. Thus, the configuration has to look as follows for every import:
- Facilities data: Primary key SerialNumber, secondary key FacilitiesID
- Scanner: Primary key SerialNumber, secondary key Hostname
Whenever a CI is found via the serial number, its fields will be overwritten. If no CI can be found via the serial number (or if the import dataset does not include a serial number), the secondary key is used.
Warning:
If both imports overwrite the same fields, import conflicts will be generated (if the conflict detection is activated).
Placing CIs in Zones
In order to be able to store CIs not only in the standard zone but in any existing zone, the corresponding zone information has to be entered into the import data source. This could be, for example, a zone code like DE_HH_123. It is, however, important that exactly the same codes have been written into a user-defined field in the zones. (A separate field has to be created in the zone schema for this.)
For an automatic assignment, a new entry has to be added to the import mapping table. Select the mapping class Zone, then the zone schema to be used for the automatic assignment, and finally the field in this zone schema containing the zone code, which is also used by the import data source.
Assigning Statuses
The life cycle status of a CI is handled like a normal field. For this purpose, create a No key mapping and to use the status as attribute.
For the status-mapping to work, the correct import identifications have to be entered into the life cycle status.
If the import identification matches the value from the import data source, the CI’s status will be set to the new status automatically.
Synchronizing two Imports with Conflict Detection
As soon as the CMDB has been filled with the initial data, the continuing individual imports will only be used for synchronizing the CMDB with the import data sources. If several imports are written in the same CI, conflicts may be generated (see Conflicts).
The conflict detection is activated by default for every import. For some initial imports or for imports only used to correct a field, it may be sensible to deactivate the conflict detection temporarily. The import then will change the data of an existing CI without generating conflicts.
Tip:
Use the conflict detection, if you expect that data differences for the same CIs may exist in your import data sources and you would like to detect and correct them.
Import optimization
Importing large amounts of data as CIs can be very time consuming. This is especially true for the initial import, since all CIs are created or modified. The following tips can help to improve the performance of CI imports:
-
Conflict detection should only be activated if there are multiple imports that change the same CIs and identical attributes and conflicts are expected. It can generally be deactivated at import level (tab Options). Additionally, a setting can be made at attribute level (only effective if conflict detection is activated).
-
For the initial import of a large set of CIs the writing of log entries for the attributes can be disabled. However, this cannot be set globally, but only on attribute level. Logging should be reactivated after the successful import, otherwise the check trace will be missing.
-
For fields to be imported that are constantly changing (e.g. TimeStamps or LastModified) logging is not necessary.
-
Importing relations is much slower than importing CIs with attributes. The imports can be split up as follows:
-
A frequently running import for CIs and attributes
-
A rarely performed import for the relations
-
-
The number of CIs to be imported has a significant influence on the duration of the import (the scaling is approximately linear with the number of imported data sets). For following imports (not for the initial import) characteristics such as Last Modified can be used to limit the amount of data (only data records that have changed).


 Copyright (c) 2000-2026 Isonet AG