Workflow-Designer App User Interface
The interface of the Workflow Designer is divided into multiple arrays. The biggest of them is the design array, in which the plug-ins can be arranged and combined into complete workflows.

On the left, there is a plug-in list, in which all of the available plug-ins are listed, divided into categories. If some plug-ins cannot be used in a workflow type, they cannot be found on the list. Above the design array, the toolbar containing various options for the Workflow Designer is located.
The toolbar can be found above the design array, in which a workflow is displayed graphically. The following options are available here (from left to right):

| Icon | Description |
|---|---|

|
Creates a new workflow. |

|
Deletes the currently open workflow. |

|
Allows for the import of a workflow XML definition. |

|
Export one or more workflows to XML. |

|
Shows the change log of the workflow including the date and executing user. Additionally, changes can be reverted if necessary. Overwriting the workflow will not be saved in the process and has to be executed manually. |

|
Saves the current workflow, whereupon a short description on the changes can be entered. The changes are displayed in the change log. |

|
Saves all currently modified and open workflows. Warning: This function does not save descriptions on workflow changes. |

|
Prints the graphic display of the workflow. |

|
Saves the current workflow as an image. The image itself corresponds to the graphic display in the Print option. |

|
Cuts the highlighted objects. |

|
Copies the highlighted objects into the clipboard. |

|
Inserts objects from the clipboard. |

|
Allows for the search within the workflow via the Full-ID of an object. |

|
Shows, in which plug-ins work items can be currently found. |

|
Slows down the processing of the workflow (only for diagnostic purposes). |

|
Displays an overview of all available workflows of all categories and types. Via a double click, the workflow will be displayed in a new tab. |
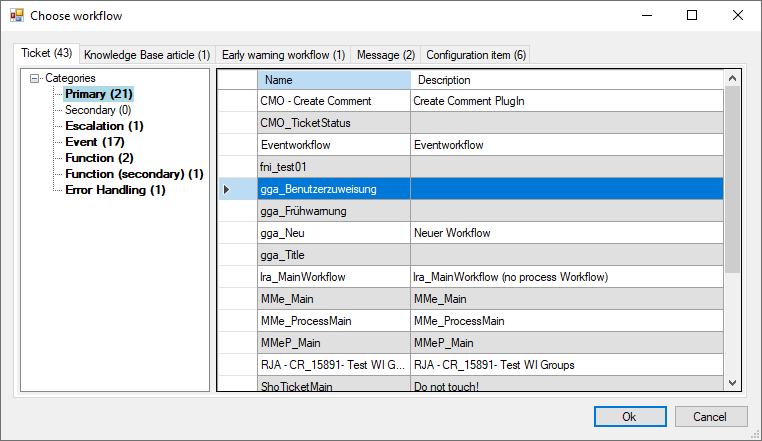
The Workflow button on the right opens a window with all saved workflows sorted by categories. Here a workflow can be marked and opened with OK (multiple selection possible  ).
).
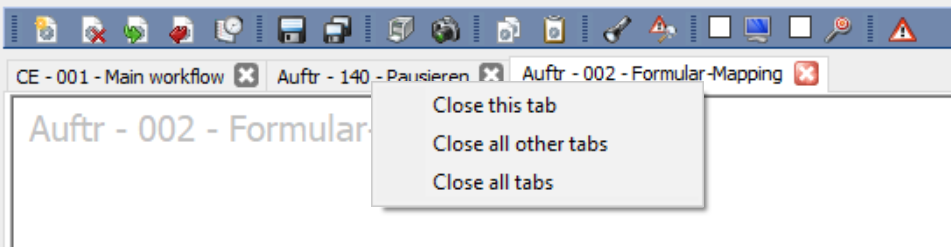
Under the toolbar, a tab is displayed for each open workflow in order to be able to quickly switch between the workflows.
To close a specific tab, hover over it with the mouse pointer and click the middle mouse button. Another option is to right-click to open the context menu. There you will find three options to choose from:
Plug-in List
On the left of the design array, a list of all available plug-ins for the respective workflow type can be found. In this list, all plug-ins are displayed in categories and can be dragged and dropped into the design area.
In the upper area of the list, there is a search option for plug-ins. Entire names as well as parts of the plug-in name can be entered here. The result includes all plug-in names containing the search key.
The digits in brackets behind each category depict the number of available plug-ins in the respective category.
Context Menu
The context menu of the Workflow Designer is displayed after a right click into the design area.
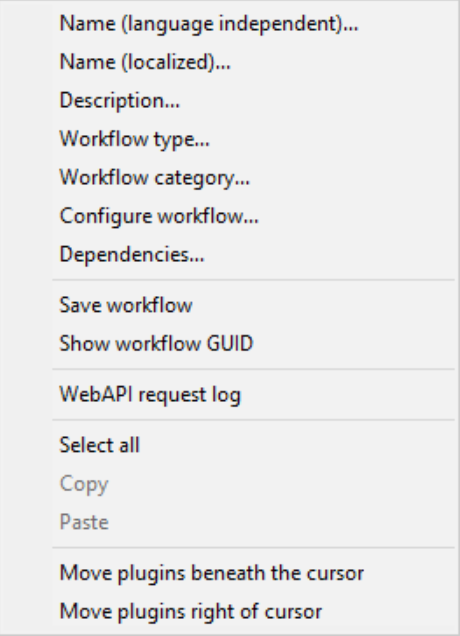
The context menu offers the following options:
Name ...: You must specify a language-independent name. The localized names of the workflow can be modified at any time.
Description ...: Contains a description for the workflow. The localized descriptions of the workflow can be edited.
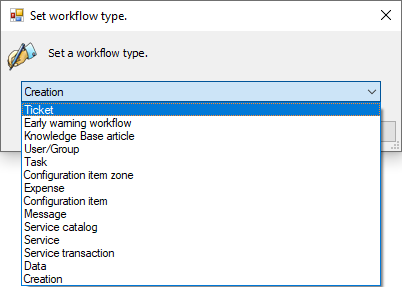
Workflow type ...: Defines the type of the workflow. Due to the selected workflow type, different plug-ins will be available in the categories, and the workflow can be used at different stages in the system. The following workflow types are available:
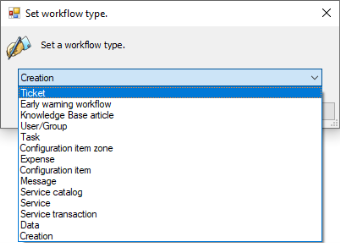
Ticket: This is the workflow type used for tickets.
Early warning: This workflow type is used for the early warning system and its messages.
KB article: This workflow type is used for the validity, resubmission, and status transition of KB articles.
Task: This workflow type is used for tasks.
Configuration item zone: This workflow type is required in order to trigger an action whenever the minimal or maximal amount of CIs in a zone has been reached.
User/Group workflow: This workflow type is used for the user and group import.
Expense: This workflow type is used for expenses.
Configuration item: This workflow type is used for configuration items.
- Message: This workflow type is used for messages (Mail2Ticket).
Service catalog: This workflow type is used for service catalogs.
Service: This workflow type is used for services.
Service transaction: This workflow type is used for service transactions.
- Data: This workflow type can process data with definable input and output parameters (e.g. fill forms with data from a database). No pauses or activities may be added.
Further detailsRequirement:
The feature key EnableDataWorkflows must be set so that data workflows are available.
Workflow category:
The start and end point of a data workflow must be in a workflow in the Primary category. In addition, all other categories are also available, but it does not make sense to use Event and Escalation for data workflows (neither escalations nor events can occur).
Usage:
In general, data workflows allow you to set input and output parameters for processing data. Results can be retrieved from external sources (e.g. SQL queries and/or REST queries).
Input: Optional values that can also be adopted by expressions (e.g. from tickets or forms).
Output: The result values returned by the data workflow.
Restrictions:
- Workflow items in data workflows cannot be restored, that is, when the Workflow Manager service is terminated, the execution of running data workflows is interrupted and is not continued later.
- Workflow activities and pauses are not supported.
- Timers (triggers) are not supported
- Logs are not created
- Creation: This workflow type has items that have the base entity as context object. The Create ticket and end workflow plug-in creates a ticket from this base entity. The base entity is an abstract entity from which any additional entity such as CI, KB, etc. can be derived.
This type of workflow is necessary if ticket creation is to be integrated into the mobile interface.
The base entity contains the minimal properties that each entity has:
- CreatorGroupObjectGuid
- CreatorUserObjectGuid
- TimeZone
- Longitude
- Latitude
- ObjectTypeObjectGuid
- ObjectDataId
- Deleted
- DeletedUserObjectGuid
- ClientObjectGuid
Workflow category ...: Specifies the category of a workflow. Each workflow type can be categorized as follows:
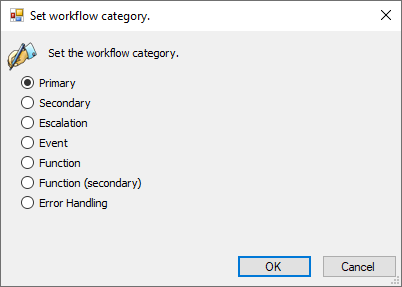
- Primary: This is the main workflow type. It should be used as the starting point for workflow items.
- Secondary: This workflow type is a subworkflow, which can be triggered from a primary workflow.
- Escalation: If, for example, a ticket or task has escalated due to a SLA/OLA assignment, this workflow type can be used.
- Event: This type can be used for events that require the redirection a workflow item.
- Function: This workflow type is a subworkflow with definable input and output parameters. It can be triggered from another workflow.
- Function (secondary): This workflow type is a subworkflow. It can be triggered from a function workflow.
- Error Handling: If unhandled errors occur that would block a workflow item, the item can be moved to such a workflow.
Configure workflow ...: This option opens a dialog that displays an overview of all plug-ins that have been already added to the workflow. The plug-ins can be configured via this dialog as well.
Validate workflow: Validates the workflow. Misconfigurations will be pointed out.
Save workflow: Saves the workflow and allows for documenting all changes in a separate dialog.
Show workflow GUID: Displays the current workflow GUID. This GUID, however, cannot be modified retroactively.
WebAPI request log: It displays information about all requests made to the Web API. This information can be useful for identifying issues.
Select all: Selects all plug-ins in the workflow. Alternatively, the shortcut [CTRL] + [A] can be used.
Cut: Allows for cutting one or more elements selected in the workflow. Alternatively, the shortcut [CTRL] + [X] can be used.
Copy: Copies an element at the currently selected location. Alternatively, the shortcut [CTRL] + [C] can be used.
Paste: Paste copied or cut elements into the workflow. Alternatively, the shortcut [CTRL] + [V] can be used.
Move plugins beneath the cursor: Moves all plugins located below the mouse pointer downward.
Move plugins right of cursor: Moves all plugins to the right of the mouse pointer further to the right.
Create a new workflow
The button New workflow (see Creates a new workflow.) allows for creating new workflows. This opens a new dialog in which the categorization and the name of the new workflow must be entered.
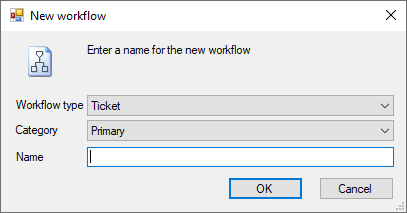
Workflow type: See Interface
Category: See Interface
Name: A workflow name is entered. If several languages are activated, these must be entered as localized languages.
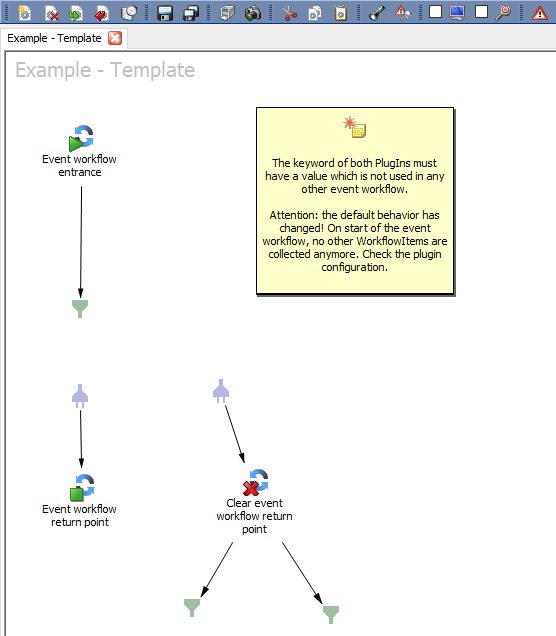
After OK the corresponding template of the designer appears (depending on the type and the category of the workflow).
Example: New workflow
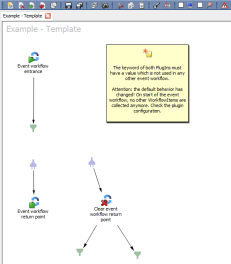
Workflow type: Ticket
Category: Event


 Copyright (c) 2000-2026 Isonet AG