Overview of the Expenses
The overview of the expenses shows all expenses that have been created. The permissions defined for the current user determine what expenses for which groups and what expense types for which projects are displayed in the overview (see also Related Topics).
The expense overview can be accessed by clicking Expenses in the navigation bar.
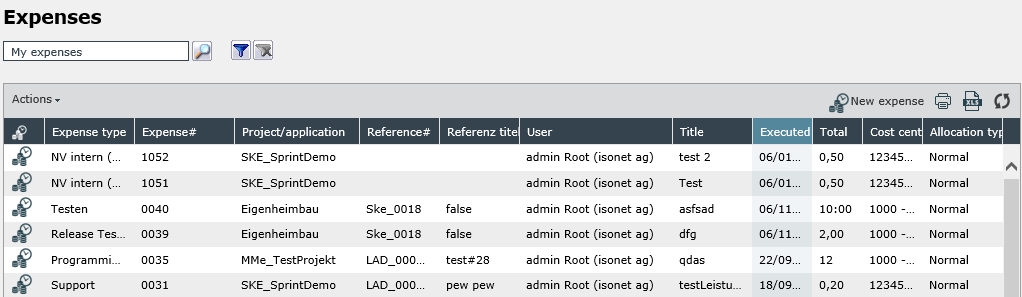
Above the expense overview the expense filter is located on the left side. Below the filter the Actions menu can be found for deleting and copying expenses as well as for assigning expenses to a ticket and for booking several expenses at a time. Buttons for booking new expenses, for printing the expense overview and for exporting expenses to an Excel file can be found on the right side of the screen.
The Actions Menu
If an expense has been selected in the list, the Actions menu provides several actions for expense treatment:
Delete expenses
The expense that has been selected in the list can be deleted from the system by selecting Delete in the Actions menu (several expenses can be selected by holding the [CTRL] key).
Copy expenses
The expense that has been selected in the list can be copied by selecting Copy expense in the Actions menu, which opens a new dialog that already contains all information as specified in the initial expense. Connections to tickets and tasks are nevertheless inherited without change.
Assign expense(s) to ticket
If one or more expenses shall be assigned to a ticket, these expenses need to be selected in the expense overview (several expenses can be selected by holding the [CTRL] key). When the entry Assign expense(s) to ticket is selected, a dialog is opened where the user can enter the desired ticket number the expense shall be assigned to.
For this purpose, it is possible to use the auto-complete so that, for instance, only CR_002 has to be entered in order to list all tickets with this string.
Leading zeros can be left out. Thus, for example, entering CR_2 results in an output containing all tickets beginning with CR_02 or CR_002.
This option is only available if the executor has the permission to use the action Book expense in a ticket.
Book multiple expenses
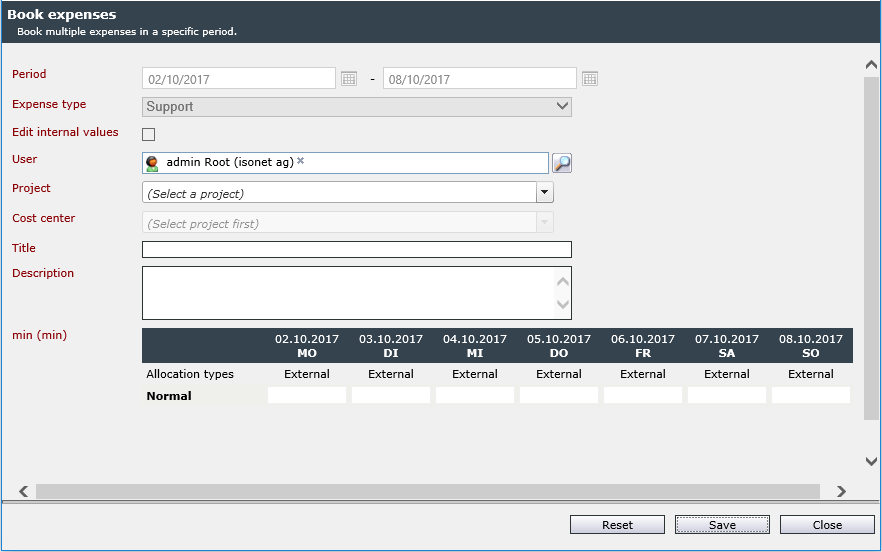
This option allows for booking several expenses at a time. After selecting the period and expense type, an expense can be created for each day within this period and for every allocation type. The expenses are created by clicking Save.
Booking and Managing Expenses
Expenses can be booked either in the expense overview without relation to a task or ticket or within a task or ticket. The following examples will explain the approach for both options.
Booking Expenses in the Expense Overview
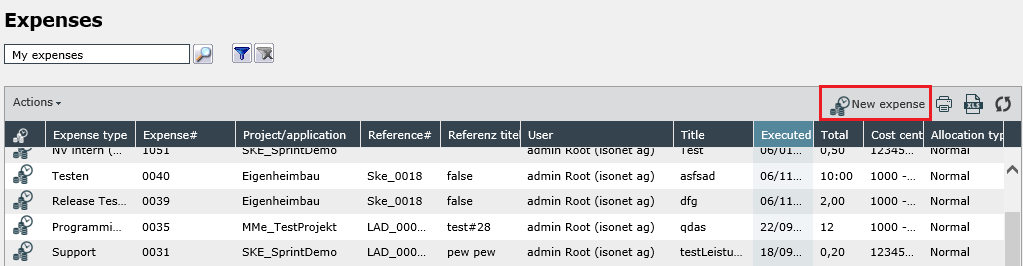
In the expense overview an expense is created by selecting New expense, which opens a new dialog to enter all necessary information for expense creation.
The following fields are available:
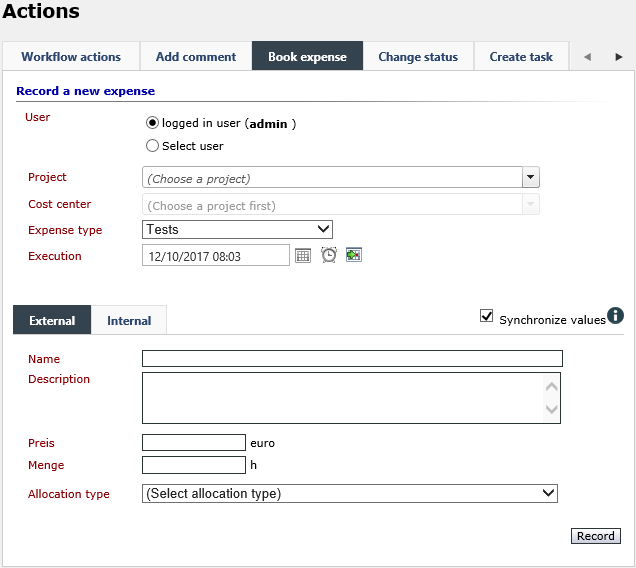
User: Defines the user the expense has been created for, which usually is the executor. If an expense shall be created for another user, this user can be selected by using the user browser. Additionally, the user requires authorization for creating expenses.
Project: Allows for selecting the desired project which has been configured in the Settings.
Cost center: Allows for selecting the desired cost center that has been configured in the project.
Expense type: Allows for selecting the desired expense type.
Execution time: Contains the date the service has been performed at.
As soon as this information has been entered, further values can be entered. Please note that there is a distinction between external and internal expense information. The option Synchronize values allows for using the same specifications for internal and external values.
Title: Contains the name of the expense.
Description: Contains the description of the expense.
Variables: The values in these fields may differ according to the variables that have been created for the expense type used for this expense.
Allocation type: The value in this field depends on the allocation types that have been created for the selected expense type.
The expense will be created after clicking Save.
Managing Expenses within Tasks or Tickets
Expenses can only be booked within tasks or tickets, if the corresponding action has been defined in the task or ticket schema (Book Expense) and if the task or the ticket obtain the correct status.
Via the Actions Tab
In the Actions tab the tab Book expense is displayed as soon as the action is available (actions can be named individually). Depending on the configuration in the ticket or task schema the dialog for booking an expense is opened. The fields to be filled in are identical with the fields for expense creation in the expense overview.
Via the Expense Tab
The Expense tab shows an overview of all expenses that are linked to a task or ticket. Adding a new expense can be effected in the same way like in the Actions tab. In the top right corner the button Book new expense is located.

By using the Actions menu, it is possible to create expenses for the respective ticket or task and to copy or delete the expenses.
Via the Overview Tab
An additional option is creating expenses in tickets directly via the history entries under Overview. Whenever comments are entered or status or user changes performed manually, expenses can be booked via these actions. Next to the history entry, a button for booking an expense can be found.
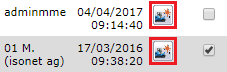
After a click on this button, a new window will open, in which an expense can be created. Possible default settings for expenses saved in the ticket will be taken into account in the process and filled in automatically.


 Copyright (c) 2000-2026 Isonet AG