Dispatching Rules
The 446 Plattform® allows for defining rules to be used for dynamically configuring the system. These rules consist of one or multiple parameters (variables) and one or multiple nested conditions. For example, recipients of e-mails can be determined, values calculated or decisions made in the workflow.
These conditions decide, which values will be set in the respective parameters. These parameters can then be used at various locations in the system, e.g. in order to control switches in the workflow.
The dispatching rules can be configured in the Workflow Management (Settings > Workflow Management > Dispatching & Rule Management).
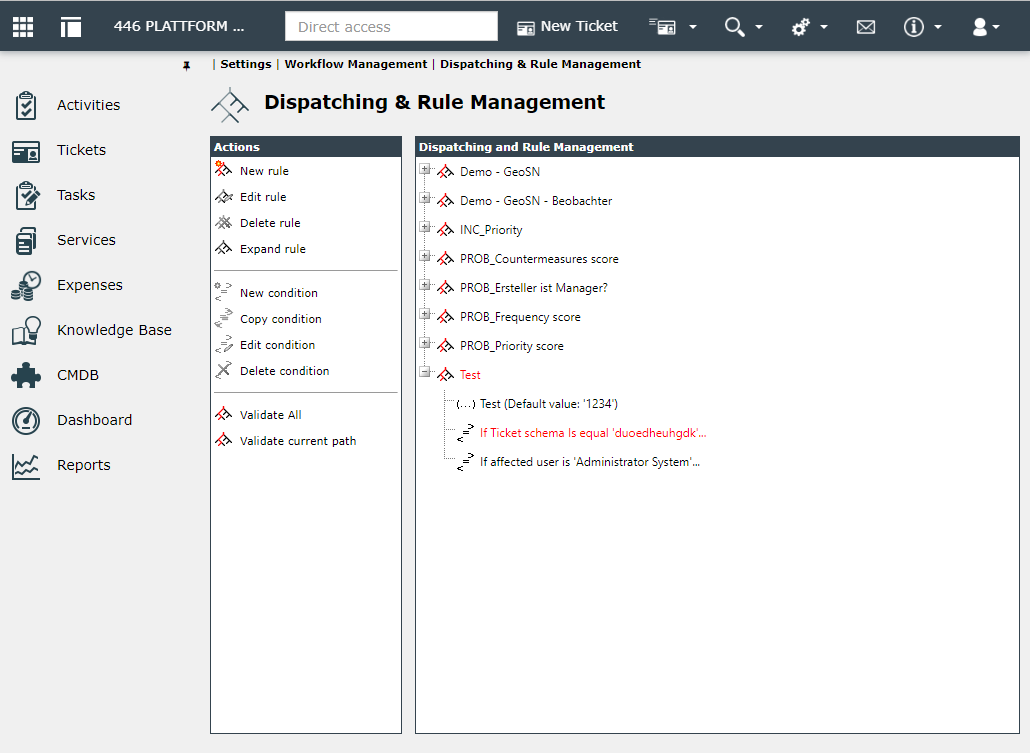
Dispatching rules overview
On the left is the action bar, on the right the overview of already configured rules.
The rules with certain conditions and parameters can be created here. They can be then used in various workflow plug-ins.
The different types (rule, condition, and parameter) can be identified in the overview via their icons.
| Icon | Description |
|---|---|

|
Shows that the object is a dispatching rule. |

|
All objects that are conditions are marked with this icon. Conditions can only be created within dispatching rules and other conditions. |

|
All objects with this icon are parameters. Parameters can only be created within a condition. If a parameter is created directly below a rule, it becomes a parameter default value. |

|
This icon denotes a parameter default value. Parameters created directly below a dispatching rule become default values automatically. The default value is the value that will be set if none of the conditions of the dispatching rule apply. |
For a better view, rules and conditions can be expanded. The title of Invalid rules and condition items is colored red.
Managing Rules
A new rule can be added via the button New rule in the Actions bar on the left. All other actions in this bar will be deactivated until either an existing rule or a condition of a rule is selected.
First, a name and a description have to be defined for the new dispatching rule (if multiple languages are activated, the localization buttons will be displayed as well). Via a click on OK, the new dispatching rule is created.
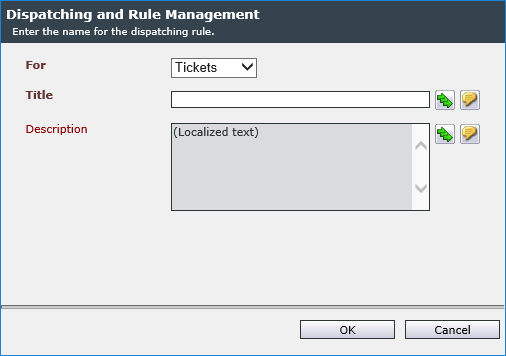
After the rule has been created, a default parameter is to be created first. For this purpose, the rule has to be selected and then the now active button New parameter in the Actions bar used.
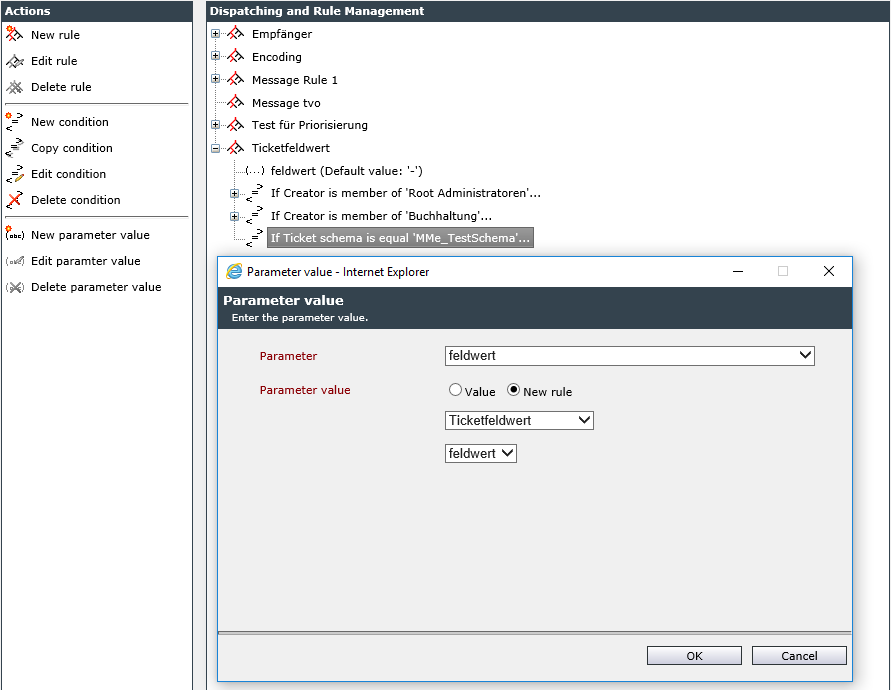
Subsequently, the following data can be entered here:
Parameter name: The name for the new parameter. The name is necessary for configuring plug-ins in the workflow, for example.
Data type:The necessary data type to be used can be selected from the types Text, User, or Time zone.
Default value: Defines whether the default value is to be set by this parameter (in this case, the default value can be selected via a text field, a user browser, or a drop-down list) or via another, already created rule. In this case, the rule and default value can be selected below the field.
After a default value has been created for the rule, conditions for the rule can be defined. For this purpose, select a rule and click on New condition. In the following dialog, the condition can be defined.
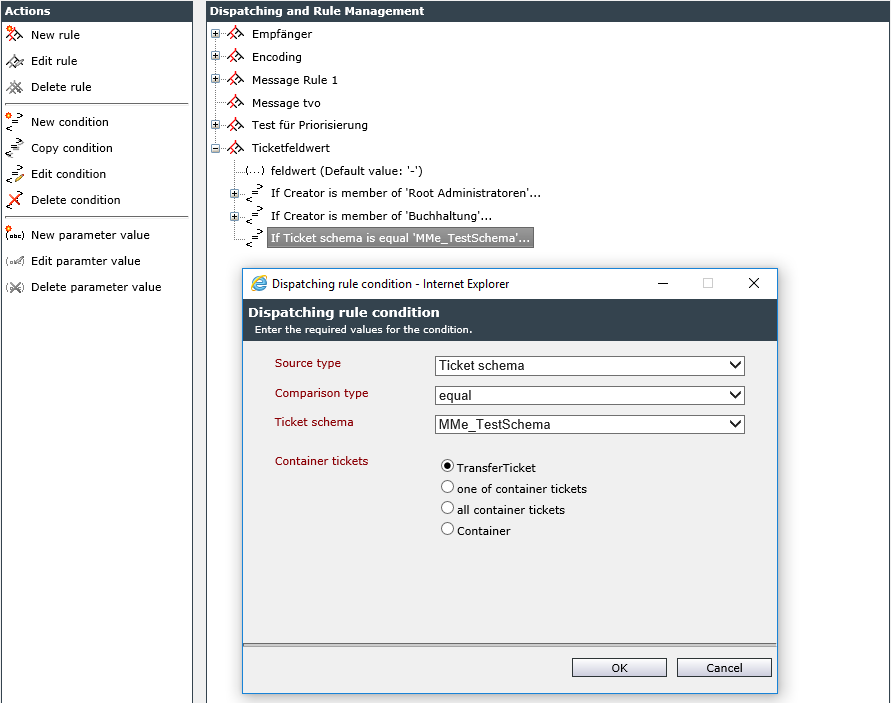
Depending on which source type has been selected, different settings can be made here.
Source type: For a first condition, the options User or Ticket schema are available. (If a ticket schema has been already selected in a superordinate condition, a ticket field can be selected instead of a ticket schema).
User:
Comparison type: Offers various comparison types, e.g. Affected user is/is not or Creator is/is not member of.
Value: The value here can either be a fixed, defined user or group or be determined dynamically via an expression as an alternative, e.g. by reading out a ticket field, the ObjectGUID or the name of the group. Available expressions can be found in the Expression Reference.
Ticket Schema:
Comparison type: The available comparison types here are equal and not equal.
Ticket schema: One of all the ticket and process schemas available can be selected here.
Ticket Field:
Ticket field: If a ticket schema has already been selected in a previous, superordinate condition, a ticket field contained in the ticket schema can be selected here instead.
Comparison type: Various comparison types are available here.
Ticket field value: Depending on the ticket field type used, a value to be contained in the field can be specified here.
Container Tickets: Specifies, which ticket the dispatching rule is to be applied on, whenever a workflow item of a container passes through the plug-in using this rule later on.
After the conditions have been configured, they can be saved by clicking OK.
You can add more conditions below the rule you just created. These conditions are then linked to the existing condition by AND, which means that all conditions must be met for this branch to be considered True.
All conditions on a level below another condition, on the other hand, are provided with an OR link. This means that only one of these conditions must be fulfilled so that the respective branch can be used.
Conditions on the same level can be sorted later by drag and drop condition A to condition B. This will place A under B.
The order of the conditions is important, since a comparison with the True result will abort the condition queries. Conditions below the query leading to the termination are therefore no longer taken into account.
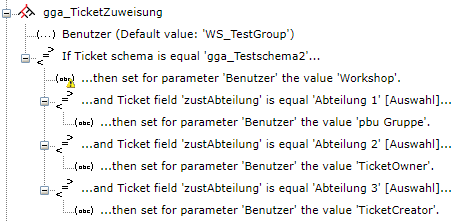
In this picture, you can see the two different possible links. The user is changed accordingly if one of the three conditions is fulfilled. If none of the conditions applies, the default value WS_TestGroup is used.
Note:
If a dispatching rule matches on one level, then no other conditions on the same level will be checked. If no sub conditions match, the main condition remains valid.
After the dispatching rules have been configured, they can be used in various workflow plug-ins, messaging schemas and ticket actions or evaluated by expressions.


 Copyright (c) 2000-2026 Isonet AG