Use
The use of 446 Plattform® WebAPI is handled by the Postman software solution based on the creation of a ticket and a service.
The following requirements must be met:
- The Postman software is installed (Download: https://www.getpostman.com/).
-
A user who has the right to book services on the 446 Plattform® must be set up.
-
A token is required to authenticate the 446 WebAPI.
- Requirements
The following requirements for using the WebAPI must be met:
- The Postman software is installed (Download: https://www.getpostman.com/)
- Configured and active OAuthClient app in the 446 Plattform® (Settings > Administration > Apps) - see also Create OAuthClient app
- Users, with appropriate permissions in the 446 Plattform® and access to the configured OAuthClient app - see also Permissions for using the app
- OAuthClient-App
To use the WebAPI outside the 446 Plattform®, an OAuthClient app is required, which must be configured in the 446 Plattform®. It is only possible to authenticate to the WebAPI using the App ID and App secret generated there.
Login with an admin user and navigate to Settings > Administration > Apps. Depending on the license installed, a certain number of OAuthClient apps can be created and configured here. The default settings for the different licenses are as follows:
- Standard Edition: No app possible
- Enterprise Edition: One app possible
- Ultimate Edition: Three apps possible
In addition to the apps available by default, any number of apps can be purchased.
You can create a new OAuthClient by clicking the Create new app button. The following input window appears:
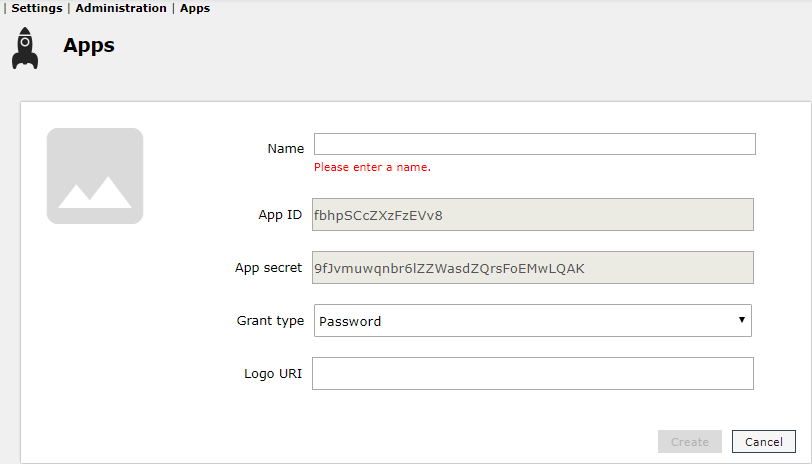
Name: Name of the app (no further function)
App ID: Generated key that uniquely identifies the app
App secret: Generated key to log in to this app (keep confidential)
Grant type: Method of authorization at the WebAPI (choose Password for Postman)
Logo URI: Optional - Link to a logo (no further function)
Finally click on the Create button.
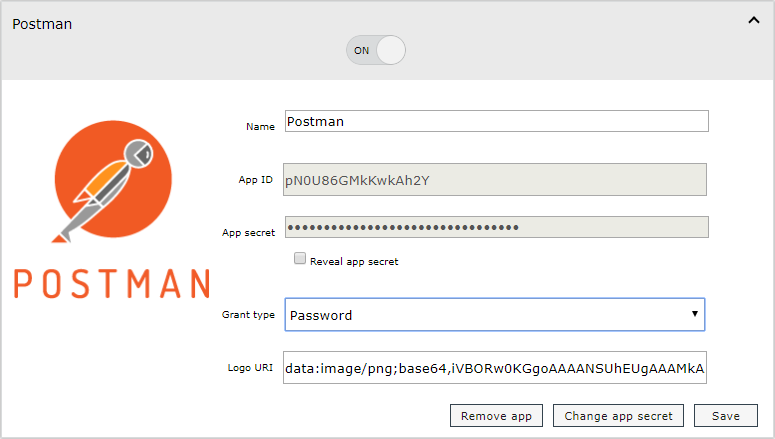
To use the OAuthClient app, the 446 Plattform® user must be granted access. To do this, navigate to Settings > User Management > User Management and select the appropriate group of which the user is a member. Click the Permission button in the left pane to open the permissions dialog for this group (only necessary for non-administrators).
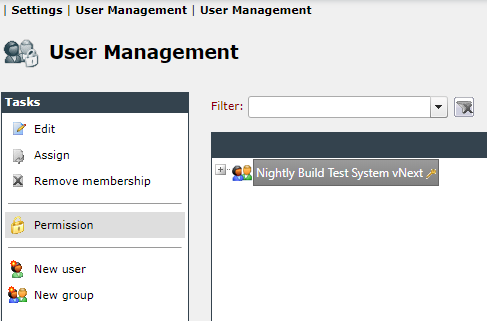
In the permissions dialog on the General > Apps tab, access for the group can be granted to the OAuthClient app:
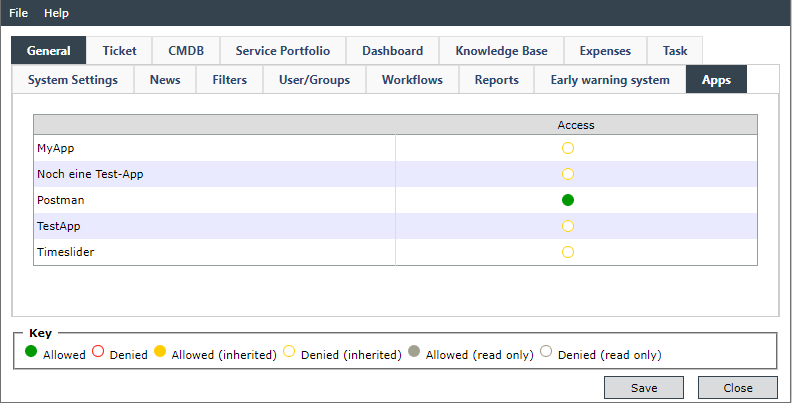
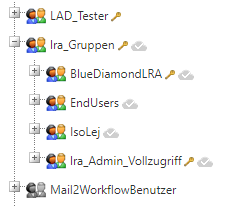
As soon as the corresponding group has access to an app, it receives a cloud icon in the user tree:
- Token für Authentifizierung
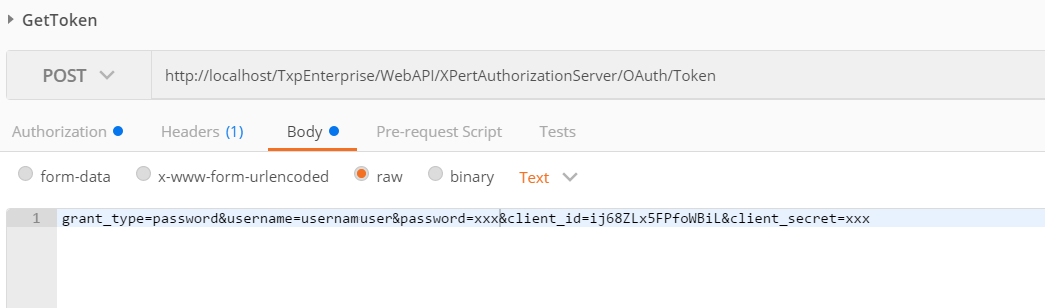
Web API Methode: POST
Web API Url: http://<446 Plattform Url>/webapi/XPertAuthorizationServer/
Body (raw/text)
grant_type=password&username=<Plattform User>&password=<Passwort> &client_id=<APP ID des OAuthClient>&client_secret=<APP Secret des OAuthClient>
Response:
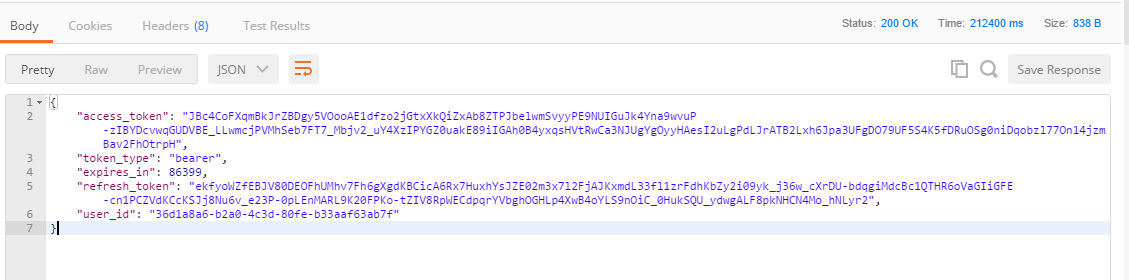
"access_token":
"JBc4CoFXqmBkJrZBDgy5VOooAE1dfzo2jGtxXk
- Creating a Ticket with the 446 WebAPI
WebAPI method: POST
WebAPI Url: http://<446 Plattform Url>/webapi/api/tickets

Headers:
| key: Authorization | value: Bearer <access_token> |
| Key: Content-Type | value: application/json |

Body (raw/json):
CreateTicketModel (JSON)
{
"SchemeObjectGuid": Guid, GUID of the ticket schema "AffectedUserObjectGuid": Guid, GUID of the affected user "AffectedGroup ObjectGuid": Guid, GUID of the affected group (optional) "ServiceTransaction DataId": Guid, Data ID of the service transaction (optional) "Fields": [TicketFieldModel], Array of ticket fields (no passing: specify empty array "[]") "Cis": [Guid], Array of CI ObjectGUIDs (no passing: specify empty array "[]") "OriginTicketObjectGuid": Guid, ObjectGUID of the origin ticket (optional) "Files": [AddFileToTicketModel], Array of files (no passing: specify empty array "[]")
}
TicketFieldModel (JSON) - OPTIONAL
{
"ObjectGuid": Guid, GUID of the ticket schema field "Text": string, Text of the ticket field "Value": string, Value of the ticket field
}
AddFileToTicketModel (JSON) - OPTIONAL
{
"OriginalFileName": string, Filename "Mimetype": string, Mimetype of the file "ContentBase64": [byte], Contents of the file as byte array "Comment": string, Create a ticket comment "TicketFileType": 3 Type of ticket file (1=General, 2=Solution, 3=Creation)
}
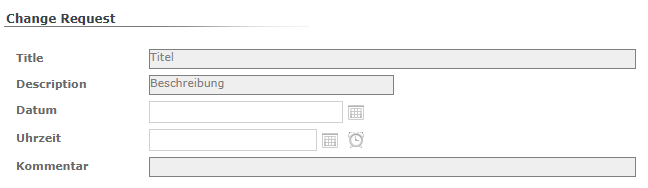
Example 1 - Ticket with ticket fields
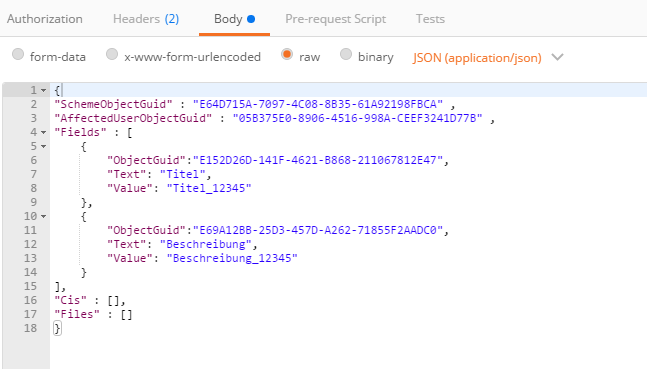
Result Postman: JSON from the created ticket
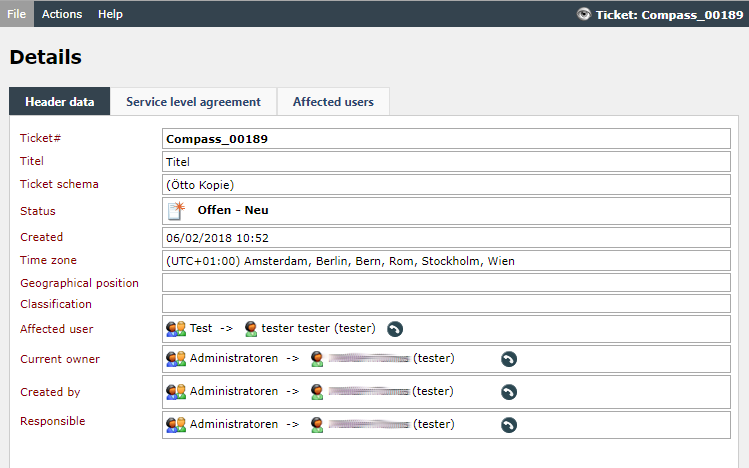
Result on the 446 Plattform®
Example 2 - Ticket with linked CIs
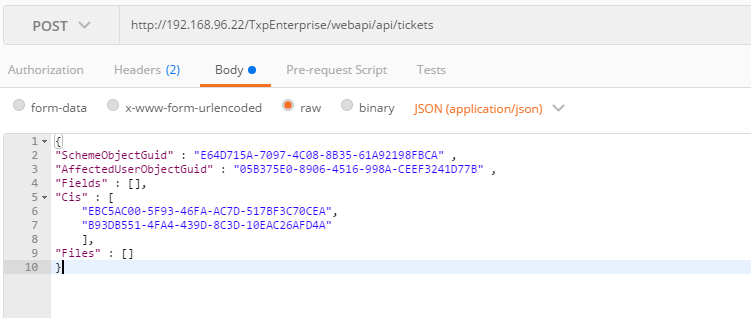
Result Postman: JSON from the created ticket
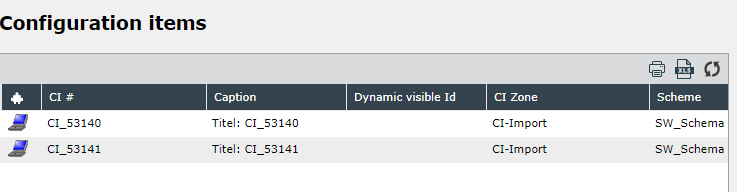
Result on the 446 Plattform®
Example 3 - Ticket with file attachment
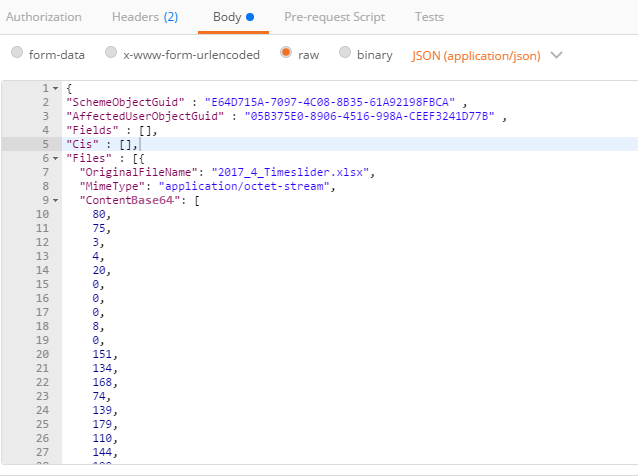
Result Postman: JSON from the created ticket
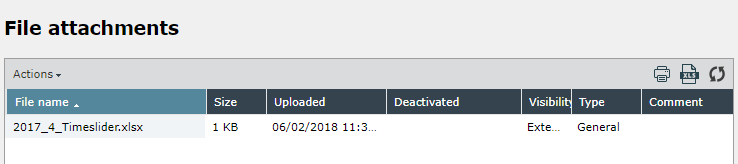
Result on the 446 Plattform®
Possible error messages
- Specified ticket schema does not exist

- Specified CI does not exist or is deleted

- Specified affected user is deleted
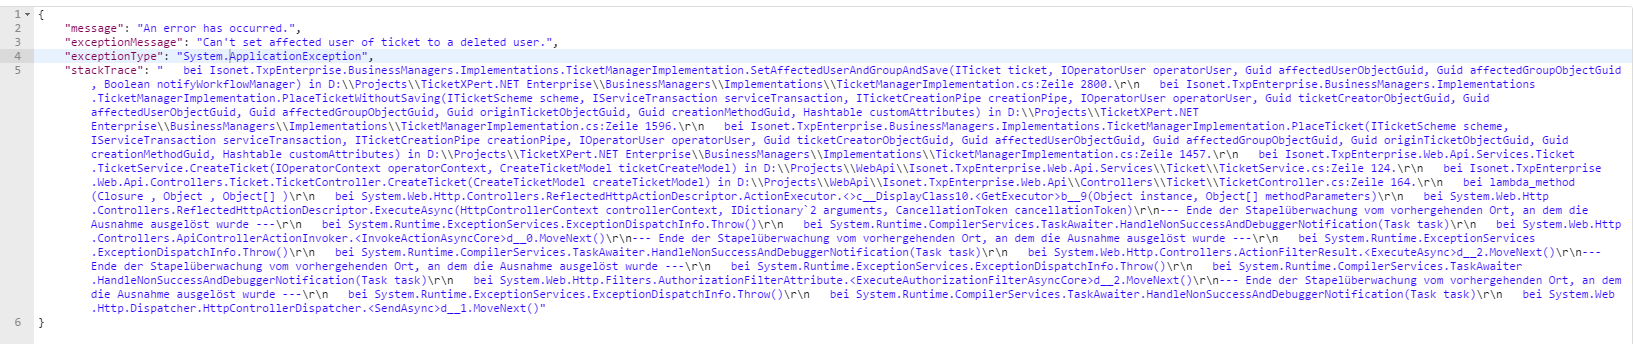
- Specified affected user does not exist (NullReferenceException)

- Incorrect ticket schema field or field does not exist
The ticket is created, but the incorrect field is ignored or omitted.
- Affected user does not exist in the affected group
The ticket is created, but the main group of the affected user is used instead.
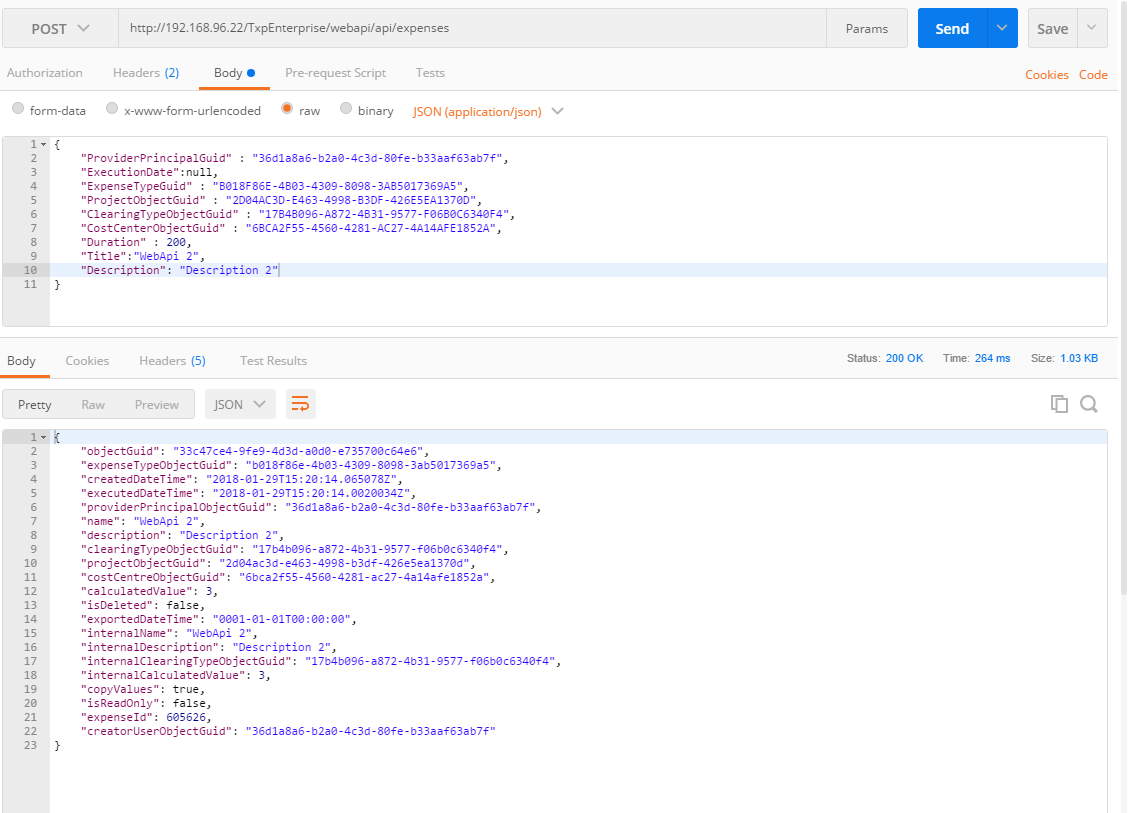
- Creating Performance with the 446 WebAPI
Note:
The current method for creating services is in draft status. You can only post services that have the type Duration and a variable as the result format.
WebAPI method: POST
WebAPI Url: http://<446 Plattform Url>/webapi/api/expenses

Headers:
| key: Authorization | value: Bearer <access_token> |
| Key: Content-Type | value: application/json |

Body (raw/json):
CreateDurationExpenseModel (JSON)
{
"ProviderPrincipalGuid": Guid, GUID of the user creating the service "ExecutionDate": Date, Creation date (UTC), null = now "ExpenseTypeGuid": Guid, GUID of expense type "ProjectObjectGuid": Guid, GUID of the project "ClearingTypeObjectGuid": Guid, GUID of the settlement type "CostCenterObjectGuid": Guid, GUID of the cost center "Duration": number, Duration in seconds "Title": string, Title of the service "Description": string, Description of the expense "TicketObjectGuid": Guid GUID of a ticket (optional)
}
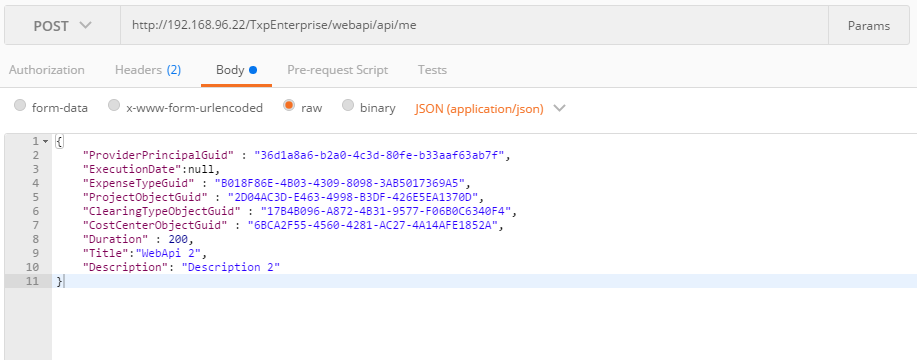
Response: JSON object, the newly created service or error message
Note:
The cost center used must be bookable directly (outside of Ticket/Task).


 Copyright (c) 2000-2026 Isonet AG