Configuration
The configuration of Mail2Workflow includes two areas - the configuration of the e-mail account and the configuration of a workflow.
Summary
You will need:
- Access the Mail2Ticket configuration under Settings > Messaging & Collaboration > Mail2Ticket
- Access to workflows under Settings > Workflow Management > Workflow Management
-
Configuration data (user name, password) for an e-mail account (Exchange, POP3 or IMAP)
- A ticket schema used for ticket creation
E-mail account
The configuration of a Mail2Workflow account is done in the same dialog as the configuration of a Mail2Ticket account. The only difference is the configuration of the processing of an incoming e-mail.
Preferences
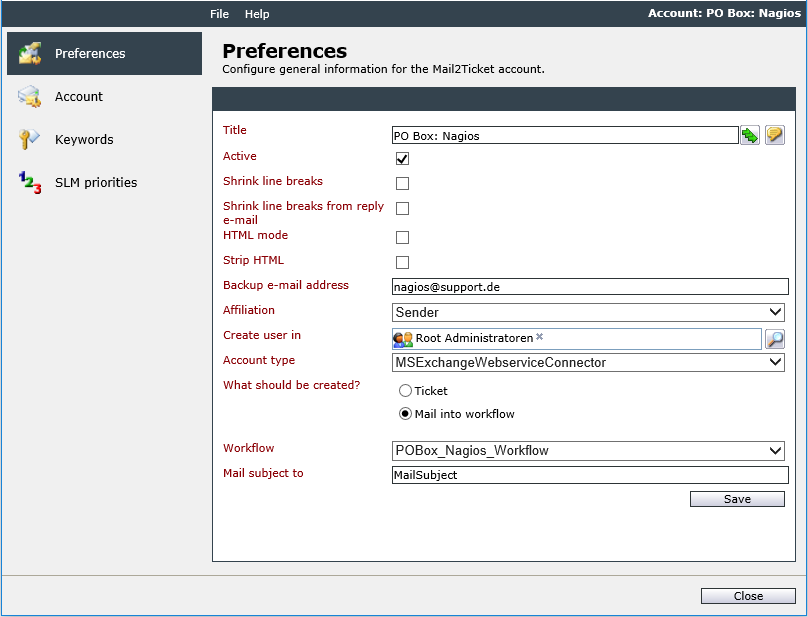
Under Settings > Messaging & Collaboration > Mail2Ticket, an existing account can be opened or a new account created. The top area is the same for both types of e-mail processing. The What should be created? option in the lower part of the dialog, you define whether Mail2Ticket or Mail2Workflow should be used. If the option Mail into workflow is selected, a workflow of the type Message is selected. A data field name must be specified in the Mail subject to field. This data field contains the e-mail subject in the workflow and can be used for the further processing via the specified name.
Account
After the basic settings of the account have been made and saved, the other configuration pages of the dialog are activated. On the Account tab, the access information can now be set to the e-mail account.
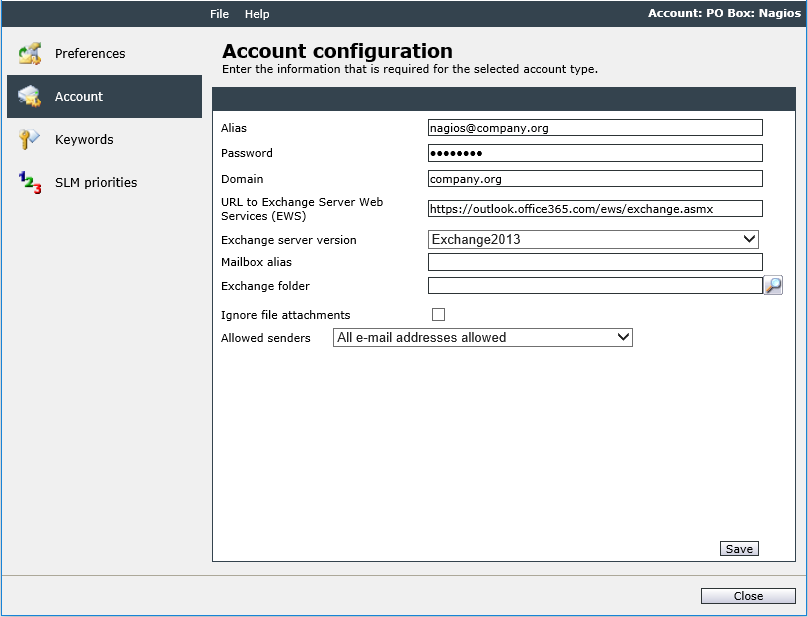
The above figure shows the configuration when you want to connect to an Exchange server (or Office 365). The Exchange server version does not have to be selected. By default, the version 2013 is always used, which in most cases works.
Under Ignore file attachments, you have the option to prohibit uploading the file systems and to specify the addresses (sender Whitelist) under Allowed senders, which are allowed as senders. If, for example, an account is requested, which is theoretically filled only by a sender address (for example, automated status messages from systems in the network), all other addresses can be excluded and spam can be prevented.
Keywords
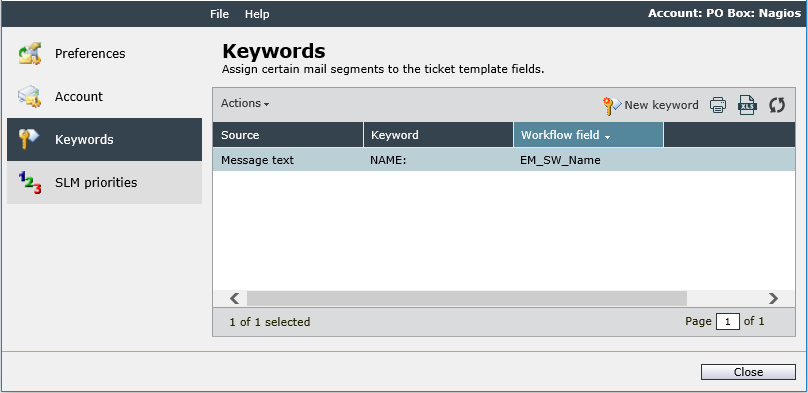
In order to access various content of the incoming e-mail in the workflow, this data must be transferred to workflow data fields. This mapping is done on the Keywords tab. As a source, various header data are available for the e-mail. If the e-mail contains defined keywords in the actual e-mail text, these can also be read out and mapped to various workflow data fields. This is e.g. often with automatically generated e-mails.
The following figure shows a sample e-mail sent by an automated system as soon as a server is no longer accessible on the network.
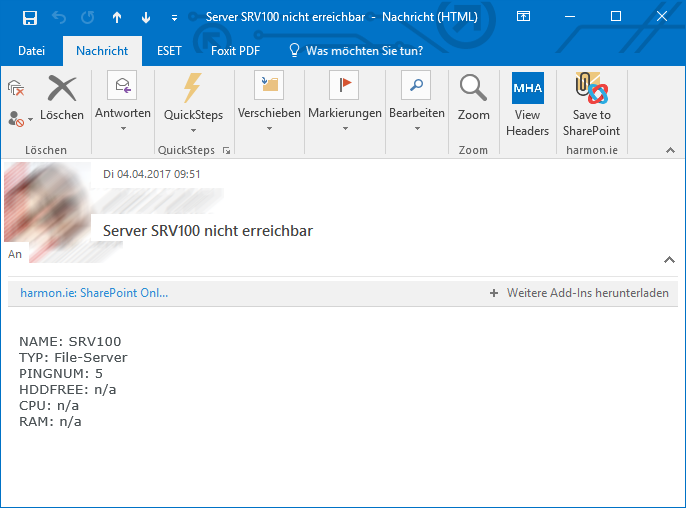
The e-mail contains various keywords which provide more detailed information about the server. These keywords can now be mapped to workflow data fields in order to work with this information in the workflow.
The dialog box, where the configuration can be made, opens with the New keyword button on the Keywords tab.
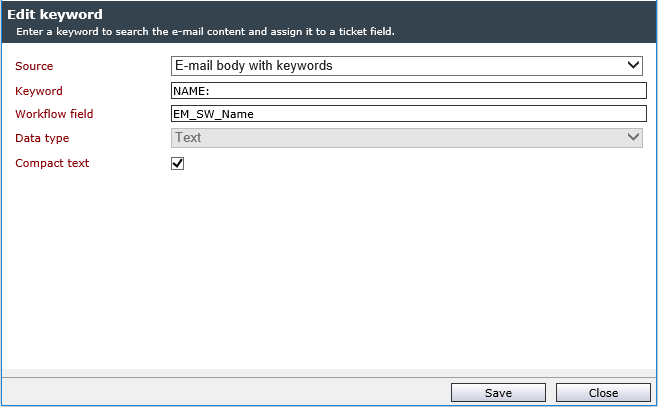
In the figure above, the source of the e-mail text (body) was selected as the keyword NAME:. This keyword is also found in the e-mail shown above. A unique identifier for a data field must be specified in the Workflow field. This name can be accessed in the workflow.
In this case, the data type is automatically set to Text, since data fields can only contain text. The Compact text option automatically removes spaces and line breaks.
Note:
A keyword is always searched completely in the text. In the upper section, the keywords were all indicated with a colon (also shown in the figure above with all configured keywords). The keyword is always searched for the entire text (e.g., NAME:). The value of the keyword thus begins only after the colon. If left out, the colon would be interpreted as part of the value.
When the keywords are parsed, all characters are interpreted as values until the next keyword is recognized or the end of the text has been reached. It would therefore be possible to write the entire text in the e-mail one after the other:

Warning:
The data field in which the subject of the message is written must not be reused in the keyword mapping.
Workflow
To make a workflow available for e-mails, it must be of the message type. To check and, if necessary, adjust this setting, right-click on a vacancy in the workflow and choose Workflow type, and then Workflow category. The category must be Primary.
Subsequently, the plug-ins in the catalog are automatically filtered. Only those that are available in a message workflow are displayed. The two most important are:
| Icon | Description |
|---|---|
|
Create new ticket
|
Creates a new ticket from an e-mail. |
|
Attach message to ticket 
|
Hereby an e-mail, e.g. in response to an e-mail previously sent from the system, can be attached to an existing ticket. |

The following is a simple workflow for the processing of e-mails. The start and end plug-ins are mandatory. The Create new ticket plug-in is responsible for the actual processing.
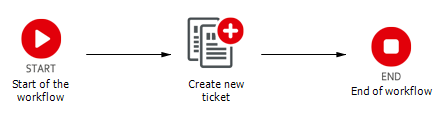
Additional plug-ins can be added at any time to customize the processing.
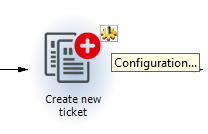
The configuration of the Plug-in Create new ticket includes the mapping of the e-mail content (data fields) on ticket fields. To open the configuration dialog, move the mouse pointer over the plug-in and click on the appearing gear.
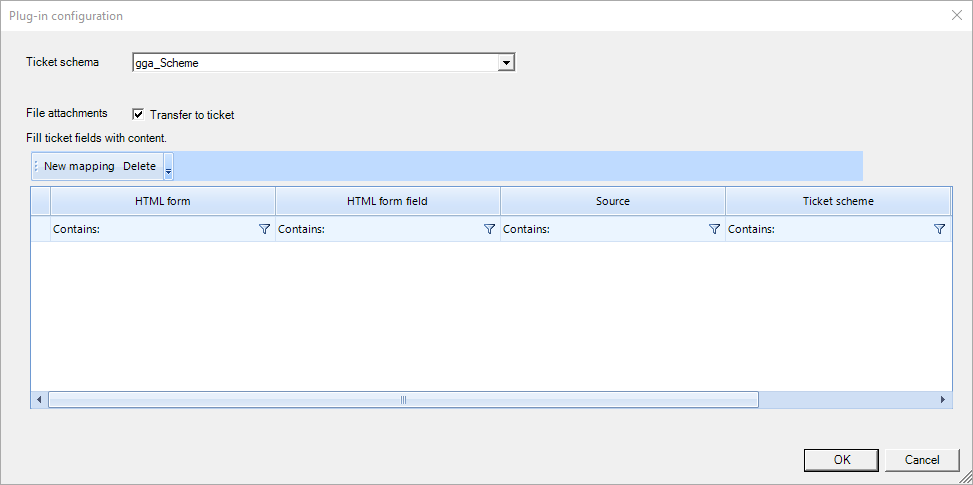
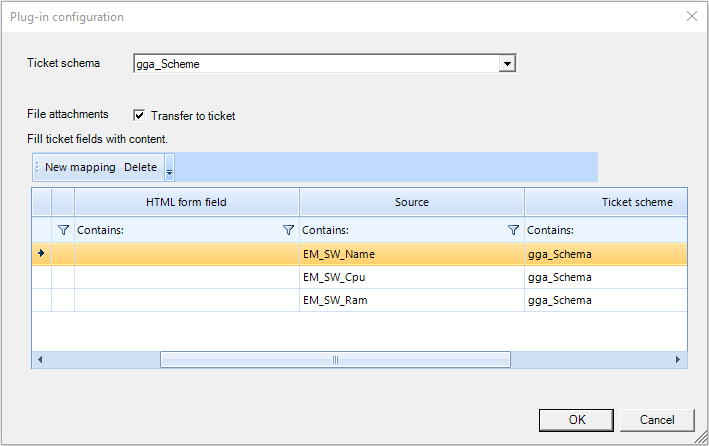
Under the item Ticket schema, you select the schema to be used for ticket creation. Below, there is the option File attachments, which indicates whether file attachments of e-mails should be attached to the ticket. The mapping table is used for the main part of the dialog. Here, the data fields created in the account configuration are now mapped to ticket fields.
A click on New mapping opens the dialog for specifying the data field and the selection of the target field in the ticket schema.
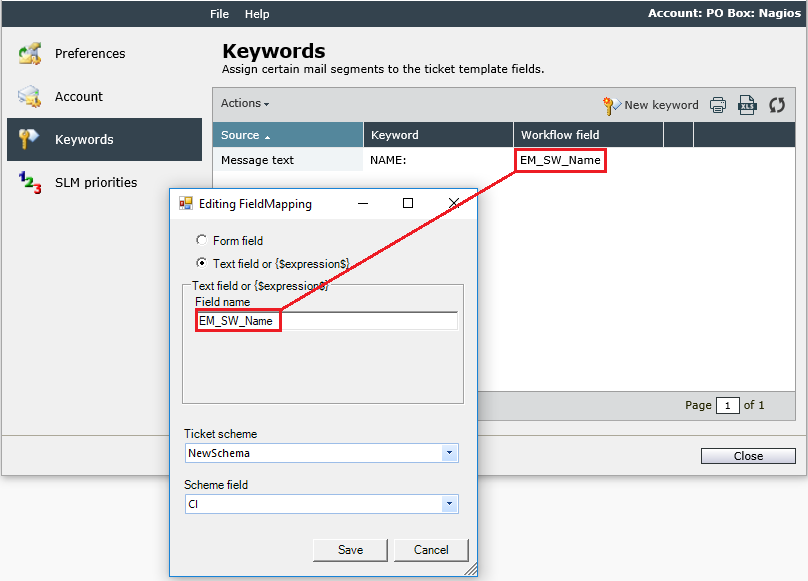
To transfer the data fields to ticket fields, select Text field or ... at the top. The name must be entered in the text box below, which has been specified as a Workflow field on the Keywords tab in the account configuration.
In the lower area of the dialog, the ticket schema (already preselected) must be selected and then the ticket field in which the value is to be stored.
If all data fields that are to be transferred in ticket fields are configured, the dialog with Save can be closed.
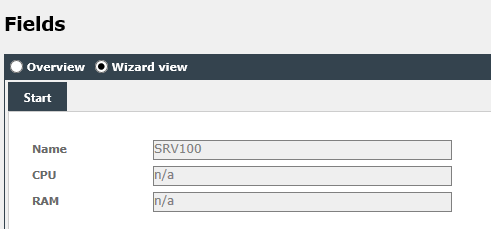
A ticket is created and the data is accepted when the configuration is set to Active and the displayed e-mail has been sent to the mailbox to be monitored.


 Copyright (c) 2000-2026 Isonet AG