Projects
The configuration of projects within the Expense Management is effected under Settings > Expense Management > Projects.
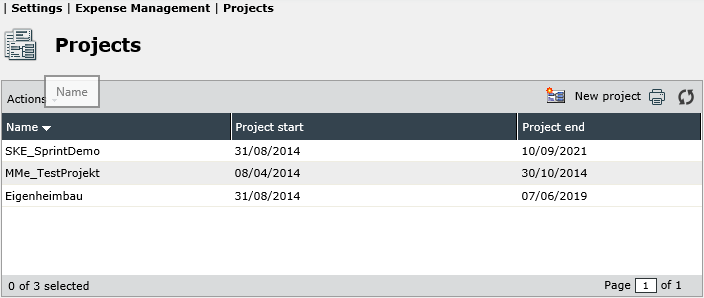
This overview shows all projects created in the Expense Management and contains information about the project name, project type and the duration of the project. Clicking the button New project enables to create new projects. Double-clicking a particular project in the list opens the settings dialog of a project. The Actions menu on the left side allows for copying and deleting projects from the system.
Configuring Projects
The settings dialog of a project is displayed when a new project is created or when a project is opened. The Project tab is the only tab that is active in the settings dialog as long as the settings are not saved.
Tab Project
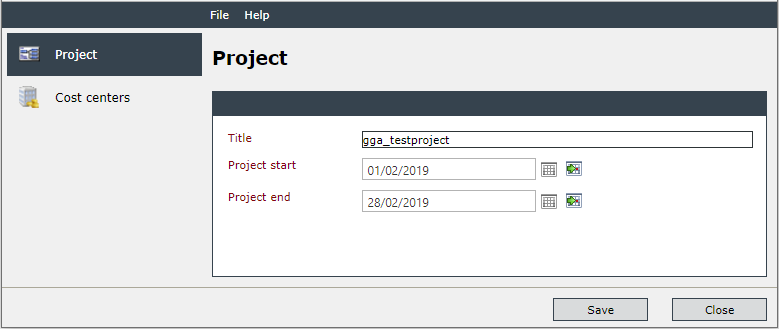
This tab allows for maintaining general project settings, the following fields are available:
Title: Defines the name of the project.
Project start: Defines the start date of the project. It is possible to define a future or a past date. Only if this date has been reached, expenses can be booked into the project.
Project end: Defines the end date of the project. It is possible to define a future or a past date. If no end date is set, the project continues as long as it is ended manually of when an end date is set. If the end date is reached, no further services can be booked for the project.
Tab Cost centers

The Cost centers tab allows for configuring project-related cost centers. For each cost center individual field values can be added additionally.
The following fields are available:
Cost center: Contains an individual number for the cost center for clearly identifying it.
Title: Contains the name of the cost center. If multiple languages are activated in the system, the localization buttons (Use text in all languages and Edit language dependent text) can be used to define the title in all available languages.
Description: Contains a detailed description of the cost center. The description can also be localized.
Start: Contains the start date for the cost center. The date in this field is individually definable and it is not a required field.
End: Contains the end date for the cost center. As of this date, the cost center is no longer available. The date in this field is individually definable and it is not a required field.
Note:
Neither the start date nor the end date are compulsory. If neither the start date nor the end date are defined, the start date and end date of the project are used. If , however, an end date has been defined, this date is considered when creating a new expense. If the cost center is expired, it is not available anymore.
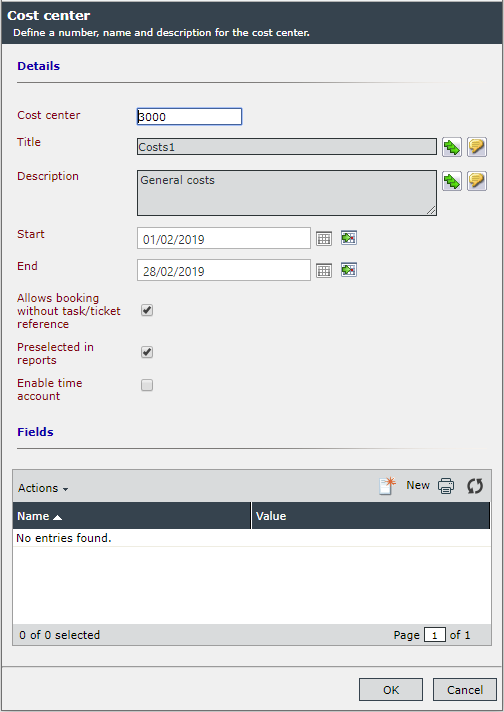
Allows booking without task/ticket reference: If this checkbox is activated, expenses can be booked without relation to tickets and tasks directly in the expense overview.
Preselected in reports: If a report is created that evaluates cost centers, the cost centers this checkbox has been activated for are already selected.
Enable time account: This option activates an account on an hourly basis. This option can be used for the reporting of expenses, for example. It is thus possible to determine the account balance of a particular package/project at any time.
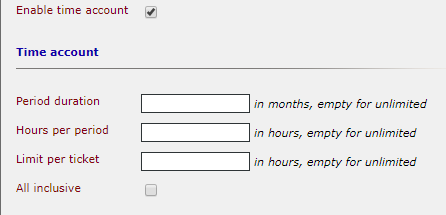
No entries are required in the three fields. If the fields are empty, the limit is set to unlimited. 
The following information can be specified for an activated hourly account:
- Period duration: After the number of months entered is elapsed, the time balance will be refilled.
- Hours per period: This value defines how many hours per period are available for the time balance.
- Limit per ticket: This value defines a limit for bookable hours per ticket. Expenses that exceed this limit can be output in another color in the report, but are nevertheless bookable in the ticket.
- All inclusive: No function
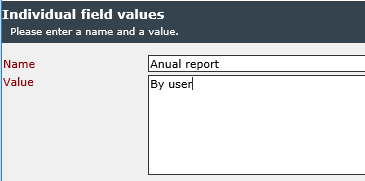
After saving the cost center it is possible to create further pairs of value that are not visible during expense creation, but evaluable on report creation. By clicking the button New in the top right corner of the dialog the value pair creation dialog opens where the following fields are available:
Key name: Contains the name of the value pair (first value).
Key value: Contains the value of the value pair (second value).


 Copyright (c) 2000-2026 Isonet AG