Zone Schemas
Zone schemas are used for entering information specific for the zone on the one hand and for creating a specific default hierarchy on the other hand. This hierarchy in turn is needed for the CI zone import, provided that it is to be based on this default hierarchy.
Note:
Imports can cause complications if the standard hierarchy is deleted or changed. If this is to be done for the standard hierarchy that already exists, this must be agreed with the person responsible.
Zones can be created in various depths and complexities. Additionally, the zone structure can depict either an organizational or geographic structure and thus differs from the schema hierarchy which is subdivided into various sorts and types of items.
Generally, the predefined zone schemas Campus, Building, Floor, and Room are available as a template and as an interlinked default hierarchy in an empty CMDB.
However, if other zone schemas are to be added or if a proprietary zone schema is to be used, proceed as follows:
Under Settings > Configuration Management (CMDB) > CMDB Schemas the entry Zone schemas has to be selected in the tree. The task list on the left now provides the button Add zone schema for creating additional zone schemas:
The following information is to be entered in the now opening dialog:
Name: The name of the zone. Localization buttons will be displayed as soon as multiple languages are activated in the system.
Description: The text stored here is purely descriptive and describes the zone. The localization buttons will be displayed here as well as soon as multiple languages are activated in the system.
Symbol: The icon for the zone schema. The icon can be used for an easier identification during the creation of the zone hierarchy later on. Instead of the preset default symbols, further symbols can be uploaded as well.
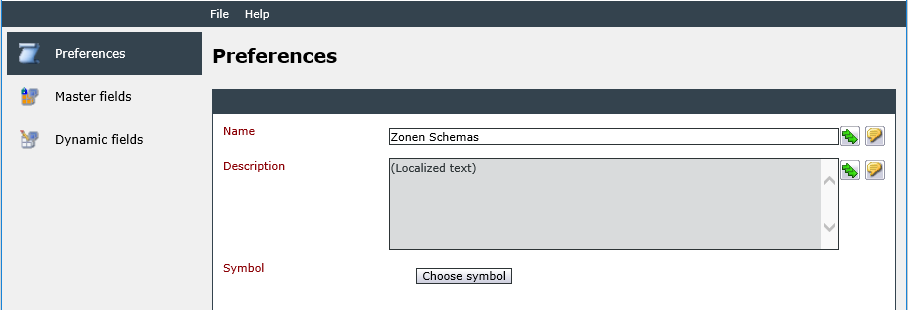
After the first saving, two additional tabs for master and dynamic fields will be available.
Master Fields
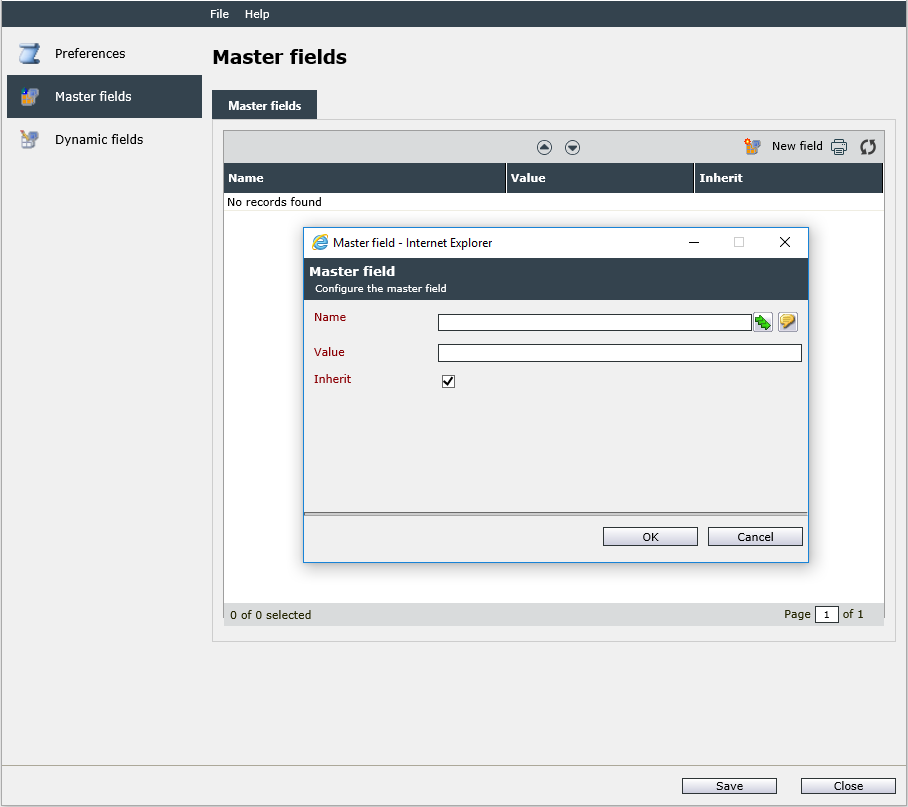
The function of master fields is an information overview, similar to those in CI schemas, which displays the same predefined content for every zone based on this schema.
Via a click on the button New field, a new master field can be created. For this purpose, the Name of the master field is to be entered as well as the Value for this field. If the option Inherit is activated, this master field will be inherited by all zones within the CMDB structure that are below a zone that uses this schema in the hierarchy.
If master fields have already been created, the can be removed via the Actions menu.
If there are multiple master fields available, their position can be changed via the two arrow buttons in the center of the screen.
Dynamic Fields
Using dynamic fields, specific content can be managed and saved for every zone, e.g. a zone specific location ID. During a later import, CIs can be automatically assigned to the zones via such a zone dynamic field (depending on the version, only if the zones have been imported themselves).
Dynamic fields are created via the button New field. The Actions menu, which is only accessible if at least one field has been created, can be used to delete dynamic fields.
If there are multiple dynamic fields available, their position can be altered via the arrow buttons in the center of the view.
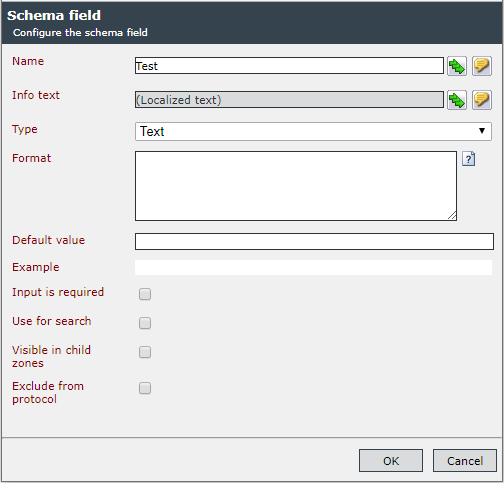
The following information has to be entered for creating a new dynamic field:
Name: The name of the field as displayed in the respective zone left of the field later on. Localization buttons will be displayed as soon as multiple languages are activated in the system.
Info text: This text will be displayed as a mouse over text for the question mark symbol, which is located right next to the dynamic field in the zone.
Type: Various predefined types can be selected here:
- Date: Only date values can be entered via a date input field here.
- Image: This allows an image to be selected and displayed during zone creation.
- IP Address: This field type allows for entering an IP address.
- Link: Via this type, a link can be entered into the field. If an arbitrary text is entered into the dynamic field, it will be automatically transformed into a link after saving the settings.
- Localized text: This type allows for entering text in multiple languages into the field.
- Localized textarea: Via this field type, larger amounts of text in multiple languages can be entered into the field.
- Number: Only numbers can be entered into this field.
- Selection field: This type is used for creating a preconfigured list to select values from during zone creation.
- Service time: This field allows for selecting a service time for the Service Level Management.
- Table: This field type is used to create a table with multiple columns (the content of a row in the configuration will be displayed in a column later on). In the zone, multiple rows can be entered for every column.
- Text: Any text can be entered into this field.
- Text Area: Instead of a text field, a larger text area is made available, which is able to contain larger amounts of text.
- True/False: The dynamic field is turned into a checkbox that can be set active or inactive.
- User Browser: Via the user browser, users can be entered into the dynamic field.
Format: If a certain format is to be specified for the selected type, it can be entered here. Examples for possible formats can be displayed via the small help icon on the right.
Default value: The value entered here will be displayed in the respective field later on and can be subsequently edited.
Input is required: If this field is activated, the dynamic field turns into a required field and has to be filled in before the CI creation can be completed.
Use for search: If this option is activated, the field is included in a Search within the CMDB zone tree. This option is not required in the Extended search.
Visible in child zones: The field is visible in child zones (no inheritance). The information is only displayed.
Exclude from protocol: When activated, no log entries are written for this CI. 


 Copyright (c) 2000-2026 Isonet AG