CI Life Cycles
The life cycle of a configuration item (CI) is defined by the statuses to be passed through and reached as well as their dependencies. Thus, structured status dependencies have to be planned for every life cycle beforehand. It is necessary to define start and end statuses, to make these statuses reachable, and to make sure that every status has further reachable statuses (except the end status).
A life cycle defines such a set of statuses and their transitions and thus, when an affected CI is to have which status. The life cycles can be managed via Settings > Configuration Management (CMDB) > CMDB Life Cycles.
Here, it is possible to define that a CI can, for example, only be moved from the status New to the status Active via the status Test. It is necessary to consider how many types of CIs should and must use a life cycle of their own.
Configuring a Life Cycle
Clicking the New life-cycle button will open a new window, in which a Name and a Description for the new life cycle is to be entered. The localization buttons will be displayed, as soon as multiple languages have been activated on the system.

Only after a click on the Save button, the life cycle will be created and the Status tab will be available. Via the button New status, as many statuses as necessary can be created here.

The following configuration has to be made for every status:
Status description: The name of a status as it will be displayed in the configuration item later on. The localization buttons will be displayed as soon as multiple languages have been activated on the system.
Symbol: The icon set here illustrates the respective status and will be displayed for a better visualization of the status in the detail view, for example. A predefined set of icons is available. However, any other icons can be used as well. They have to be .GIF files at a size of 20 x 20 px.
Start state: Every CI obtains the start status in a life cycle first. There can only be one start status in a life cycle.
Status type: The status type is a rough categorization of the freely definable statuses. The list of status types cannot be edited.
Import ID: This information can be left blank. Import labels are used to uniquely identify the status during the CI import.
After saving the status preferences, the Reachable statuses tab will be available. It can be ignored until all of the required statuses have been created.
Configuring the Status Dependencies
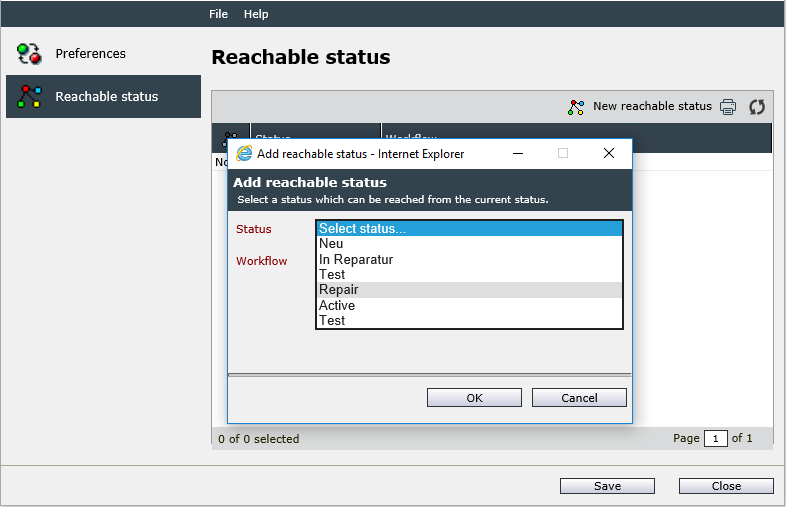
After all of the designated statuses have been created, the transitions between the individual statuses have to be defined. It is possible to define, which statuses can be reached from which statuses. For this purpose, the initial status has to be opened via a double-click and the tab Reachable statuses is to be selected. On this tab, all statuses to be reachable from this status can be added by clicking the button New reachable status. Please note that workflows may be triggered by status transitions (only workflows of the CI type are available here).
A reachable status can be removed by selecting the respective option in the Actions menu.
Example:
Status: Test
Reachable statuses: Repair, Active
After all of the statuses have been set up, the schemas have to be configured.


 Copyright (c) 2000-2026 Isonet AG