Export, Import and Copy
The Workflow Designer allows for the export and import of workflows. The corresponding buttons can be found in the toolbar.
Export
In order to export a workflow, select the button Export to XML.
A click on the respective button opens the export dialog listing all available workflows. The currently selected workflow is selected for export automatically. The button Highlight all allows for selecting all workflows for export. If only some of the workflows are to be exported, they can be checked individually. Clicking on OK opens the saving dialog for selecting the memory location. After the selection of a memory location, click on Save. The workflow will now be saved as an XML file. If several workflows have been checked, a dialog for selecting a directory for the saved workflows will appear. Upon saving the workflows, the file names will be derived from the workflow names and every workflow will be saved as an individual XML file.
Import
If a workflow is to be imported, it is necessary to ensure that the ObjectGUID of the workflow (the workflows unique ID) is not already used in another workflow. For this purpose, the XML file that contains the workflow to be imported has to be opened. An XML or text editor can be used for this purpose.
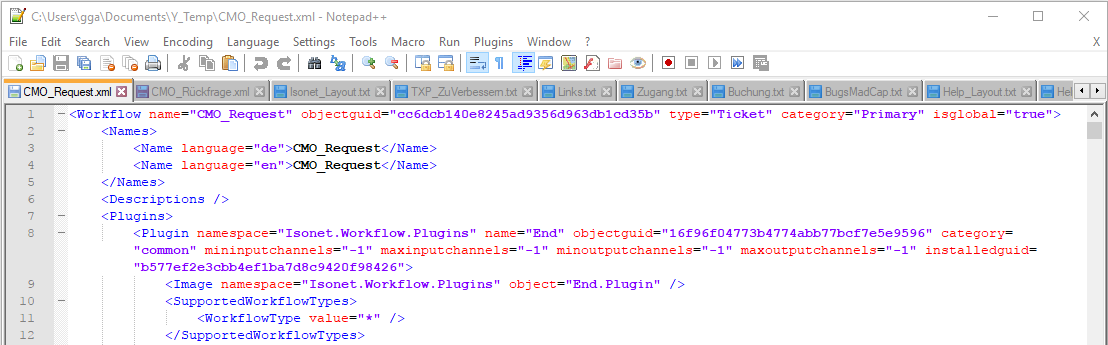
Figure: The selected name, ObjectGUID, and localized names of an example workflow
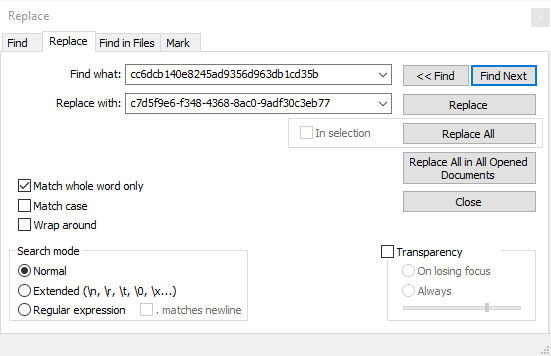
The very first line of the XML file shows an XML node beginning with <Workflow ...>. This node contains the attribute name. This name can be edited if already existing in the system. This node also contains the attribute objectguid. This ID has to be checked as well and edited in case the ObjectGUID already exists on the system. For this purpose, a GUID generator can be used. The GUID generated there can either be used as is or the hyphens between the individual blocks can be removed. Both notations are accepted by XML. In order to replace the GUID, the Replace option provided by the editor can be used. The following figure shows this function for the editor Notepad++:
Note:
It is necessary to ensure that all occurrences of the original GUID from the attribute objectguid are replaced in the XML. Otherwise, the workflow will not be imported correctly.
During this step, the name and description of the workflow can be adjusted as well. For this purpose, the <Names> node and the <Descriptions> node have to be edited in all available languages. However, both of these attributes can also be edited after the import by opening the context menu of the workflow via a right click and selecting either Name ... or Descriptions ....
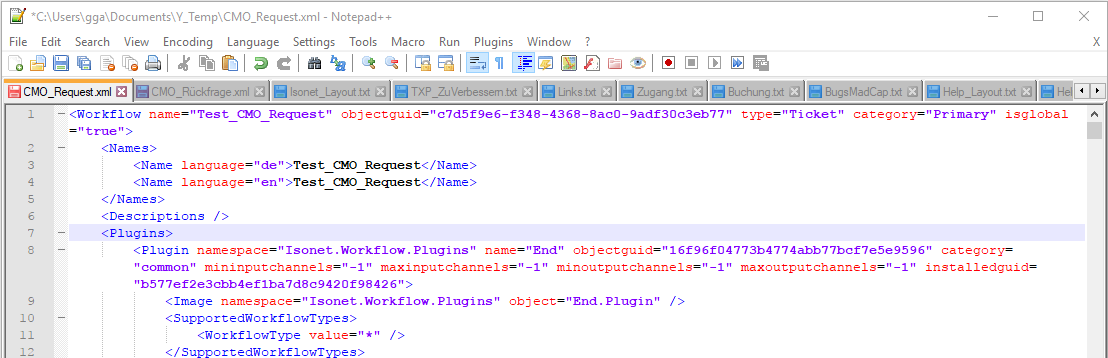
Figure: The already edited XML file is displayed.
By selecting the button Import workflow displaying a green arrow in the Workflow Designer, the workflow can be imported. A dialog for selecting the respective XML file will open.
After selecting the desired workflow, the Open button has to be used. Thew workflow will now be imported. The question whether the workflows are to be reloaded is to be confirmed by clicking Yes. The workflow can now be used.
Copy
In order to copy a workflow, it has to be exported first and subsequently reimported.


 Copyright (c) 2000-2026 Isonet AG