Zones
Manage
Using a predefined or own zone schema, it is possible to establish a zone hierarchy, which can be realized in the CMDB stage by selecting the CMDB module in the bottom bar.
In addition to normal zones that are based on zone schemas as described in the basic configuration it is possible to create top-level zones.
Top-Level and Sub-Top-Level Zones
Unlike the normal zones, top-level zones are "logical". The physical zones like Campus or Building can be nested into these logical zones, e.g. Region, Country or Continent. The logical zones can be nested arbitrarily, but cannot contain CIs. They are displayed in gray in the zone tree.
To create a new top-level zone, the context menu in the zone-tree can be opened (right-click on the respective zone). By clicking New top-level zone in the menu a new top-level zone can be created. In the dialog that is opened subsequently only the name for the top-level zone needs to be entered. After clicking Save the top-level zone is always displayed at the very top of the hierarchy. As soon as this zone has been created, further zones can be added as top-level or sub-top-level zones. Sub-top-level zones cannot contain CIs, but are not limited to the top hierarchy level. They can be created below normal zones. Additionally, it is possible to immediately create a zone, where CIs can be created in.
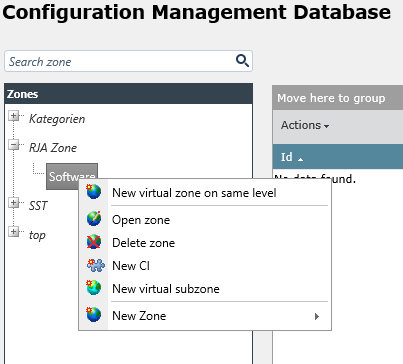
Zones
If no customization has been made to the zone hierarchy, zones can be created by using one of the four zone schemas: Campus, Building, Floor and Room. If further or other zone schemas have been configured, these are available in the context menu. These zones are displayed in black color in the zone tree and can contain CIs.
Note:
Top-level zones can only be created by root administrators. If the zone-tree does not contain any zones, the notification No zones available is displayed. By right-clicking this entry new zones can be created via the context menu.
When a new zone is created from the context menu, it is necessary to define a zone schema the new zone shall be based on. This determines the dynamic and master fields that can be displayed and filled out in the zone.
A new dialog window is opened to enter the name and other zone details.
- Name: The name of the zone as displayed in the zone hierarchy. The localization button will be displayed as soon as multiple languages are activated in the system.
- Description: Contains a descriptive text for the zone that can be localized as well.
- Default: affected user: Defines a default value for new CIs. The user or group defined in this field is set as the default affected user or group for each CI created in the zone.
- Default: supplier: Defines a default value for new CIs. The user defined in this field is set as the default supplier for each CI created in the zone.
- Minimal number of CIs/Workflow: Defines a minimal number of CIs. If the amount of CIs falls below this value, the selected workflow (type: CI Zone) is executed and the zone is moved into this workflow as a workflow item.
- Maximal number of CIs/Workflow: Defines a maximal number of CIs. If the amount of CIs exceeds this value, the selected workflow (type: CI Zone) is executed and the zone is moved into this workflow as a workflow item.
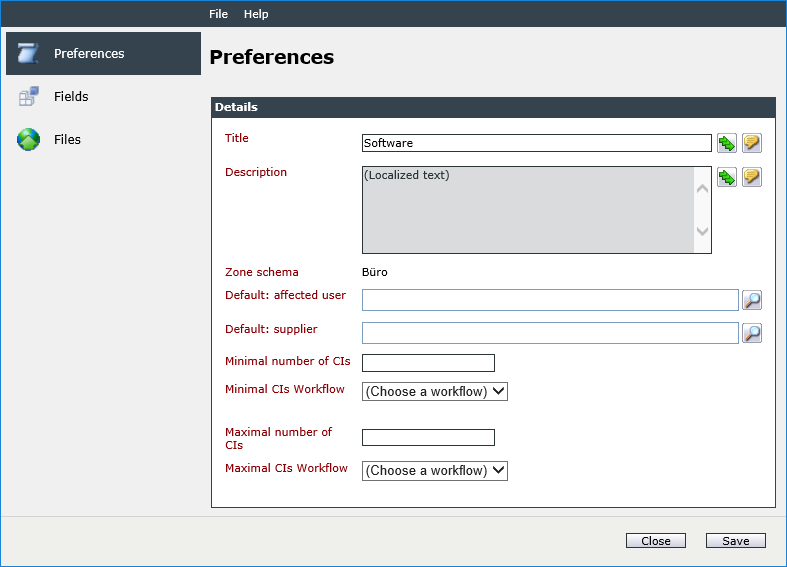
If all values have been entered, the zone is created by clicking Save. The tabs Fields and Files are available. Under Fields the dynamic fields can be edited and the master fields are displayed. Under Files file attachments can be uploaded to be used for all CIs in this zone or for a zone in general.


 Copyright (c) 2000-2026 Isonet AG